Country Living in a Cariboo Valley

Homesteading in BC

  • How to Get Started
  • Vegetable Gardening
  • Preserving Food
  • Recipes
  • Homemade Wine Recipes
  • About Us
  • Work With Me
  • Shop
    • Vegetable Garden Planner Printable: Grow Your Best Garden Ever
    • Grow Enough Food for a Year
    • Delicious Dandelions: A Recipe Collection
    • Dirt to Dollars: Selling at the Farmers Market
    • 8 Pounds in 8 Weeks: Raising Chicks for the Dinner Table
    • Making Wild Wine
    • Build a Hanging Chicken Feeder
    • 15 Things to Know About Living in the Country

Best Garlic Cloves for Planting – Growing Garlic – Part 4

By Annie

How to choose the best garlic cloves for planting – just follow these tips!

Here’s the fourth (and last) installment in the How to Plant Garlic series and this part focuses on how to choose the best garlic cloves for planting. The first article can be found here; Part 2 here; Part 3 here.

Here in Canada, we plant garlic (Allium sativum) in the Fall before the ground freezes. This allows the garlic cloves to settle in and even grow a few roots. Then when the cold weather comes, the cloves go dormant for the winter, then begin to grow early in the Spring.

Choosing the best cloves for planting goes a long way in growing large garlic bulbs! Here is information on hardneck garlic, plus sorting garlic bulbs and choosing cloves for replanting.

Best garlic cloves for planting on a counter
Here’s how to find the best garlic cloves for planting.

What are the Best Garlic Cloves for Planting?

There are two types of garlic that can be used for planting – hardneck garlic and softneck garlic. Here in Canada, we grow the hardneck varieties of garlic, because they do well with a cold period, meaning a cold winter.

Garlic Varieties:

Softneck varieties, such as Silverskins, grow well in southern climates, where they do much better than the hardneck type. The softneck type of garlic is not covered here, as we cannot grow that here.

Hardneck types that grow well in Canada and northern USA include:

  • Purple Stripe
  • Rocambole
  • Porcelains – Yugoslavian and Music
  • Chesnok Red
  • Fish Lake
  • Tibetan

Elephant garlic is actually not a type of garlic at all; it is one of the varieties of leeks!

Garlic cloves in a bowl ready for planting in the Fall
Save to your Pinterest board!


Curing Garlic

Read through the prior installments (see above) that will explain everything about harvesting and curing garlic. 

We begin sorting the best looking garlic bulbs when hanging them for curing. The nice big bulbs get hung together, while the smaller bulbs get hung together. These smaller bulbs will be eaten over the Winter (Spring & Summer too, because I plant so many heads).

The nice big bulbs are the ones set aside for seed for next years garlic harvest. We usually hang my garlic bulbs in groups of 10 using nylon rope. This makes for easier counting of the bundles and finding the total number of bulbs we brought to harvest. A looped rope goes around the stalk, tying up the leaves and stem. 


Garlic bulbs hanging to cure
Porcelain garlic hanging to cure in bundles of 10.


It’s important to plant the largest, nicest looking cloves, if you are trying to improve your garlic harvests.

Since we sell some bulbs, it’s in our best interest to ensure that as many of the bulbs as possible are big and beautiful! If you plant small, misshapen cloves you will get garlic heads full of small misshapen cloves.

It’s logical – if you are always trying to improve your harvests (and you are, aren’t you?) then always use your biggest and best. That way, you will get more of those biggest and best heads!


Choosing the Best Garlic Cloves for Planting

Once the garlic is cured, the stalks are cut from the bulbs, the roots are trimmed with garden shears and the bulbs are put into boxes. At this point, you can either start splitting the heads or just set the box aside for a couple of weeks. You will find it is easier to split the bulbs into cloves if the bulbs are drier.

Breaking Open Garlic Bulbs into Cloves

When you are ready to start busting the bulbs open, grab a couple of empty boxes and get started. Carefully open up all the heads and separate the individual cloves.


Garlic bulbs split and separated
The box on the right is full of cloves to be replanted in the garlic bed.


Put the nice big garlic cloves in one box – these are the bulbs that will be replanted in the garden. (The planting will take place around late September, in order for us to have lots of fresh Garlic next August.)

Smaller cloves go in another box for storage over the winter. These will end up in our kitchen where they will get roasted in the oven or put in tin foil on the barbecue.


A bowl of large garlic cloves separated for planting.
Nice healthy large garlic cloves set aside for planting.


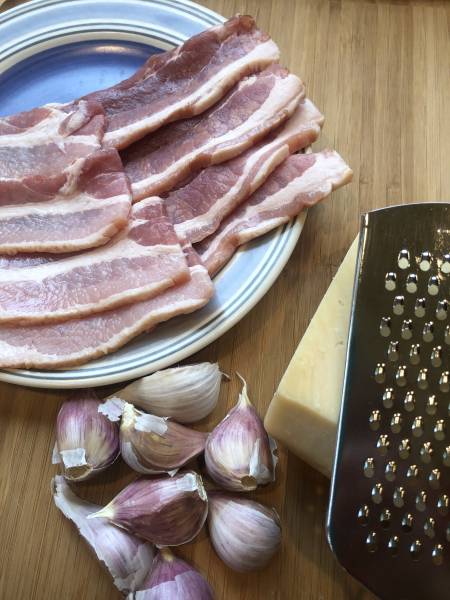
I’ll use them when I make Bacon Garlic Bites or add them to my jars of Homemade Pickled Asparagus. Look at these beautiful garlic cloves – these are the ones that will be replanted for harvesting garlic next year.


Garlic cloves on dirt ready for planting. A measuring tape is there for spacing
Large garlic cloves ready for planting in the Fall.

You can get a good idea of the clove size in the photo above. That’s a standard sized tape measure – those cloves are quite large.

Ready for replanting? Head over to Growing Garlic Part 1, for all the planting information you need. Information in that post includes:

  • planting depth for each individual clove
  • fertilizing with blood meal
  • side-dress cloves with well composted manure and compost to add nitrogen to the soil
  • mulching with straw to keep weeds from growing
  • cutting off the flowering stalks of each garlic plant (here this happens in late June or early July)

Garlic Questions 

Is Store Bought Garlic Good for Planting?

It depends! Often, garlic bulbs bought at the grocery store have been sprayed with chemicals. It is very important to buy organic garlic bulbs from a reputable nursery. You can also find organic unsprayed bulbs at the farmers market.

Be sure to ask if the plants have been sprayed with chemicals. Organic sprays such as fish fertilizer is fine; this is a chemical free spray that helps with bulb growth.

What Type of Garlic is the Healthiest?

Any variety of garlic that is organically grown is a healthy garlic! Tip: You may find grocery store garlic has all of its roots shaved off. If the base of the bulb is completely root free and clean, it can be assumed that those bulbs have been sprayed.

The reason for the shaved base is that countries do not allow garlic to be imported with roots, as there is a greater chance of dirt coming in on those roots. This dirt may possible contaminate the soil in which they will now be planted.

Yugoslavian Porcelain garlic cloves in a bucket
Yugoslavian Porcelain garlic cloves for planting.

What is the Difference Between Seed Garlic and Eating Garlic?

There is no difference between seed and eating garlic. Usually, smaller bulbs and cloves are used for eating and the larger cloves are reserved for replanting.

What Month is Best to Plant Garlic?

The ideal time for planting garlic depends on the climate where you live. Here in Zone 3 (Canada) we plant garlic in late September or early October. We always aim to have garlic planted before the middle of October.

It is best if the cloves are planted early enough that they can form some root growth, but not too early so that the leaves start growing tall.

If the weather is unusual and top growth begins, your plants will still be fine. Just cover them with mulch once the cold weather starts.

How Do You Grow Garlic for Beginners?

This information can be found in Part 1 of this series – then continue reading the different articles in the series to get all the information, right from growing through harvesting and curing.

Garlic growing in a garden bed
A garlic patch in our garden.

I hope these posts all about growing garlic are a help to you. Garlic is easy to grow and takes up hardly any room at all. Even if you live in an apartment, you can easily plant 20 or 30 heads of garlic in a few pots or growing bags, so do it!

Backyard garlic growers love the strong fresh flavor of homegrown garlic! Plus, garlic is a very powerful natural antibiotic as well as an antioxidant.

Have you learned more about growing garlic from this series of posts? Feel free to share this article!


How to Grow Garlic Articles:

How to Plant Garlic – garlic bed preparation, spacing and garlic planting information

What to do with Garlic Scapes – and why you really do need to remove them

How to Harvest and Cure Garlic – from digging to hanging garlic for curing.


Find your best garlic cloves for planting – then get them in the soil this Fall for bulbs next August.


Want to find out which are The 5 Easiest Vegetables to Grow?

Available only to subscribers; join our Newsletter!


originally published October 2019; latest update January, 2023

Filed Under: Garlic, Garlic (4 Part Series), Grow Your Own Vegetables Tagged With: Garlic, Grow Vegetables

Bacon Wrapped Garlic Appetizer

By Annie

This Bacon Wrapped Garlic Appetizer is delicious, easy, sure to please a crowd, and best of all, it’s ready in just 10 minutes!

bacon wrapped garlic cloves with spices.
If you’re looking to impress guests or just want a tasty appetizer, this Bacon Wrapped Garlic is for you!

Bacon Wrapped Garlic Appetizer Backstory

It’s all about garlic these days at our house! If we haven’t been drying garlic, cleaning garlic or selling garlic, we’ve been eating garlic. It’s like this at the end of summer every year at our house. Everything is about garlic – including our meals.

Big full heads of Russian Red, Yugoslavian and Music garlic – we’re indulging every evening with dinner. We love garlic. We love bacon too. Why not have them together? Enjoy this Bacon Wrapped Garlic appetizer! They’re like little Bacon Garlic Bombs, especially if you use a stronger flavoured garlic. 

This is a really easy and fast recipe Graham came up with, using a few heads of big cloves of garlic and some of our homegrown bacon. Graham loves to be in the kitchen and I love benefiting from that. Lucky me! And since he is always experimenting with new recipe ideas, I get to be a very willing guinea pig. Here’s his Bacon Wrapped Appetizer.

I’m not sure 12 of these was enough for us! They are that good…seriously. If you are looking for a fast and easy appetizer, give this a try. These Bacon Wrapped Garlic Bites are great for holiday parties or when guests arrive unexpectedly. With such a fast prep time, it is super easy to pop these in the oven.


How to Make This Bacon Wrapped Garlic Appetizer

cloves of garlic and strips of bacon on a counter.
Garlic wrapped in bacon makes for this easy delicious appetizer.


  1. Cut off basal plate from garlic cloves with a sharp knife and peel the cloves.
  2. Cut bacon slices in half, to make 12 slices.
  3. Wrap bacon around each full garlic clove and secure with a toothpick. Flimsy toothpicks won’t work; you need the thicker stronger ones. Those garlic cloves are hard to poke through.
  4. Arrange on baking sheet (using tin foil equals super easy cleanup!)
  5. Grate cheese on top of each clove. Sprinkle each with a bit of cayenne pepper, if you like. We love this option, as it adds just a good little bit of heat!
  6. Bake at 400F for 15 – 20 minutes. Cool on tray for 5 minutes before serving.
  7. If you find they are a bit greasy from the bacon, just blot the bottom of each garlic clove with clean paper towel.


garlic wrapped in bacon on foil-lined baking sheet.
This appetizer is so easy to put together and will be sure to please any bacon or garlic lovers!


FAQ and Tips

How can I grow my own garlic?

  • If you want to start growing garlic, take a look at this – Everything you want to know about how to grow awesome garlic. From planting right through to harvesting, curing and storing.
  • Garlic can be grown in the ground, in containers or pots on your patio. Anywhere you have a bit of room for a large wide pot, you can grow several garlic bulbs.
  • Or, edge your garden bed in garlic bulbs. The foliage is pretty (kind of like an Iris) and the bulbs are, of course, delicious!

How do I buy the best bacon?

  • If possible, buy your bacon from the deli or meat counter. Prepackaged bacon typically has things like added preservatives to increase shelf life, and if you go to the deli counter you’ll also be able to have a say in the way it’s cut!
  • Go for center cut whenever you can; this will yield bacon that’s more meaty and less fatty (but some fat is good).


Variations and Serving Suggestions

  • Paired with a glass of wine, it is a delicious late afternoon treat before we start dinner. Graham enjoys a glass of homemade Rhubarb wine alongside these treats, while I prefer a glass of Saskatoon Raspberry homemade wine.
  • These would be delicious brushed with some melted butter and sprinkled with chopped parsley.
  • Aside from cayenne pepper, you can sprinkle this little bites with whatever seasonings you like! If you’re a huge garlic lover, you could top with garlic powder, or go classic with some salt and pepper.


garlic bacon wraps ready for the oven.
Garlic Bacon Wraps ready for the oven.


More Appetizer Recipes

  • Paprika Kale Chips
  • Garlic Parmesan Asparagus – a delicious and easy side dish.
  • Pickled Eggs
  • Homemade Salsa
  • Feta Cheese and Garlic Dip
  • Fig Crostini from The Spruce Eats


Bacon Wrapped Garlic Appetizer Recipe

If you like this delicious appetizer recipe, be sure to rate it 5 stars below!

Bacon Wrapped Garlic Bites

Bacon Wrapped Garlic Bites

Yield: 12
Prep Time: 15 minutes
Cook Time: 20 minutes
Total Time: 35 minutes

Ingredients

  • 12 large garlic cloves
  • 6 slices thick of bacon
  • parmesan cheese

Instructions

  1. Peel garlic cloves. Slice bacon in half, so there are 12 slices total
  2. Wrap each garlic clove in bacon and secure with a toothpick. Cover your cooking sheet with foil to make clean up easy.
  3. Arrange cloves on cookie sheet and sprinkle parmesan cheese on each of the cloves.
  4. Bake at 400F for 15 - 20 minutes.
Nutrition Information:
Yield: 6 Serving Size: 2
Amount Per Serving: Calories: 66Total Fat: 4gSaturated Fat: 2gTrans Fat: 0gUnsaturated Fat: 3gCholesterol: 12mgSodium: 210mgCarbohydrates: 2gFiber: 0gSugar: 0gProtein: 5g

Did you make this recipe?

Please leave a comment on the blog or share a photo on Pinterest

© Annie

First Published September 2019; Updated December 2020

Thanks for checking out this recipe. For more, follow me on Facebook, Pinterest, Instagram, and Twitter!

Our entire Country Living in a Cariboo Valley Recipe Collection can be found here.


fully cooked garlic wrapped in bacon.
You’ll make this simple appetizer again and again!

Filed Under: Food, Garlic, Recipes

Putting the Garden to Bed for Winter

By Annie

It’s Fall and things are finally winding down in the garden. Everything has been dug up and dealt with. Now it’s time to start putting the garden to bed for winter. Here’s what we’ve done so far this season with our garden harvests.

Root crops are being stored in our cold room.

The canning is almost finished for the season and we’re happy to see jars full of home canned goodness on our shelves.

We’ve canned green beans, made and canned strawberry jam and a few cases of pickled beets.

We’ve made Salsa (delicious!) and even managed to can fish.


An autumn garden that needs harvesting.

After dealing with garlic all season, we’re happy that the new crop of Garlic has been planted.

The Garlic beds have been mulched with old hay and the tools are slowly getting picked up and stored for winter.


Half of the main garden has been taken over by Garlic.

If you want to learn more about how to grow and harvest Garlic, check out our 4 part series.

But now, it’s time to get to work putting the rest of the garden to bed for winter.


putting the garden to bed for winter

Putting the Garden to Bed for the Winter

I never like to leave our garden soil exposed over the winter time. Part of putting the garden to bed for the winter season is taking care of the exposed soil.

I would rather have it covered with a green manure that will hold that topsoil in place.

A cover crop of green manure will also help to keep amending your soil.

You can see a bare area in the middle top of the photo above. Once that area was given a good weeding, I raked the area into raised beds.

We added a LOT of well composted manure to the empty garden. We have pushed a lot of heavy wheelbarrows!

Once the upper left part of the garden was cleared out and weeded, I scattered Fall Rye seed.

This will become a cover crop and in turn will act as a green manure to help amend the soil.

Sometimes I use Buckwheat, especially in the late summer.

Buckwheat doesn’t need much time to grow, so if you have a free area and 30 days of growing time left in the season, try Buckwheat.

From mid Fall into the early Spring, I like to cover with Fall Rye. Planted before the real cold sets in, it will start growing roots and a bit of top growth.

Then it will go dormant for the winter. In the Spring, it just starts growing again.

If we till the garden in the Spring, this gets tilled in.

If you want to learn more about green manure (cover cropping) click on the link.


Putting an Asparagus Patch to Bed for Winter

You can see the Asparagus patch on the far left in the photo above.

We pick Asparagus freely here until the end of the first week in July, and then we leave it alone.


The stalks grow and turn into fronds, starting to yellow in late summer.

Some people cut the stalks down in Fall, but we leave ours alone and do the cutting in the Spring.

Those fronds will add a bit of protection to the roots below the surface.

Before the snow flies, I’ll mulch the Asparagus with old spent hay to add further protection.

This is the only thing that is needed in a northern climate when putting this part of the garden to bed for winter.

This will get removed in the Spring and the Asparagus will grow again.


The leaves are gone now from most of the trees; Fall is slowly turning to Winter here in the Cariboo.

If you like gathering leaves to add to your garden soil, now is the time. Or add them to your compost pile where they will break down.

We haven’t had snow yet; thank goodness. Now is the time to finish outdoor homestead projects and make sure things are cleaned up and put away.


Leave some potatoes in the ground

putting a garden to bed


I still have to mulch the strawberry beds, but I’ll do that when I do the Asparagus. We are also leaving a row of potatoes in place and not digging them up.

We will dig those potatoes up in mid-March or so. It depends on the amount of snow we get, but we are looking forward to a few fresh and delicious potatoes to enjoy in the Spring.

Try this sometime; you can leave potatoes in the ground over winter!

Just don’t leave them in the ground too long. Don’t let the ground get too wet or they will rot.

If you have to, dig them up in February and then put them in your cold room.

We are already enjoying the extra rest we’re getting; sleeping in a bit is always the bonus of October.


More posts about putting a garden to bed for the winter:


Tucking the Yard in for Winter – The Garden

5 Outdoor Things We Have to Do Before Winter

Pruning Shrubs and Trees

Cleaning up a Raspberry Patch


Filed Under: Cover Crops/Green Manure, Garlic, Grow Your Own Vegetables

How to Make Pickled Garlic Scapes

By Annie

In this second installment on Growing your own Garlic, I’m going to share a fantastic Pickled Garlic Scapes recipe.

In the first post, I gave an overview about the process involved with growing Garlic. Garlic is one of the easiest garden vegetables to grow!

Here in the Cariboo, the Garlic Scapes come on hot and heavy in early summer around July. Since we have almost 300 garlic plants in the garden, we basically have almost 300 scapes!

Fresh garlic scapes in a bowl.
Here’s a Garlic Scape Pickle recipe you are going to love. Preserve garlic scapes to store them for year round use.

Every garlic plant sends one scape up and if you want the largest garlic bulbs possible, you have to cut the stems off.

The energy saved by not having the scape now goes into the bulb. This is a good thing. That makes the bulb grow BIGGER, which is what we want – the biggest, best bulbs we can grow.


Cooking Garlic Scapes

To cook the Scapes, just steam them for a few minutes if you like them still a bit crunchy or longer if you want to soften them. You can also lightly fry or grill them with a bit of sesame oil. Either way, they are delicious, with a strong garlic flavor.

We can only eat so many Scapes fresh with dinner so I looked around for something else to do with them. 

I found a recipe for pickling the scapes. I fiddled around with the ingredients and came up with this recipe.

You can print off the full Pickled Garlic Scapes recipe at the bottom of this post.


Pickled Garlic Scapes Recipe

  • 2 pounds garlic scapes
  • 1/4 cup canning salt (you can also use kosher salt in a pinch, but canning salt is better)
  • 2-1/2 cups white vinegar
  • 2-1/2 cups water
  • 1 tsp cayenne pepper, divided
  • <4 heads dill, divided
  • Pickling spice (optional)


  1. Trim ends off the garlic scapes. Combine salt, vinegar and water in a large saucepot. Bring to a boil.
  2. Pack scapes lengthwise into hot jars, leaving ¼ inch headspace. Add ¼ teaspoon cayenne pepper, and 1 head dill to each pint.
  3. Ladle hot brine over garlic scapes, leaving ¼ inch headspace. Remove air bubbles and adjust two-piece caps. Process pints and quarts 10 minutes in a boiling-water canner.

Yield: about four pints of liquid.

For some extra flavor, you can add ingredients like coriander seeds, red pepper flakes, black peppercorns, dill seed, bay leaves, garlic cloves, apple cider vinegar, or even some chili peppers.

Since we had fresh dill growing in the garden, I added that, along with a few very hot red and yellow peppers.

But first things first – I went down to the Garden and cut off all the Scapes I could find before retiring to the Porch to get started.

Fresh garlic scapes in a bowl.
Don’t these scapes look so green and beautiful?

I sat down with the bag of Scapes and first trimmed off just above the white bulb. Then I cut off the straight section of the Scape, leaving just the curled part. These went into separate bowls.

Trimmed garlic scapes in bowls.
You’ll want to trim them down so they fit in your jars.

I’m going to use fresh homegrown dill heads along with fresh homegrown hot peppers! They are going to add  great zingy taste to these Pickled Garlic Scapes.

Sterilizing Canning Jars

First, I need to get the water boiling as I need to sterilize the jars. Always sterilize your canning jars first when you are doing a boiling water bath!

sterilizing mason jars in boiling water.
All you need is a large pot and some boiling water to sterilize your jars.

Once the water is boiling (with enough water to fully cover the empty jars) I use tongs to submerse the jars and boil them for 10 minutes.

After cutting all the straight Scapes to a length to precisely fill the pint jars, I then cut the Curly Scapes into 2 or more pieces. These will go in separate jars.

At this point, I got the liquid mixture ready and put it on the stove to boil. I don’t like to do this too early in the process, as I find that it evaporates and I don’t have enough liquid to cover the Scapes in the jars.

Scapes in a colander in the sink.
As with any fresh produce, make sure you rinse them first.

Packing the Jars with Garlic Scapes for Canning

After the Scapes have had a good washing, I started packing them tightly into pint sized Mason jars.

Two mason jars fille with garlic scapes.
Don’t be afraid to really pack the scapes into the jars.

I cut the hot peppers into slivers, and included one of each color in each jar. These should really pack a punch, because those peppers are pretty hot.

tattler lids and rings.
I love my Tattler canning rings!


Using Tattler Lids and Seals

All this time, my canning seals and lids were sitting in scalding water waiting to be put on the jars. These are the Tattler lids and seals, which I love using.

I can easily recommend Tattler – using these lids and seals, you can get many many years of reuse from them. How nice not to have to buy new seals each year!

WIping down the rim of a jar.
Be sure to wipe down your jars before you finish up.

Adding Brine to Pickled Garlic Scapes

After filling the jars with Garlic Scapes, I poured the boiling liquid over top, leaving 1/4 inch of head space.

Before putting on the seal, I wipe each jar rim with a piece of clean paper towel. It’s important not to reuse the same portion of paper towel for the jars.

You don’t want to have lifted something off one jar, only to deposit it onto another. You want to make sure the rims are free of food and liquid.

Placing a rubber ring on the rim of a jar.
These rubber rings are super easy to use.

Time now to set a seal on the top of each jar. Just center the rubber seal on the rim. Once the top is put on, the seal will stay in place.

placing the plastic lid on top of the rubber ring.
Be sure everything is lined up nicely.

I add the the lid, then screw on the metal band.

Screwing on the Metal Band

Now here is where Tattler lids work differently than conventional canning seals and lids.

With the Tattler lids and seals, I need to screw the band on loosely and hold the lid in place with my finger while I finish tightening the band.

Then I need to turn the band BACK 1/4 inch. This is to allow the jars to vent while they are being processed.

Pickled garlic scapes and hot peppers in jars ready for home canning.
Look at how beautiful these scapes are all lined up!

Canning Pickled Garlic Scapes

Into the boiling hot water bath canner the jars go, and once the water is fully boiling, I set the timer for 15 minutes.

I need to add 5 minutes to the processing time, as I live at almost 3000 feet elevation. MAKE SURE you check your altitude before canning.

The elevation plays an important part of the canning process and you must be sure of how many minutes you need to process your food.

I often will have to remove water from the canner when I add the jars. You may need to as well, as the jar contents are heavier than the water.

You need enough water to cover the empty jars completely when sterilizing, but that may be too much water when you add the filled jars.

I keep a canning ladle and a large empty saucepan nearby so I can easily and safely remove some of the water while adding the filled jars.

Picking up a mason jar with tongs.
Using tongs to transfer your jars ensures you won’t get scalded or burnt.

Removing Jars from Water Bath Canner

After the 15 minutes are up, I use the canning tongs to remove the jars. I immediately tighten the metal bands on each jar.

Now I let the jars sit undisturbed for 24 hours. That means out of any drafts as well.

Then I wipe them down and put them away into the pantry or cold room. I can remove the metal bands now if I wish.

They serve no further purpose (sealed is sealed) and I can reuse the bands on other canning.

Right after I remove the band, I check the seal to ensure it is sealed. Just gently pick the jar up by the seal.

If the seal comes off, you can either put the jar into the fridge and use the contents within a week. You can also reprocess the jar in the boiling water bath.

Properly canned, these Pickled Garlic Scapes will last for years in your pantry.


Safe Home Canning

I have been canning food for well over 20 years. Canning is safe to do and safe to feed your family, but do NOT cut corners.

I cannot stress that enough. Do not go to all the trouble of preserving if you are not going to follow exact instructions.

They are in place for a reason – if you do not can safely and accurately, you run the risk of feeding your family spoiled food. This can cause very severe illness and even death. You can’t always smell the bacteria, so don’t rely on your nose!

Part 3 of Grow Garlic can be found here.

Now, start canning and filling your cupboard shelves with your own, freshly grown food. Water bath canning is easy, safe and can save you a lot of money. Do the work now while the harvest is here and you will enjoy that harvest right over Winter!


Other Uses for Garlic Scapes

Use your scapes to make a garlic scape pesto, which is great on burgers and sandwiches. You can also top salads with scapes for an aromatic garlic-y addition, or toss them in with your next stir fry.


Looking for more Pickle Recipes?

  • How about trying some Homemade Pickled Beets?
  • Pickled Asparagus Spears are great on a pickle plate or to add to a Caesar or Bloody Mary!
  • If you’ve got extra eggs on hand, try this Pickled Egg recipe.
  • Websites such as Simply Canning and Bernardin are great resources if you are new to canning.
Pickled Garlic Scapes with pickling spice being added to canning jars
Pickled Garlic Scapes are easy to make and have a wonderful zingy taste. Here’s a recipe to make your own Pickled Scapes at home.


Pickled Garlic Scapes in Canning Jars on wood counter

Pickled Garlic Scapes

Yield: 8 pints
Prep Time: 25 minutes
Cook Time: 15 minutes
Total Time: 40 minutes

These easy Pickled Garlic Scapes are a great way to preserve these short lived scapes.

Ingredients

  • 2 pounds garlic scapes
  • 1/4 cup canning salt
  • 2-1/2 cups vinegar
  • 2-1/2 cups water
  • 1 tsp cayenne pepper, divided
  • 4 heads dill, divided
  • Pickling spice (optional)

Instructions

  1. Fill water bath canner with water and turn on high heat.
  2. Add clean pint size mason jars to the water in the canner.
  3. Once boiling, set timer for 15 minutes to sterilize jars.
  4. Trim ends off the garlic scapes.
  5. Combine salt, vinegar and water in a large saucepot. Bring to a boil.
  6. Pack scapes lengthwise into hot jars, leaving ¼ inch headspace. Add ¼ teaspoon cayenne pepper, and 1 head dill to each pint.
  7. Ladle hot brine over garlic scapes, leaving ¼ inch headspace. Remove air bubbles and adjust two-piece caps.
  8. Process pints and quarts 10 minutes (depending on altitude) in a boiling-water canner.
  9. Remove jars when time is up, set on a thick towel on the counter out of the way and in a draft free place.
  10. Leave jars to seal and cool for 24 hours, before wiping jars and storing in your cupboard.

Notes

You can also use kosher salt in a pinch, but canning salt is better.

Nutrition Information:
Yield: 64 Serving Size: 1
Amount Per Serving: Calories: 6Total Fat: 0gSaturated Fat: 0gTrans Fat: 0gUnsaturated Fat: 0gCholesterol: 0mgSodium: 445mgCarbohydrates: 1gFiber: 0gSugar: 0gProtein: 0g

Did you make this recipe?

Please leave a comment on the blog or share a photo on Pinterest

© Annie
Cuisine: American / Category: Canning


Fresh garlic scapes in a bowl.
Here’s a Garlic Scape Pickle recipe you are going to love. Preserve garlic scapes to store them for year round use.


originally published 2011; last updated July 2022

Filed Under: Canning, Garlic, Garlic (4 Part Series), Grow Your Own Vegetables Tagged With: Canning, Garlic, Grow Vegetables, preserving, Tattler

Garlic Scape Pesto Pasta – Recipe

By Annie

Looking for a quick and easy dinner idea? Try this Garlic Scape Pesto Pasta recipe – make it with any kind of Pesto! A simple but delicious dish that’s perfect for any night of the week!

Creamy pesto pasta on a dinner plate alongside grilled chicken.
This garlic scape pesto pasta is a fantastic recipe for a quick and satisfying weeknight meal!

Why You’ll Love this Pasta Recipe

Pesto pasta is a versatile and flavorful dish that is so easy to make! Even if you don’t have garlic scape pesto, you can make this pasta with the pesto of your choice and it will still turn out delicious. You can add hot Italian sausages or chicken for a meal with more protein, then serve with a side salad and enjoy!


Ingredients Needed

  • butter – makes the sauce flavorful and gives it a buttery consistency.
  • flour – help thicken the sauce.
  • salt and pepper – can be adjusted to taste.
  • milk – ensures that the sauce maintains its creamy texture.
  • cheddar cheese – makes your pesto pasta creamy and cheesy.
  • pesto – you can use whatever kind of pesto you have on hand; this recipe will turn out great every time!
  • pasta – almost any kind of pasta can be used for this recipe, but I went with farfalle (or bowties!)


How to Make Pesto Pasta

  1. Melt butter in saucepan, then whisk in the flour. I like to keep it on the heat so the sauce starts to thicken right away.
  2. Add salt and pepper, whisking constantly.

    Cheddar cheese being mixed into a white sauce.
    Be sure to really let your cheese melt and incorporate into the sauce.
  3. Let it thicken a bit (keep stirring!) then slowly add the milk. Stir it constantly and once it is as thick as you like, turn down the heat.
  4. Add the cheese and then the pesto and stir that in. Keep warm and stir every once in a while.

    Pesto being whisked into a cheese sauce.
    The pesto adds so much flavor and color to this already delicious sauce!
  5. Meanwhile, boil water for the pasta. We like using colourful pasta but any good quality pasta will work. One day I will finally try making my own fresh pasta.
  6. Start adding the pesto cheese sauce to the cooked pasta. You might not use all of the sauce, it depends on how much pasta you have cooked. Leftover sauce can be used over meat in another meal. Or try it on homemade Eggs Benedict – delicious.

    Pesto sauce being added to cooked noodles.
    You may not have to use all of the sauce you’ve made. Be sure to combine this well so all of the noodles are well-covered!

And…there’s dinner! It was delicious and didn’t take long to prepare. A great meal after a hard day of work.


Variations and Serving Suggestions

  • Adding something like chicken or turkey is a great way to make this pasta an even heartier and more well-rounded meal.

    Seasoned turkey pieces wait to be grilled.
    Seasoned homegrown turkey meat waits to go on the grill. We are going to enjoy this on the side with our pesto pasta
  • Serving a salad on the side also provides even more nutrients and is the perfect pairing with this delicious garlic scape pesto pasta!
  • I used farfalle for this recipe, but you could do penne, rigatoni, rotini, or even a longer noodle like spaghetti. This pesto cheese sauce tastes good on everything!


More Recipes

Our entire Country Living in a Cariboo Valley Recipe Collection can be found here, and here are some more recipes hand-picked for you!

  • Special occasion coming up? Why not make this awesome Almond Butter Cake?
  • A Spring favorite here is the Parmesan Garlic Asparagus side dish!
  • If you love chicken, you will love this Mediterranean Lemon Chicken dinner recipe!
  • This easy Apple Crisp recipe is a delicious treat!
  • Have you ever made your own Salsa? Here’s how we make (and preserve!) our own fresh Salsa.
  • Want to learn how to get started on the path to providing more of your own healthy food for your family?


Garlic Scape Pesto Pasta Recipe

If you enjoy this recipe for easy pesto pasta, please be sure to rate it 5 stars below! And print this off or save it to your recipes folder!

creamy pesto pasta on a dinner plate alongside grilled chicken

Pesto Pasta

Prep Time: 10 minutes
Cook Time: 20 minutes
Total Time: 30 minutes

We love using Garlic Scape Pesto for this dish, but if you can't find any, use any kind of Pesto you like.

Ingredients

  • 2 tbsp butter
  • 2 tbsp flour
  • 1/8 tsp salt
  • dash pepper
  • 1 cup milk
  • 3/4 cup cheddar cheese
  • 3 tbsp pesto

Instructions

  1. Melt butter in saucepan, then whisk in the flour.
  2. Keep on the heat so the sauce starts to thicken right away. Add salt and pepper, whisking constantly.
  3. When mixture thickens, slowly add the milk while stirring.
  4. Keep heating and once thickened, add the cheese.
  5. Add the pesto.
  6. Meanwhile, cook noodles then strain well.
  7. Stir the pesto sauce into the cooked noodles.

Did you make this recipe?

Please leave a comment on the blog or share a photo on Pinterest

© Annie

Filed Under: Food, Garlic, Recipes

  • « Previous Page
  • 1
  • 2
  • 3
  • Next Page »

Connect With Us!

  • Email
  • Facebook
  • Instagram
  • Pinterest
  • Twitter

Search this site

Generic selectors
Exact matches only
Search in title
Search in content
Post Type Selectors
Search in posts
Search in pages

Our Most Popular Posts

Garlic cloves in oil

How to Preserve Garlic in Oil – and Other Ways to Store Garlic

a open jar of pickled brussel sprouts on a counter

Easy Pickled Brussels Sprouts Recipe (Water Bath Canning)

Privacy Policy

Read about our Privacy Policy

Disclosure

Please note that some of this site’s links are affiliate links, and CountryLivinginaCaribooValley.com is a participant in the Amazon Services LLC Associates Program, an affiliate advertising program designed to provide a means for us to earn fees by linking to Amazon.com and affiliated sites. At NO ADDITIONAL COST TO YOU, I will earn a small commission, if you purchase them. I recommend them as they are good products.

Theme Design By Studio Mommy · Copyright © 2026