Country Living in a Cariboo Valley

Homesteading in BC

  • How to Get Started
  • Vegetable Gardening
  • Preserving Food
  • Recipes
  • Homemade Wine Recipes
  • About Us
  • Work With Me
  • Shop
    • Vegetable Garden Planner Printable: Grow Your Best Garden Ever
    • Grow Enough Food for a Year
    • Delicious Dandelions: A Recipe Collection
    • Dirt to Dollars: Selling at the Farmers Market
    • 8 Pounds in 8 Weeks: Raising Chicks for the Dinner Table
    • Making Wild Wine
    • Build a Hanging Chicken Feeder
    • 15 Things to Know About Living in the Country

How to Preserve Fresh Basil

By Annie

Here’s how to preserve Basil so it tastes fresh all year!

Basil is a quick growing herb and should be ready to harvest some leaves within two months. Perfect for any tomato dish or whipped into a pesto! Want to know an easy way to preserve all those extra Basil leaves? We’ll show you how!

Want more articles about gardening? Check out all of our Food Gardening posts here.

Basil growing in a pot
Preserving Basil – here’s the easiest way to preserve fresh Basil.

Read on to find out how easy it is to freeze Basil leaves – but first – watch this video to show you exactly how to preserve Basil to use these fresh herbs all year long!

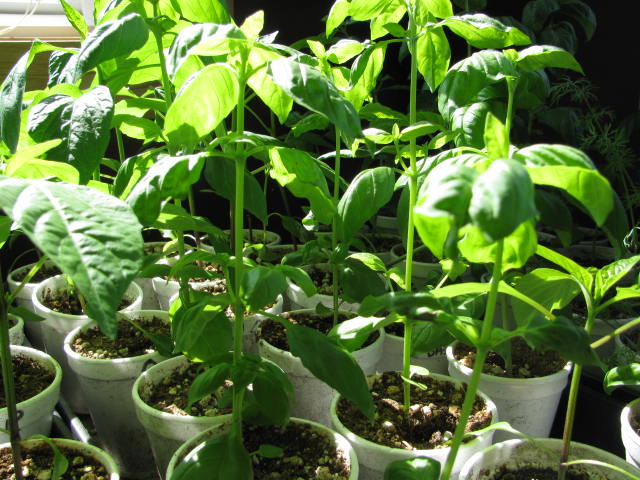
Here is some Basil that I seeded just a few weeks ago and it is already in need of trimming. Since I want the Basil plants to be full and bushy, I needed to pinch off some of the leaves and stem. 

But what can you do with the trimmings? Here’s how to preserve fresh Basil so you can enjoy it all winter long.

Basil plants before preserving leaves in freezer
Young Basil plants grow quickly so you can trim frequently


I love Basil and we use it a lot in cooking. Since we grow a lot of Basil, we could never eat it all when the leaves are ready.

We enjoy the leaves added as salad greens. We add Basil to all kinds of pasta dishes, pasta sauces and in tomato sauce.

But I have figured out a great way to preserve a lot of Basil. It’s quick and easy. And, the Basil tastes great whether we use it in November, January or any other time of the year.

How to Preserve Fresh Basil


Basil leaves and scissors sit on a cutting board


How to Preserve Basil By Drying

Drying Basil certainly works, but it’s not my favourite method. It tends to lose a lot of flavor once it’s dried.

Meh. Not for me. But here is how to dry basil leaves, if you want to give it a try.


Basil leaves drying in a basket in open air
Large leafed herbs can be dried in a basket in open air

Dry it just like I do with Lovage . That’s Lovage in the photo above – it tastes a lot like celery, but without the stalk.

Lovage is a perennial, so plant it once and it comes back every year. Here’s how to grow Lovage in the herb garden.

When it comes to air drying Basil, just pinch off some leaves and lay them on a baking sheet or parchment paper.

Spread them out so they are not piled onto each other. A single layer of leaves is always better than several layers and you need as much air around them as possible. 

Leave them in the open on the kitchen counter for a couple of days and once dry, crush them (or store the leaves whole) in a Mason jar.

Use whenever you want to add some flavour to soups, stews, salads and the like.

Of course, you can also dry Basil in a dehydrator – I have never tried it, as we like our method better!


Grab your free copy of The 5 Easiest Vegetables to Grow! and sign up for our newsletter!


How to Preserve Basil by Freezing


Young Basil plant with lots of new growth
Snip or pinch Basil leaves to store for later use

OK, now we’re talking. I like to freeze our Basil leaves. It’s the one method I’ve found that has the Basil leaves tasting just like they were freshly picked off the plant.

I just pinch and trim the leaves. Once the plant is really growing, I can take off a lot of the larger leaves.

If the plant is still small, a little prune job is still possible. Just don’t take too much!


Washed Basil sitting in a salad spinner basket
A salad spinner makes washing and drying herbs a breeze


I then give them a good rinsing and run them through my Salad Spinner. Have you got one of these? If not, you should – they are a great time saver.

The spinner holds a LOT of herbs (or lettuce) and makes really quick work of cleaning herbs.


Basil leaves in ice cube tray with water on them ready for freezer
Add enough water to cover the Basil leaves

How to Freeze Basil Leaves

I just chop a bunch of basil leaves into smaller pieces, then I fill an ice cube tray with water.

Fill each compartment with Basil leaves; you will have to push them into place to fit several pieces into each compartment.

Put them in the freezer for a day or two. Once they are frozen individually, pop them all out and put them together in a Ziplock bag. A thinner plastic bag will also work, but heavier ones are better for longer term storage.

You could also store them in any kind of freezer-safe container – as long as they are kept in the freezer.

Back in the freezer they go, to be pulled out whenever we want Basil. One or two of the frozen basil cubes will add wonderful flavor to fresh spaghetti sauce, on pasta, tossed into a salad or spread on pizza.


Basil and cherry tomatoes on a wood table


If you need to thaw the cubes without heating, just place them in a bowl and let the cubes come to room temperature. Drain on paper towel, then, you’ve got fresh basil leaves to use in cooking.

You can’t get much easier than this – make sure you include Basil in your garden this year.

Basil is easy to grow, easy to harvest and easy to preserve. Basil likes a lot of heat and cannot withstand frost – keep this in mind when you plant it.

I put my Basil plants into containers and keep them on the porch. Of course, you can easily grow Basil and other herbs indoors too!


It’s easy to Grow Herbs and Spices Indoors. Read more here and start your Herb Garden today!


They’re pretty, they smell wonderful when you brush against them and it’s super convenient to snip a few leaves to include with your meals.

Basil does like to flower early, so keep pinching the top leaves off. This will keep the plant from flowering. Enjoy!


Basil Pesto Recipes

Basil is great to use in so many different Italian dishes. It’s the perfect herb to use along with:

  • tomatoes
  • garlic cloves
  • onions
  • cheese, especially parmesan and mozzarella 
  • olive oil

Slice fresh tomatoes thickly and arrange on a plate with slices of mozzarella. Drizzle about a tablespoon of olive oil over both ingredients and crumble basil leaves over top.

This is a delicious appetizer with tons of fresh taste – perfect for a summer afternoon.

Here’s a great recipe for a fast and easy Basil Pesto. This one uses walnuts instead of pine nuts.

Allergic to nuts? Try this Nut Free Basil Pesto!

Now you know how to preserve Basil, trim some leaves and freeze some this year!


Looking for more about growing Herbs?

Want to learn about Lovage? A super easy herb to grow and it looks great in flower beds!

Here’s the method we use to dry Parsley to use all year.

Ever tried Garlic Scape Pesto ? It is delicious and I have got the recipe here, check it out.

Drying herbs is really very easy, take a look.

Ever thought of growing Hops in your garden or yard?


fresh basil growing in a windowsill


Filed Under: Drying Herbs Tagged With: basil, drying herbs, herbs, preserving

How to Make Pickled Garlic Scapes

By Annie

In this second installment on Growing your own Garlic, I’m going to share a fantastic Pickled Garlic Scapes recipe.

In the first post, I gave an overview about the process involved with growing Garlic. Garlic is one of the easiest garden vegetables to grow!

Here in the Cariboo, the Garlic Scapes come on hot and heavy in early summer around July. Since we have almost 300 garlic plants in the garden, we basically have almost 300 scapes!

Fresh garlic scapes in a bowl.
Here’s a Garlic Scape Pickle recipe you are going to love. Preserve garlic scapes to store them for year round use.

Every garlic plant sends one scape up and if you want the largest garlic bulbs possible, you have to cut the stems off.

The energy saved by not having the scape now goes into the bulb. This is a good thing. That makes the bulb grow BIGGER, which is what we want – the biggest, best bulbs we can grow.


Cooking Garlic Scapes

To cook the Scapes, just steam them for a few minutes if you like them still a bit crunchy or longer if you want to soften them. You can also lightly fry or grill them with a bit of sesame oil. Either way, they are delicious, with a strong garlic flavor.

We can only eat so many Scapes fresh with dinner so I looked around for something else to do with them. 

I found a recipe for pickling the scapes. I fiddled around with the ingredients and came up with this recipe.

You can print off the full Pickled Garlic Scapes recipe at the bottom of this post.


Pickled Garlic Scapes Recipe

  • 2 pounds garlic scapes
  • 1/4 cup canning salt (you can also use kosher salt in a pinch, but canning salt is better)
  • 2-1/2 cups white vinegar
  • 2-1/2 cups water
  • 1 tsp cayenne pepper, divided
  • <4 heads dill, divided
  • Pickling spice (optional)


  1. Trim ends off the garlic scapes. Combine salt, vinegar and water in a large saucepot. Bring to a boil.
  2. Pack scapes lengthwise into hot jars, leaving ¼ inch headspace. Add ¼ teaspoon cayenne pepper, and 1 head dill to each pint.
  3. Ladle hot brine over garlic scapes, leaving ¼ inch headspace. Remove air bubbles and adjust two-piece caps. Process pints and quarts 10 minutes in a boiling-water canner.

Yield: about four pints of liquid.

For some extra flavor, you can add ingredients like coriander seeds, red pepper flakes, black peppercorns, dill seed, bay leaves, garlic cloves, apple cider vinegar, or even some chili peppers.

Since we had fresh dill growing in the garden, I added that, along with a few very hot red and yellow peppers.

But first things first – I went down to the Garden and cut off all the Scapes I could find before retiring to the Porch to get started.

Fresh garlic scapes in a bowl.
Don’t these scapes look so green and beautiful?

I sat down with the bag of Scapes and first trimmed off just above the white bulb. Then I cut off the straight section of the Scape, leaving just the curled part. These went into separate bowls.

Trimmed garlic scapes in bowls.
You’ll want to trim them down so they fit in your jars.

I’m going to use fresh homegrown dill heads along with fresh homegrown hot peppers! They are going to add  great zingy taste to these Pickled Garlic Scapes.

Sterilizing Canning Jars

First, I need to get the water boiling as I need to sterilize the jars. Always sterilize your canning jars first when you are doing a boiling water bath!

sterilizing mason jars in boiling water.
All you need is a large pot and some boiling water to sterilize your jars.

Once the water is boiling (with enough water to fully cover the empty jars) I use tongs to submerse the jars and boil them for 10 minutes.

After cutting all the straight Scapes to a length to precisely fill the pint jars, I then cut the Curly Scapes into 2 or more pieces. These will go in separate jars.

At this point, I got the liquid mixture ready and put it on the stove to boil. I don’t like to do this too early in the process, as I find that it evaporates and I don’t have enough liquid to cover the Scapes in the jars.

Scapes in a colander in the sink.
As with any fresh produce, make sure you rinse them first.

Packing the Jars with Garlic Scapes for Canning

After the Scapes have had a good washing, I started packing them tightly into pint sized Mason jars.

Two mason jars fille with garlic scapes.
Don’t be afraid to really pack the scapes into the jars.

I cut the hot peppers into slivers, and included one of each color in each jar. These should really pack a punch, because those peppers are pretty hot.

tattler lids and rings.
I love my Tattler canning rings!


Using Tattler Lids and Seals

All this time, my canning seals and lids were sitting in scalding water waiting to be put on the jars. These are the Tattler lids and seals, which I love using.

I can easily recommend Tattler – using these lids and seals, you can get many many years of reuse from them. How nice not to have to buy new seals each year!

WIping down the rim of a jar.
Be sure to wipe down your jars before you finish up.

Adding Brine to Pickled Garlic Scapes

After filling the jars with Garlic Scapes, I poured the boiling liquid over top, leaving 1/4 inch of head space.

Before putting on the seal, I wipe each jar rim with a piece of clean paper towel. It’s important not to reuse the same portion of paper towel for the jars.

You don’t want to have lifted something off one jar, only to deposit it onto another. You want to make sure the rims are free of food and liquid.

Placing a rubber ring on the rim of a jar.
These rubber rings are super easy to use.

Time now to set a seal on the top of each jar. Just center the rubber seal on the rim. Once the top is put on, the seal will stay in place.

placing the plastic lid on top of the rubber ring.
Be sure everything is lined up nicely.

I add the the lid, then screw on the metal band.

Screwing on the Metal Band

Now here is where Tattler lids work differently than conventional canning seals and lids.

With the Tattler lids and seals, I need to screw the band on loosely and hold the lid in place with my finger while I finish tightening the band.

Then I need to turn the band BACK 1/4 inch. This is to allow the jars to vent while they are being processed.

Pickled garlic scapes and hot peppers in jars ready for home canning.
Look at how beautiful these scapes are all lined up!

Canning Pickled Garlic Scapes

Into the boiling hot water bath canner the jars go, and once the water is fully boiling, I set the timer for 15 minutes.

I need to add 5 minutes to the processing time, as I live at almost 3000 feet elevation. MAKE SURE you check your altitude before canning.

The elevation plays an important part of the canning process and you must be sure of how many minutes you need to process your food.

I often will have to remove water from the canner when I add the jars. You may need to as well, as the jar contents are heavier than the water.

You need enough water to cover the empty jars completely when sterilizing, but that may be too much water when you add the filled jars.

I keep a canning ladle and a large empty saucepan nearby so I can easily and safely remove some of the water while adding the filled jars.

Picking up a mason jar with tongs.
Using tongs to transfer your jars ensures you won’t get scalded or burnt.

Removing Jars from Water Bath Canner

After the 15 minutes are up, I use the canning tongs to remove the jars. I immediately tighten the metal bands on each jar.

Now I let the jars sit undisturbed for 24 hours. That means out of any drafts as well.

Then I wipe them down and put them away into the pantry or cold room. I can remove the metal bands now if I wish.

They serve no further purpose (sealed is sealed) and I can reuse the bands on other canning.

Right after I remove the band, I check the seal to ensure it is sealed. Just gently pick the jar up by the seal.

If the seal comes off, you can either put the jar into the fridge and use the contents within a week. You can also reprocess the jar in the boiling water bath.

Properly canned, these Pickled Garlic Scapes will last for years in your pantry.


Safe Home Canning

I have been canning food for well over 20 years. Canning is safe to do and safe to feed your family, but do NOT cut corners.

I cannot stress that enough. Do not go to all the trouble of preserving if you are not going to follow exact instructions.

They are in place for a reason – if you do not can safely and accurately, you run the risk of feeding your family spoiled food. This can cause very severe illness and even death. You can’t always smell the bacteria, so don’t rely on your nose!

Part 3 of Grow Garlic can be found here.

Now, start canning and filling your cupboard shelves with your own, freshly grown food. Water bath canning is easy, safe and can save you a lot of money. Do the work now while the harvest is here and you will enjoy that harvest right over Winter!


Other Uses for Garlic Scapes

Use your scapes to make a garlic scape pesto, which is great on burgers and sandwiches. You can also top salads with scapes for an aromatic garlic-y addition, or toss them in with your next stir fry.


Looking for more Pickle Recipes?

  • How about trying some Homemade Pickled Beets?
  • Pickled Asparagus Spears are great on a pickle plate or to add to a Caesar or Bloody Mary!
  • If you’ve got extra eggs on hand, try this Pickled Egg recipe.
  • Websites such as Simply Canning and Bernardin are great resources if you are new to canning.
Pickled Garlic Scapes with pickling spice being added to canning jars
Pickled Garlic Scapes are easy to make and have a wonderful zingy taste. Here’s a recipe to make your own Pickled Scapes at home.


Pickled Garlic Scapes in Canning Jars on wood counter

Pickled Garlic Scapes

Yield: 8 pints
Prep Time: 25 minutes
Cook Time: 15 minutes
Total Time: 40 minutes

These easy Pickled Garlic Scapes are a great way to preserve these short lived scapes.

Ingredients

  • 2 pounds garlic scapes
  • 1/4 cup canning salt
  • 2-1/2 cups vinegar
  • 2-1/2 cups water
  • 1 tsp cayenne pepper, divided
  • 4 heads dill, divided
  • Pickling spice (optional)

Instructions

  1. Fill water bath canner with water and turn on high heat.
  2. Add clean pint size mason jars to the water in the canner.
  3. Once boiling, set timer for 15 minutes to sterilize jars.
  4. Trim ends off the garlic scapes.
  5. Combine salt, vinegar and water in a large saucepot. Bring to a boil.
  6. Pack scapes lengthwise into hot jars, leaving ¼ inch headspace. Add ¼ teaspoon cayenne pepper, and 1 head dill to each pint.
  7. Ladle hot brine over garlic scapes, leaving ¼ inch headspace. Remove air bubbles and adjust two-piece caps.
  8. Process pints and quarts 10 minutes (depending on altitude) in a boiling-water canner.
  9. Remove jars when time is up, set on a thick towel on the counter out of the way and in a draft free place.
  10. Leave jars to seal and cool for 24 hours, before wiping jars and storing in your cupboard.

Notes

You can also use kosher salt in a pinch, but canning salt is better.

Nutrition Information:
Yield: 64 Serving Size: 1
Amount Per Serving: Calories: 6Total Fat: 0gSaturated Fat: 0gTrans Fat: 0gUnsaturated Fat: 0gCholesterol: 0mgSodium: 445mgCarbohydrates: 1gFiber: 0gSugar: 0gProtein: 0g

Did you make this recipe?

Please leave a comment on the blog or share a photo on Pinterest

© Annie
Cuisine: American / Category: Canning


Fresh garlic scapes in a bowl.
Here’s a Garlic Scape Pickle recipe you are going to love. Preserve garlic scapes to store them for year round use.


originally published 2011; last updated July 2022

Filed Under: Canning, Garlic, Garlic (4 Part Series), Grow Your Own Vegetables Tagged With: Canning, Garlic, Grow Vegetables, preserving, Tattler

How to Can Homemade Sauerkraut

By Annie

Ever wondered how to can sauerkraut so you can enjoy it all winter long? You can easily ferment and can your own sauerkraut in the comfort of your own kitchen!

Recently I wrote about our Cabbage harvest and using some of it to make Sauerkraut. Water bath canning Sauerkraut is pretty easy; a beginning canner can preserve cabbage with confidence and just a few ingredients.

a head of cabbage growing in the garden
We love our home-grown cabbage!

What is Sauerkraut?

Hailing from Germany, this salted cabbage dish is created by fermenting cabbage and results in a distinctive sour flavor.

Because it has a long shelf life, it’s an easy way to preserve some shredded cabbage and Graham loves it along with pierogies and sausages.

Read here to see how to make your own Sauerkraut including more details about the normal fermentation process.

The best part is the sauerkraut ferments passively, which means for the most part you can let it be.

The process essentially involves removing the outer leaves of the cabbage (don’t discard these, you can eat them!), shredding the cabbage with a knife or food processor, and layering with pickling salt.

It’s easy to cover cabbage and let the fermentation process do its job! Check out the recipe above for more detailed instructions on fermented sauerkraut.

Jar with homemade Sauerkraut ready to be canned.
Learn how to can Sauerkraut safely.

After leaving the kraut in a 3 gallon crock for a couple of weeks and checking it often, I scooped some out for Graham to do a taste test. He found it to be delicious and mild, which he likes.

That meant it was time to finish off the preserving of the Sauerkraut. If we wanted to, we could just put the crock down in our Cold Room and use the Sauerkraut when we wanted some.

We keep our Cold Room between 32 and 40F, and this temperature would be fine for the Sauerkraut.

However, we chose to can it instead – so should you if you cannot keep the crock in a cool enough place. Here’s how I did it.

You can also raw-pack your sauerkraut by skipping the steps that involve heating it before packing it into the jars. I prefer to hot-pack when canning sauerkraut.

See every one of our Preserving Recipe and Instructions Guides – right here!

Water Bath Canning for Homemade Sauerkraut

  1. Heat the Sauerkraut in a large pot, stirring with a plastic or wooden spoon. You want it to gently simmer, don’t boil it. Gentle bubbles means you’re at the right temperature.
  2. Add a bit of the juice. Make a brine (1 1/2 tablespoons of salt for each 1 quart of water), in case you don’t have enough juice in the crock.

    sauerkraut heated on stove before being canned in jars
    To hot-pack, you’ll want to heat the sauerkraut on the stove before transferring to jars.
  3. You’re going to Hot Water Bath the Sauerkraut, so wash your jars and then set them into your boiling water canner. Keep them in there for 10 minutes.
  4. Meanwhile, get your seals and rings ready. Pour boiling water over them and let them sit until you need them. I’m using Tattler lids for some of the jars – I should have ordered more so I had some new lids!

    tattler lids on a counter
    I love using these lids for easy and reliable food preservation!
  5. Use 1 1/2 tablespoons of salt for each 1 quart of water. Heat this brine on the stove.
  6. Once you get your Sauerkraut warmed up, hot pack it into jars. I use these pint jars but you can use quarts if you like a larger jar size.
  7. Leave 1/2 inch headspace in the jars. Add the warm liquid and use the brine, if you need to. Leave 1/2 inch of headroom and wipe jar rims.
  8. If you are using Tattler lids and seals, there is a slightly different process to follow and you can read it here. It is very important to let the contents vent during the processing.
  9. Place your jars in the Boiling Water Bath and once the water comes back to a boil, set your timer for 15 minutes for pints. If I had used quarts, the processing time would be 25 minutes.

    hot packed sauerkraut in jars ready for water bath canning
    Be sure to leave a bit of head room in your jars.
  10. I have to add 5 minutes because of our altitude (2800 ft). Make sure you always take your elevation into account when you do canning, it is very important.
  11. Once the time is up, remove your jars and leave them alone for 24 hours. After that, you can wipe the jars down, remove the metal bands if you like, and place the jars on your pantry shelf.

    canning jars of sauerkraut ready for canning
    Here’s the sauerkraut all packed into the jars. It’s easy to make dozens of jars like this all at one time!

What Supplies Do I Need for Home Canning?

Not sure where to start when it comes to canning? Here are some recommendations:

I have a very handy food grade Canning kit (Presto) that includes jar lifter, seal grabber, a funnel, a measuring gauge that allows you to easily figure out the headspace and more.

These items are almost a necessity when canning. You can order one of these Canning kits here.

For sauerkraut, I also recommend getting a nice sharp knife to slice the cabbage into nice thin shreds. A mandolin is also another option for slicing.

Here, you can find the Canning Supplies and Equipment Needed to Preserve Food

What Can I Use Sauerkraut For?

Graham has already enjoyed a meal of Bratwurst and Sauerkraut along with Perogies, and is looking forward to many more.

It can also be eaten on its own or as a simple side dish if you really enjoy the flavor. It pairs well with bold, savory flavors like onions and garlic.

Sauerkraut has many health benefits: lots of naturally occurring probiotics that foster beneficial bacteria in the body to improve digestion, nutrients, vitamins, and it can even help strengthen the immune system and reduce the risk of certain diseases.

A hearty mason jar of sauerkraut can also be given as a nice homemade gift for friends, family, and loved ones.

We ended up with 17 pints of Sauerkraut using a 3 gallon crock, which held a total of 15 pounds of cabbage.

Here’s an article about Canning Tips You Should Know

Jar of Sauerkraut ready to be canned.
Save this to your Pinterest board for later!

More Home Food Preservation Guides

  • Want to can some fruit? Here’s How to Can Cherries so you can fill your pantry shelves.
  • Here’s How to Can Salmon (and any other fish)
  • Using Tattler Lids? Here’s how I make sure to use Tattler Lids and Seals properly!
  • Make these Quick Pickled Carrots from the Minimalist Baker!
  • Learn how to store Home Canned Food Properly
How to can Sauerkraut jars on a shelf

How to Can Homemade Sauerkraut

Cook Time: 25 minutes
Additional Time: 1 day
Total Time: 1 day 25 minutes

This easy homemade sauerkraut is perfect to quickly can right in your own kitchen! This will extend its shelf life and keep it fresh and tasty for much longer.

Ingredients

  • 10 pounds cabbage leaf
  • 6 tablespoons pickling salt

Instructions

  1. Heat the Sauerkraut in a large pot, stirring with a plastic or wooden spoon, until it reaches a gentle simmer.
  2. Add a bit of the juice. Make a brine, in case you don’t have enough juice in the crock.
  3. You’re going to Hot Water Bath the Sauerkraut, so wash your jars and then set them into your boiling water canner. Keep them in there for 10 minutes.
  4. Meanwhile, get your seals and rings ready. Pour boiling water over them and let them sit until you need them.
  5. Use 1 1/2 tablespoons of salt for each 1 quart of water. Heat this brine on the stove.
  6. Once you get your Sauerkraut warmed up, hot pack it into jars.
  7. Add the warm liquid and use the brine, if you need to. Leave 1/2 inch of headroom and wipe jar rims.
  8. Place your jars in the Boiling Water Bath and once the water comes back to a boil, set your timer for 15 minutes for pints (or 25 for quarts).
  9. Once the time is up, remove your jars and leave them alone for 24 hours. At this point, wipe them down, remove the metal rims if you like, and store them wherever you like.

Notes

  • This recipe takes sauerkraut that's already been made and prepares it for canning. Check this post for information on how to make your sauerkraut from scratch!
  • As a general rule of thumb, you can fit 5 pounds of cabbage for every gallon that your crockpot or slow cooker will fit. Feel free to tweak the amount of cabbage depending on the size of your pot.
  • Make sure you always take your elevation into account when you do canning, it is very important. Higher altitudes will require more time.

Did you make this recipe?

Please leave a comment on the blog or share a photo on Pinterest

© Annie


Filed Under: Canning, Food, Grow Your Own Vegetables, How To Tagged With: Grow Vegetables, preserving, Sauerkraut, vegetables

Connect With Us!

  • Email
  • Facebook
  • Instagram
  • Pinterest
  • Twitter

Search this site

Generic selectors
Exact matches only
Search in title
Search in content
Post Type Selectors
Search in posts
Search in pages

Our Most Popular Posts

Garlic cloves in oil

How to Preserve Garlic in Oil – and Other Ways to Store Garlic

a open jar of pickled brussel sprouts on a counter

Easy Pickled Brussels Sprouts Recipe (Water Bath Canning)

Privacy Policy

Read about our Privacy Policy

Disclosure

Please note that some of this site’s links are affiliate links, and CountryLivinginaCaribooValley.com is a participant in the Amazon Services LLC Associates Program, an affiliate advertising program designed to provide a means for us to earn fees by linking to Amazon.com and affiliated sites. At NO ADDITIONAL COST TO YOU, I will earn a small commission, if you purchase them. I recommend them as they are good products.

Theme Design By Studio Mommy · Copyright © 2026