This post contains affiliate links. Learn More
Once you learn how to can green beans, you’ll become more comfortable with pressure canning.
We love home canned beans. I love growing and harvesting beans off our Scarlet Runner plants. We like to grow pole beans because the harvesting is so easy. We don’t have to bend down, plus the beans are always clean because they aren’t in touch with the soil.
I want to show you how to can green beans in your own kitchen. Whether you grow them or buy them in bulk, canning beans at home is a great way to preserve some of your own food. But first, let’s talk about how beans need to be canned and that’s in a pressure canner.

When it comes to doing any kind of pressure canning, I am very serious about the process. I don’t mean to scare you – I home can cases and cases of vegetables and we eat from our cold room all winter long.
However, pressure canning is serious business. If it isn’t done properly, the food can spoil. You can make your family very sick by eating improperly canned food.
So learn the process and then treat it like a serious process – each and every time you do home canning. Here’s some more important information about how to use a pressure canner. That article covers using weighted gauge pressure canners and dial gauge pressure canners.
How to Can Green Beans – Equipment Needed
Green beans MUST be canned using a pressure canner. The only exception is if you are making pickles from the beans.
Pressure canning is the only safe method to can most vegetables.
It is unsafe to be:
- canning beans in a hot water bath canner
- canning green beans in a pressure cooker
So, yes you need a pressure canner and there are many on the market. We like and have used All American, Mirro, Presto and others. I can recommend any of these brands. I’ve had a Mirro pressure canner for more than 12 years now and just love it.

Here’s an awesome harvest of 18 pounds of green beans. By the end of the day, we will have lots of pint sized mason jars full of safely home canned beans.

In the coming weeks, I’ll be harvesting and emptying the garden. There is a LOT of food that needs to be brought in. Potatoes, carrots and beets all need to be dug. Want to read about how to store potatoes for months?
I’ll be glad to get these fresh beans canned up and off my list!
How to Pressure Can Green Beans

I prefer using a hot pack method for doing beans. To hot pack your green beans, cut the ends, snap the raw beans into approximately 1-inch pieces, wash them and then blanch them for a few minutes in a large stock pot with lots of water (you will need that water again when filling jars).
You can also skip the blanching step to raw pack instead–which method you use depends on your preferences.
Getting Mason Jars ready for Canning
Wash canning jars with hot water and soap and rinse them well. For the glass part of the jar, it can also be a good idea to boil water and submerge them to be sure they’re completely sterile.
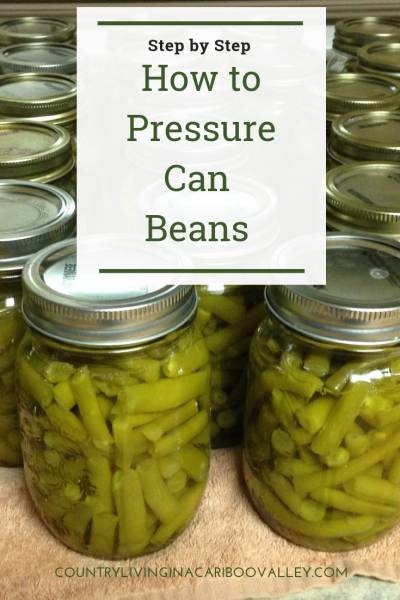
I usually use pint jars because they fit in my canner, but quart jars may also be an option, especially if you have a larger family.
Then soak the canning seals in hot (not boiling) water for about 10 minutes to soften the rubber. Get the jar rings ready and your canning kit out.
I put 3 1/2 quarts of water into the pressure canner and then begin to fill jars with the hot beans, using a canning funnel. I add the liquid leaving a half inch leaving a half inch to 1 inch of headspace for each jar.

Use a butter knife to move around the inner side of the jar to remove air bubbles. Wipe the rims of the jars (I use a clean piece of paper towel) to help ensure a good seal, put the seals on, twist the screw band on tight and finally set each jar in the pressure canner.
As an optional step, place a teaspoon of canning salt in each jar before adding the beans. Be sure you don’t use regular table salt, as this contains iodine that we don’t want inside our cans or jars.
My canner load is about 7 pints, but you can get taller ones so you can process 14 pints at a time.
Just be sure to have a metal canning rack on top of the first layer of jars. You will want to keep the layers separated from each other.
You don’t want the jars in contact with each other during process time, so keep this in mind when you place your jars into the canner.

Using a Pressure Canner
Put the lid on and then place the canner on the heat. Put it on high (make sure the weight is NOT on!) and once steam starts pouring out the top, let it go for 10 minutes. Just let the steam keep coming out of the vent.
We do most of our canning outdoors on a propane burner, but you can also use your stovetop burner.
After 10 minutes, add your weight (since we are at 2850 feet elevation, I can everything with 15 pounds of pressure).
If you are below 1000 feet altitude, you will can with 10 pounds weight.
Once the weight has been added, let the pressure canner go until the first release of steam.
Once that happens, you should lower the heat under the canner, likely to between low and medium.
Also set your timer for 20 minutes for pint jars (for beans). Check the time required for each type of vegetable or meat you want to can.
Meat is usually 90 minutes but it is very important to check the recipe.
Every once in a while, the pressure canner will let off a big release of steam and pressure.
This is normal. Although scary. Especially when you first start canning. Don’t freak out, all will be well!
Opening the Pressure Canner
Once your timer goes off, turn off the heat under the pressure canner. Then…wait. Do NOT open the canner lid right away or jiggle the weight to release the pressure.
It’s important to let the canner cool down naturally. Only then, do you lift the lid.
Lift the lid AWAY from you. There will still be some steam inside the canner and you don’t want to get hit in the face with it.

Remove the jars right away using a jar lifter and set them on a towel or blanket on your counter or wherever they can sit for 24 hours without being disturbed. At all.
Within a short time you will hear the jars pinging. This means they are sealing and that’s a good thing!
Don’t move them or shake the jars – they must be left to settle and seal on their own.

The next day, tap the lids of each jar. You will definitely hear the difference between a sealed jar and an unsealed one. If a jar hasn’t sealed, you can either pressure can it again or just put it in the fridge.
Be sure to use it up within a few days. From the 18 pounds of fresh beans, I ended up with 33 pints of canned beans.
Other Home Food Preservation Instructions
- How to Can Salmon and Other Fish – for a complete guide on pressure canned fish.
- Make and Preserve Pickled Beets – quick and easy water bath canning method.
- How to Make and Can Tomato Sauce – another easy to pick up water bath canning guide.
- How to Blanch and Freeze Garden Peas – a super easy way to enjoy garden peas all winter!

You can preserve other vegetables too, like peas.

originally published 2016; updated June 2022