This Bacon Wrapped Garlic Appetizer is delicious, easy, sure to please a crowd, and best of all, it’s ready in just 10 minutes!

Bacon Wrapped Garlic Appetizer Backstory
It’s all about garlic these days at our house! If we haven’t been drying garlic, cleaning garlic or selling garlic, we’ve been eating garlic. It’s like this at the end of summer every year at our house. Everything is about garlic – including our meals.
Big full heads of Russian Red, Yugoslavian and Music garlic – we’re indulging every evening with dinner. We love garlic. We love bacon too. Why not have them together? Enjoy this Bacon Wrapped Garlic appetizer! They’re like little Bacon Garlic Bombs, especially if you use a stronger flavoured garlic.
This is a really easy and fast recipe Graham came up with, using a few heads of big cloves of garlic and some of our homegrown bacon. Graham loves to be in the kitchen and I love benefiting from that. Lucky me! And since he is always experimenting with new recipe ideas, I get to be a very willing guinea pig. Here’s his Bacon Wrapped Appetizer.
I’m not sure 12 of these was enough for us! They are that good…seriously. If you are looking for a fast and easy appetizer, give this a try. These Bacon Wrapped Garlic Bites are great for holiday parties or when guests arrive unexpectedly. With such a fast prep time, it is super easy to pop these in the oven.
How to Make This Bacon Wrapped Garlic Appetizer
- Cut off basal plate from garlic cloves with a sharp knife and peel the cloves.
- Cut bacon slices in half, to make 12 slices.
- Wrap bacon around each full garlic clove and secure with a toothpick. Flimsy toothpicks won’t work; you need the thicker stronger ones. Those garlic cloves are hard to poke through.
- Arrange on baking sheet (using tin foil equals super easy cleanup!)
- Grate cheese on top of each clove. Sprinkle each with a bit of cayenne pepper, if you like. We love this option, as it adds just a good little bit of heat!
- Bake at 400F for 15 – 20 minutes. Cool on tray for 5 minutes before serving.
- If you find they are a bit greasy from the bacon, just blot the bottom of each garlic clove with clean paper towel.

FAQ and Tips
How can I grow my own garlic?
- If you want to start growing garlic, take a look at this – Everything you want to know about how to grow awesome garlic. From planting right through to harvesting, curing and storing.
- Garlic can be grown in the ground, in containers or pots on your patio. Anywhere you have a bit of room for a large wide pot, you can grow several garlic bulbs.
- Or, edge your garden bed in garlic bulbs. The foliage is pretty (kind of like an Iris) and the bulbs are, of course, delicious!
How do I buy the best bacon?
- If possible, buy your bacon from the deli or meat counter. Prepackaged bacon typically has things like added preservatives to increase shelf life, and if you go to the deli counter you’ll also be able to have a say in the way it’s cut!
- Go for center cut whenever you can; this will yield bacon that’s more meaty and less fatty (but some fat is good).
Variations and Serving Suggestions
- Paired with a glass of wine, it is a delicious late afternoon treat before we start dinner. Graham enjoys a glass of homemade Rhubarb wine alongside these treats, while I prefer a glass of Saskatoon Raspberry homemade wine.
- These would be delicious brushed with some melted butter and sprinkled with chopped parsley.
- Aside from cayenne pepper, you can sprinkle this little bites with whatever seasonings you like! If you’re a huge garlic lover, you could top with garlic powder, or go classic with some salt and pepper.

More Appetizer Recipes
- Paprika Kale Chips
- Garlic Parmesan Asparagus – a delicious and easy side dish.
- Pickled Eggs
- Homemade Salsa
- Feta Cheese and Garlic Dip
- Fig Crostini from The Spruce Eats
Bacon Wrapped Garlic Appetizer Recipe
If you like this delicious appetizer recipe, be sure to rate it 5 stars below!

Bacon Wrapped Garlic Bites
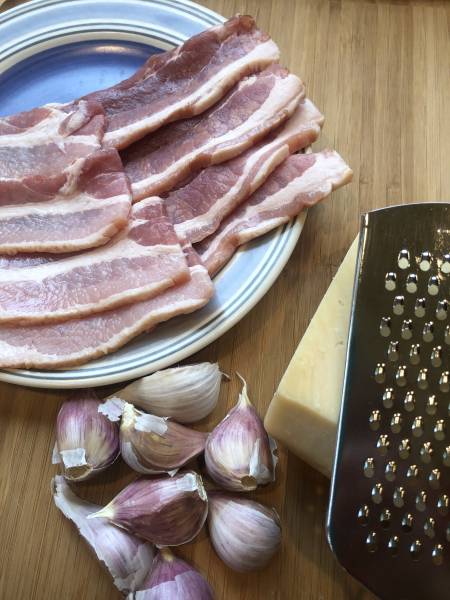
Ingredients
- 12 large garlic cloves
- 6 slices thick of bacon
- parmesan cheese
Instructions
- Peel garlic cloves. Slice bacon in half, so there are 12 slices total
- Wrap each garlic clove in bacon and secure with a toothpick. Cover your cooking sheet with foil to make clean up easy.
- Arrange cloves on cookie sheet and sprinkle parmesan cheese on each of the cloves.
- Bake at 400F for 15 - 20 minutes.
Nutrition Information:
Yield: 6 Serving Size: 2Amount Per Serving: Calories: 66Total Fat: 4gSaturated Fat: 2gTrans Fat: 0gUnsaturated Fat: 3gCholesterol: 12mgSodium: 210mgCarbohydrates: 2gFiber: 0gSugar: 0gProtein: 5g
First Published September 2019; Updated December 2020
Thanks for checking out this recipe. For more, follow me on Facebook, Pinterest, Instagram, and Twitter!
Our entire Country Living in a Cariboo Valley Recipe Collection can be found here.


