Country Living in a Cariboo Valley

Homesteading in BC

  • How to Get Started
  • Vegetable Gardening
  • Preserving Food
  • Recipes
  • Homemade Wine Recipes
  • About Us
  • Work With Me
  • Shop
    • Vegetable Garden Planner Printable: Grow Your Best Garden Ever
    • Grow Enough Food for a Year
    • Delicious Dandelions: A Recipe Collection
    • Dirt to Dollars: Selling at the Farmers Market
    • 8 Pounds in 8 Weeks: Raising Chicks for the Dinner Table
    • Making Wild Wine
    • Build a Hanging Chicken Feeder
    • 15 Things to Know About Living in the Country

How to Make Homemade Sauerkraut

By Annie

Once you learn how to make homemade Sauerkraut, it will be easy to can up a few jars every year.

Since cabbage grows so easily (and big!) here in the Cariboo, we often end up with heads over 10 pounds. What to do with all that cabbage? That’s easy – we make Sauerkraut.

We love having jars of home canned kraut on hand for a quick meal in the winter. Here’s how to make Sauerkraut (and how to can it too) with just 2 ingredients.


Make Sauerkraut with the largest heads of cabbage you can
Cabbage grows great in northern gardens


We do keep several heads in the Cold Room and they will easily keep down there until past Christmas with no problems.

Just peel off the outer layer and discard it before cutting up the cabbage. Coleslaw is often on our dinner table here in the Fall.

We mix the red and green Cabbages together, grate some Carrot, add a few raisins or cranberries and put dressing all over it. We probably eat Coleslaw at least three times a week.


A stone crock that Sauerkraut will be made in.
A stone crock is a good investment for your homestead


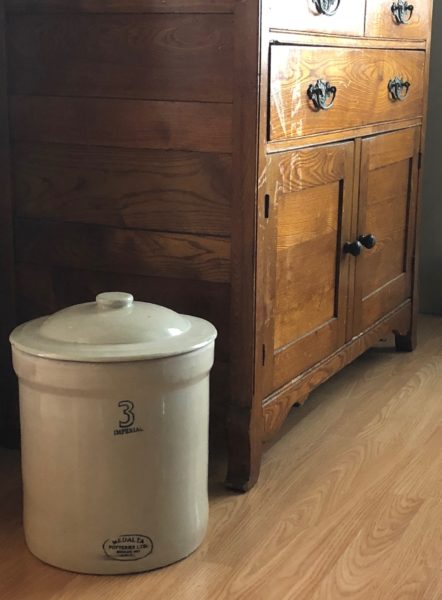
I also love decorating with my crocks (one even holds our woodstove kindling). Here’s my 3 gallon stone crock alongside the dining room sideboard.

I’ll just borrow this one for a few weeks and start fermenting cabbage.


sliced cabbage ready for fermenting into sauerkraut
This easy sauerkraut recipe only requires salt and cabbage!


How to Make Homemade Sauerkraut – Instructions

Coarse salt with a measuring spoon in a bowl
Use coarse salt when packing the cabbage into the crock


For this homemade sauerkraut recipe, I need 6 tablespoons of coarse pickling salt for every 10 pounds of cabbage leaf. Some people use sea salt, but we always prefer the pickling salt. I don’t use table salt, because of the iodine.

If you have a fermentation crock and don’t know how much it will hold, the general rule is 5 pounds of food for every 1 gallon of crock capacity.

Our 3 gallon jug crock should hold 15 pounds of cabbage. So I need and measure out 9 tablespoons of the pickling salt. Depending on how much cabbage you have, you may have to ferment in batches.

The prep time to get it into the fermentation crock is about 30 minutes – it really doesn’t take long at all.

Preparing Cabbage for Sauerkraut

Large heads of cabbage on the counter ready to slice
Slice cabbage nice and thin before adding to the fermenting crock.
  1. Wash the cabbage, taking off the looser outer leaves of the cabbage. Start with a nice tight head of cabbage, then cut the cabbage in half.
  2. Do it again, so you have four wedges, and cut out the core from each.
  3. Shred cabbage (use your food processor to finely shred) or slice very thin, weigh it and then put a layer in the crock.

    thinly sliced cabbage sits in the fermenting crock
    Layer the shredded cabbage into the crock and add salt.
  4. I just slice our thinly with a good kitchen knife. You want very thin ribbons of cabbage. It doesn’t take long to get several heads of cabbage all ready for the crock.
  5. As the cabbage is layered, massage and compact it down firmly with your hand to remove as much air as possible. You could use a wooden spoon, but the bottom of a mug works very well too.
  6. On top of EACH layer, sprinkle some of the pickling salt, a couple teaspoons at a time. Don’t start with too much salt, as you’ll want to make sure there’s an even amount between each layer. Alternate Cabbage and the salt until your crock is almost full.
  7. Once my layers started getting higher, I used the bottom of a coffee cup to firmly pack the Cabbage down. I want as little air in there as possible. You can also use a wooden pestle like this one. REALLY squish that Cabbage down!


Fermenting the Sauerkraut

Once you’ve got your Cabbage and salt layered in the crock, tear some plastic wrap and place it on top, tightly tucking it down the sides if possible.

thin layer of plastic wrap sits on top of the cabbage
A thin layer of plastic wrap will help keep the cabbage seated in the crock.

If you have to, tear more plastic wrap and just jam it around the edge of the crock. Remember, you want zero air coming into contact with the Cabbage! No oxygen at all!


a ziplock bag full of water sits on top of the sliced cabbage
This will help keep the cabbage submerged and fermenting.


Now take a plastic freezer bag 3/4 full of cold water and set that directly on top of the plastic wrap. The bag will find any open areas and sit on top of it, hopefully removing ALL air at the top.

Put the lid on your crock and leave it alone at room temperature for a couple of weeks. I find this method easier than using smaller containers with an airlock on each.

There is no need to keep the fermenting cabbage in the refrigerator. Check it every few days – there should be no scum or anything resembling mold sitting on the top. If there is, take a spoon and carefully remove it.

Make sure you put fresh plastic wrap on top. After it’s finished the fermenting process, it will be ready for canning.

I’ve put a link below to my post all about how to do the canning of your Sauerkraut. For fermenting, you want a temperature of 68 – 72F or 20 – 22C.


Jars of home canned Sauerkraut sit on the counter
Sauerkraut is a great dish to make in large quantities and can at home to have delicious sauerkraut all year long!

Fermenting Kits for Sauerkraut in Small Batches

Try making some homemade sauerkraut for your family! You can use glass mason jars, if you don’t have a crock. You can use fermenting kits, like these, to make small batch sauerkraut.

To add some extra flavor, try incorporating ingredients like caraway seeds, juniper berries, ginger, or onion.

Don’t use anything metal and never mix fresh cabbage in with cabbage already fermenting. After it’s ready, you will probably want to read about how to water bath can Sauerkraut.

It is easy to do and great to have some jars on your pantry shelf! Just heat, seal, and store in the fridge to extend shelf life (especially once opened).


FAQs

What is sauerkraut?

Sauerkraut is a German dish made from finely shredded raw cabbage, which is fermented by lactic acid bacteria. Like other fermented food it has a distinctly sour flavor, partially from the lactic acid which ferments the sugars in the cabbage leaves.

This unique taste has made it one of Germany’s most iconic dishes.

Is sauerkraut good for you?

Absolutely, sauerkraut is rich in lots of vitamins and minerals. Specifically, it’s a good source of vitamins C and K, as well as calcium and magnesium. Sauerkraut is high in dietary fiber, folate, iron, and potassium.

When uncooked and unpasteurized, sauerkraut is rich in enzymes and because of live lactobactilli and beneficial microbes, it’s a great source of probiotics and beneficial bacteria which can improve digestive health and your immune system.

How should I eat sauerkraut?

It’s great on its own, especially as a side dish to a hearty main course of meat. Sauerkraut works as a great palette cleanser between bites of a more intensely flavored main dish.

Sauerkraut can also be used as a salsa, great to dip chips or use as a topping on tacos. Use it on salads, sandwiches, or as a topping for your favorite burger or hot dog.

You can add it to eggs or potatoes for breakfast, add it to avocado toast, or make a delicious and healthy rice bowl with a variety of other veggies.

What can I do with sauerkraut juices?

The brine that’s created as a byproduct of the fermenting process has some applications of its own.

This liquid can be taken directly as a gut shot that can aid in digestion, you can toss it into a salad splash over vegetables or meat, or even save it to use for the next batch of sauerkraut if you need more liquid.

You can even use it the same way you might use pickle juice in cocktails or pickle back shots.


Want to learn more about how to grow cabbage?

More Canning Recipes

  • Here’s how we make Pickled Asparagus – delicious!
  • How I use all our small Beets – I turn them into Pickled Beets.
  • You can read more about using iodized salt in Sauerkraut here.


Homemade Sauerkraut Recipe

Homemade fermented Sauerkraut in a jar

Homemade Sauerkraut Recipe

Yield: approximately 12 pints
Prep Time: 30 minutes
Fermentation Time: 14 days
Canning Time: 15 minutes
Total Time: 14 days 45 minutes

This recipe for fermented sauerkraut in a crock can be water bath canned after fermentation is complete. Store canned sauerkraut on your pantry shelves to use all year long.

Ingredients

  • 15 pounds Cabbage
  • 9 Tablespoons Pickling Salt

Instructions

  1. Wash the cabbage, taking off the looser outer leaves.
  2. Cut the cabbage in half.
  3. Cut it again, so you have four edges, and cut out the core from each.
  4. Shred cabbage or slice very thin, weigh it and then put a layer in the crock.
  5. As the cabbage is layered, massage and pat it down firmly with your hand to remove as much air as possible.
  6. On top of EACH layer, sprinkle some of the pickling salt, a couple teaspoons at a time.
  7. Don’t start with too much salt, as you’ll want to make sure there’s an even amount between each layer.
  8. Alternate Cabbage and the salt until your crock is almost full.
  9. Use the bottom of a coffee cup to firmly pack the Cabbage down.
  10. Tear some plastic wrap and place it on top, tightly tucking it down the sides if possible.
  11. Add a closed Ziplock bag with water to the plastic wrap, ensuring no air can get at the cabbage.
  12. Check the cabbage every few days. Taste it after 10 days; left continue to ferment if you want it stronger.

Notes

For instructions on water bath canning your homemade sauerkraut, read here: Canning Sauerkraut

Did you make this recipe?

Please leave a comment on the blog or share a photo on Pinterest

© Annie
Cuisine: American / Category: Recipes

Published November 2019, latest update September 2024.

Filed Under: Canning Tagged With: Sauerkraut

How to Can Homemade Sauerkraut

By Annie

Ever wondered how to can sauerkraut so you can enjoy it all winter long? You can easily ferment and can your own sauerkraut in the comfort of your own kitchen!

Recently I wrote about our Cabbage harvest and using some of it to make Sauerkraut. Water bath canning Sauerkraut is pretty easy; a beginning canner can preserve cabbage with confidence and just a few ingredients.

a head of cabbage growing in the garden
We love our home-grown cabbage!

What is Sauerkraut?

Hailing from Germany, this salted cabbage dish is created by fermenting cabbage and results in a distinctive sour flavor.

Because it has a long shelf life, it’s an easy way to preserve some shredded cabbage and Graham loves it along with pierogies and sausages.

Read here to see how to make your own Sauerkraut including more details about the normal fermentation process.

The best part is the sauerkraut ferments passively, which means for the most part you can let it be.

The process essentially involves removing the outer leaves of the cabbage (don’t discard these, you can eat them!), shredding the cabbage with a knife or food processor, and layering with pickling salt.

It’s easy to cover cabbage and let the fermentation process do its job! Check out the recipe above for more detailed instructions on fermented sauerkraut.

Jar with homemade Sauerkraut ready to be canned.
Learn how to can Sauerkraut safely.

After leaving the kraut in a 3 gallon crock for a couple of weeks and checking it often, I scooped some out for Graham to do a taste test. He found it to be delicious and mild, which he likes.

That meant it was time to finish off the preserving of the Sauerkraut. If we wanted to, we could just put the crock down in our Cold Room and use the Sauerkraut when we wanted some.

We keep our Cold Room between 32 and 40F, and this temperature would be fine for the Sauerkraut.

However, we chose to can it instead – so should you if you cannot keep the crock in a cool enough place. Here’s how I did it.

You can also raw-pack your sauerkraut by skipping the steps that involve heating it before packing it into the jars. I prefer to hot-pack when canning sauerkraut.

See every one of our Preserving Recipe and Instructions Guides – right here!

Water Bath Canning for Homemade Sauerkraut

  1. Heat the Sauerkraut in a large pot, stirring with a plastic or wooden spoon. You want it to gently simmer, don’t boil it. Gentle bubbles means you’re at the right temperature.
  2. Add a bit of the juice. Make a brine (1 1/2 tablespoons of salt for each 1 quart of water), in case you don’t have enough juice in the crock.

    sauerkraut heated on stove before being canned in jars
    To hot-pack, you’ll want to heat the sauerkraut on the stove before transferring to jars.
  3. You’re going to Hot Water Bath the Sauerkraut, so wash your jars and then set them into your boiling water canner. Keep them in there for 10 minutes.
  4. Meanwhile, get your seals and rings ready. Pour boiling water over them and let them sit until you need them. I’m using Tattler lids for some of the jars – I should have ordered more so I had some new lids!

    tattler lids on a counter
    I love using these lids for easy and reliable food preservation!
  5. Use 1 1/2 tablespoons of salt for each 1 quart of water. Heat this brine on the stove.
  6. Once you get your Sauerkraut warmed up, hot pack it into jars. I use these pint jars but you can use quarts if you like a larger jar size.
  7. Leave 1/2 inch headspace in the jars. Add the warm liquid and use the brine, if you need to. Leave 1/2 inch of headroom and wipe jar rims.
  8. If you are using Tattler lids and seals, there is a slightly different process to follow and you can read it here. It is very important to let the contents vent during the processing.
  9. Place your jars in the Boiling Water Bath and once the water comes back to a boil, set your timer for 15 minutes for pints. If I had used quarts, the processing time would be 25 minutes.

    hot packed sauerkraut in jars ready for water bath canning
    Be sure to leave a bit of head room in your jars.
  10. I have to add 5 minutes because of our altitude (2800 ft). Make sure you always take your elevation into account when you do canning, it is very important.
  11. Once the time is up, remove your jars and leave them alone for 24 hours. After that, you can wipe the jars down, remove the metal bands if you like, and place the jars on your pantry shelf.

    canning jars of sauerkraut ready for canning
    Here’s the sauerkraut all packed into the jars. It’s easy to make dozens of jars like this all at one time!

What Supplies Do I Need for Home Canning?

Not sure where to start when it comes to canning? Here are some recommendations:

I have a very handy food grade Canning kit (Presto) that includes jar lifter, seal grabber, a funnel, a measuring gauge that allows you to easily figure out the headspace and more.

These items are almost a necessity when canning. You can order one of these Canning kits here.

For sauerkraut, I also recommend getting a nice sharp knife to slice the cabbage into nice thin shreds. A mandolin is also another option for slicing.

Here, you can find the Canning Supplies and Equipment Needed to Preserve Food

What Can I Use Sauerkraut For?

Graham has already enjoyed a meal of Bratwurst and Sauerkraut along with Perogies, and is looking forward to many more.

It can also be eaten on its own or as a simple side dish if you really enjoy the flavor. It pairs well with bold, savory flavors like onions and garlic.

Sauerkraut has many health benefits: lots of naturally occurring probiotics that foster beneficial bacteria in the body to improve digestion, nutrients, vitamins, and it can even help strengthen the immune system and reduce the risk of certain diseases.

A hearty mason jar of sauerkraut can also be given as a nice homemade gift for friends, family, and loved ones.

We ended up with 17 pints of Sauerkraut using a 3 gallon crock, which held a total of 15 pounds of cabbage.

Here’s an article about Canning Tips You Should Know

Jar of Sauerkraut ready to be canned.
Save this to your Pinterest board for later!

More Home Food Preservation Guides

  • Want to can some fruit? Here’s How to Can Cherries so you can fill your pantry shelves.
  • Here’s How to Can Salmon (and any other fish)
  • Using Tattler Lids? Here’s how I make sure to use Tattler Lids and Seals properly!
  • Make these Quick Pickled Carrots from the Minimalist Baker!
  • Learn how to store Home Canned Food Properly
How to can Sauerkraut jars on a shelf

How to Can Homemade Sauerkraut

Cook Time: 25 minutes
Additional Time: 1 day
Total Time: 1 day 25 minutes

This easy homemade sauerkraut is perfect to quickly can right in your own kitchen! This will extend its shelf life and keep it fresh and tasty for much longer.

Ingredients

  • 10 pounds cabbage leaf
  • 6 tablespoons pickling salt

Instructions

  1. Heat the Sauerkraut in a large pot, stirring with a plastic or wooden spoon, until it reaches a gentle simmer.
  2. Add a bit of the juice. Make a brine, in case you don’t have enough juice in the crock.
  3. You’re going to Hot Water Bath the Sauerkraut, so wash your jars and then set them into your boiling water canner. Keep them in there for 10 minutes.
  4. Meanwhile, get your seals and rings ready. Pour boiling water over them and let them sit until you need them.
  5. Use 1 1/2 tablespoons of salt for each 1 quart of water. Heat this brine on the stove.
  6. Once you get your Sauerkraut warmed up, hot pack it into jars.
  7. Add the warm liquid and use the brine, if you need to. Leave 1/2 inch of headroom and wipe jar rims.
  8. Place your jars in the Boiling Water Bath and once the water comes back to a boil, set your timer for 15 minutes for pints (or 25 for quarts).
  9. Once the time is up, remove your jars and leave them alone for 24 hours. At this point, wipe them down, remove the metal rims if you like, and store them wherever you like.

Notes

  • This recipe takes sauerkraut that's already been made and prepares it for canning. Check this post for information on how to make your sauerkraut from scratch!
  • As a general rule of thumb, you can fit 5 pounds of cabbage for every gallon that your crockpot or slow cooker will fit. Feel free to tweak the amount of cabbage depending on the size of your pot.
  • Make sure you always take your elevation into account when you do canning, it is very important. Higher altitudes will require more time.

Did you make this recipe?

Please leave a comment on the blog or share a photo on Pinterest

© Annie


Filed Under: Canning, Food, Grow Your Own Vegetables, How To Tagged With: Grow Vegetables, preserving, Sauerkraut, vegetables

Connect With Us!

  • Email
  • Facebook
  • Instagram
  • Pinterest
  • Twitter

Search this site

Generic selectors
Exact matches only
Search in title
Search in content
Post Type Selectors
Search in posts
Search in pages

Our Most Popular Posts

Garlic cloves in oil

How to Preserve Garlic in Oil – and Other Ways to Store Garlic

a open jar of pickled brussel sprouts on a counter

Easy Pickled Brussels Sprouts Recipe (Water Bath Canning)

Privacy Policy

Read about our Privacy Policy

Disclosure

Please note that some of this site’s links are affiliate links, and CountryLivinginaCaribooValley.com is a participant in the Amazon Services LLC Associates Program, an affiliate advertising program designed to provide a means for us to earn fees by linking to Amazon.com and affiliated sites. At NO ADDITIONAL COST TO YOU, I will earn a small commission, if you purchase them. I recommend them as they are good products.

Theme Design By Studio Mommy · Copyright © 2026