Country Living in a Cariboo Valley

Homesteading in BC

  • How to Get Started
  • Vegetable Gardening
  • Preserving Food
  • Recipes
  • Homemade Wine Recipes
  • About Us
  • Work With Me
  • Shop
    • Vegetable Garden Planner Printable: Grow Your Best Garden Ever
    • Grow Enough Food for a Year
    • Delicious Dandelions: A Recipe Collection
    • Dirt to Dollars: Selling at the Farmers Market
    • 8 Pounds in 8 Weeks: Raising Chicks for the Dinner Table
    • Making Wild Wine
    • Build a Hanging Chicken Feeder
    • 15 Things to Know About Living in the Country

Best Books for Homesteaders

By Annie

Read on for our best books for homesteaders! Perfect for those new to country life or for gifts!

No matter how self-sufficient you may be, there will come a time when you need to read about and learn from the experiences of others. That’s where books come in.

While nothing replaces hands-on experience, learning from the successes and failures of others can help you avoid some pitfalls, speed up your learning curve, and develop a greater appreciation for this lifestyle.

Whether you’re homesteading full-time or just starting out, we’ve gather up the best books for homesteaders to help you build the skills you need to thrive.

Best Books for Homesteaders

1) A Survival Guide. The Prepper’s Pantry

Food is definitely important! The Prepper’s Pantry covers a lot of ground.

This book is a great resource for homesteaders of all levels of experience. It covers everything from food storage and preservation to emergency preparedness.

Survival Guide Preppers Pantry
Click to learn more

2) The Backyard Homestead Book for a Self-Sufficient Lifestyle

If you only have a small amount of space, this book is for you. The Backyard Homestead will show you how to turn your yard into a mini-farm that can provide you with all the food and other resources you need to live a more self-sufficient lifestyle.

Backyard Homestead Book
Click to learn more.

3) 40 Projects for Building Your Backyard Homestead

This book is perfect for homesteaders who want to get their hands dirty and build things themselves. It includes projects like building a chicken coop, constructing a root cellar, and making your own soap.

40 Projects for your Homestead Book
Click to learn more.

4) The Encyclopedia of Country Living

There’s a reason this book has been printed and included on bestseller lists for over 50 years: it’s an incredibly comprehensive guide to all things homesteading. It’s good to have whether you’re a beginner or have years of experience – there’s tips in there for everyone.

Encyclopedia of Country Living book
Click to learn more.

5)  The Homesteading Handbook

This book is perfect for homesteaders who are just starting out. It covers a wide range of topics like choosing a homestead site, building a shelter, and raising animals. It’s great for anyone trying to stretch a tight budget.

The Homesteading Handbook cover
Click to learn more.

6) Basic Butchering of Livestock & Game: Beef, Veal, Pork, Lamb, Poultry, Rabbit, Venison

One of the more challenging aspects of homesteading is raising animals for meat.

This book is essential for any homesteader who plans on raising animals for food. It covers everything from slaughtering and butchering to food safety and animal welfare.

Basic Butchering book cover
Click to learn more.

7) The Rooted Life: Cultivating Health and Wholeness Through Growing Your Own Food

Even if you don’t have a lot of space, time, or experience, you can still grow your own food. This book shows you how, with tips and advice on everything from starting a garden to preserving your harvest.

It’s wonderful for those who are just starting to explore more self sufficient living and the idea of homesteading.

Rooted Life Book Cover
Click to learn more.

More of our Best Books for Homesteaders

8) Root Cellaring: Natural Cold Storage of Fruits and Vegetables

Having a root cellar is a great way to store food for long-term use. This book is essential for any homesteader who wants to learn all about it. It covers topics like choosing a root cellar site, building a root cellar, and storing food in a root cellar.

Root Cellaring Book Cover
Click to learn more.

9) The Self Sufficient Life and How to Live It: The Complete Back to Basics Guide

If you’re a beginner to the homesteading lifestyle and aren’t quite sure where to start, this is a good book to check out. It’s both inspirational and practical and will help you feel more confident about homesteading. It’s a comprehensive guide that covers a lot of different topics related to living off the land.

SElf Sufficient Lifestyle book cover

10) The Homesteader’s Herbal Companion: The Ultimate Guide to Growing, Preserving, and Using Herbs

This book is perfect for homesteaders who want to grow and use herbs. It covers topics like growing herbs, harvesting and drying herbs, and using herbs for medicinal purposes.

Herbalism is a wonderful skillset to add to your homesteading repertoire and this book is full of great information.

Herbal Companion Book Cover
Click to learn more.

11) The Complete Beginner’s Guide to Greenhouse Gardening: A Month-by-Month Planting Book to Grow 365 Days a Year

This book is perfect for homesteaders who want to grow their own food year-round. It covers topics like choosing a greenhouse, growing plants in a greenhouse, and using a greenhouse for winter gardening.

You can increase the amount of food you’re able to produce by learning how to properly care for a greenhouse, so it’s well worth it!

Pssst! Want to read how we built a backyard greenhouse for only $200?


Greenhouse Gardening book cover
Click to learn more.

12) Ball Complete Book of Home Preserving: 400 Delicious and Creative Recipes for Preserving Food at Home

This book is essential for any homesteader who wants to preserve food. It covers topics like canning, freezing, drying, and fermenting food. Preserving food helps you to enjoy the fruits of your homesteading labor all year long.

Ball Book of Preserving Book Cover
Click to learn more.

13) The Practical Permaculture Project Book: Design Your Landscape with Ecosystems in Mind

This book is perfect for homesteaders who want to design their land using permaculture principles. It covers topics like site assessment, water management, and soil fertility. If you’re interested in sustainable living, this is the book for you.

These are just a few of the many great books available to homesteaders. These books will provide you with the information you need to get started homesteading and live a more self-sufficient lifestyle.

Practical Permaculture Book Cover
Click to learn more.

More Ways to Learn About Homesteading

best books for homesteaders collage
Click to save to your Pinterest board.


Now that you know all the best books for homesteaders, maybe you’re looking for more ways to learn new skills that will help you on your homesteading journey. Here are a few that can help:

1) YouTube Channels: There are many great YouTube channels that offer helpful homesteading tips and tricks. Search for homesteaders on YouTube that share helpful experiences and how-tos.

2) Podcasts: Another great way to learn about homesteading is by listening to podcasts. Some of our favorites include:

3) Blogs: There are many homesteading bloggers out there who share their experiences and offer helpful tips. Check out some of our favorites:

  • Salt in my Coffee
  • Healing Harvest Homestead
  • A Modern Homestead

4) Meetup Groups: There are often homesteading meetup groups in most areas. This is a great way to meet other homesteaders and learn new skills.

5) Local Classes and Workshops: Many universities, community colleges, and extension offices offer classes and workshops on various homesteading topics. Check with your local resources to see what might be available near you.

6) Experience: One of the best ways to learn about homesteading is by getting your hands dirty and doing it yourself. Start small with some simple projects and work your way up to more complex ones. There’s no better way to learn than by experience.

Learning is a never ending process for everyone, including homesteaders. As you continue to grow and learn new skills, you’ll also be able to pass some helpful knowledge along to others in the same way.

And don’t forget:

Grab some of these best books for homesteaders and carve out some time for learning!

Filed Under: Gift Guides

Planning A Vegetable Garden

By Annie

Planning a vegetable garden?  A productive and thriving garden doesn’t happen by accident. It takes planning and thoughtful prepping.

Winter and early spring are the perfect times of year to finalize plans for the gardens. Planning a vegetable garden is an important part of ensuring there is enough food in the cold room for the winter.

This planning is just one of the things I love about Winter. There’s very little work to be done outside, and no one minds if we get up late and linger over coffee. Once the last frost hits, you can get started on your seedlings, ready to transplant.

I would love to share tips with you about choosing the right location, selecting plant varieties that fit your location and growing season, and practical steps for success. Read on!

A vegetable garden in a raised with seedlings growing.
Save this to your Pinterest Gardening board!

Garden catalogs have started to arrive, although I get a lot less than I used to. That’s because I focus on growing heirloom varieties, so I can save my own seeds. This is a way to skip the seed packet purchase and grow from your own seeds.

Needless to say, seed businesses that use GMO seeds don’t get much business from my house. Food gardening has gotten a lot cheaper for me, since I can gather the seeds myself.

Written garden plan on a table with lots of seed packages.
Planning a vegetable garden in early Spring followed by planting seeds.

The harvest time is the same, and you will have hearty and fruitful plants to enjoy in the warmer months and late summer. 

I don’t have to pay those shipping costs, which always add up. When I do make a mail order, I try to find friends who want seeds as well, so we can go in on an order together and save some money. Whether you decide to grow cucumbers, tomatoes, leafy vegetables, and more!

Planning A Vegetable Garden

Perhaps the easiest way for me to show you how to plan your food garden is to show you what I am doing for my own vegetable and berry gardens.

Cabbages, lettuces, peas and turnips grow in a vegetable garden.
Cabbages, lettuces, peas and turnips grow in our vegetable garden.

Our food Production This Year:

For starters, one change is going to be that I plant a SMALLER garden than we usually do. 

We still have lots of canned food in our Cold Room, from previous years. This is a huge bonus.

I can spend the time on other things, and we still won’t have to spend much money at the grocery store!

Even if you have a small space, you can find a good garden design to maximize your space. 

The biggest thing is to make sure you do a soil test for optimal soil.

You also need to site the garden so it gets enough sunlight, but also offers partial shade, depending on the type of plants you are opting to plant. 

From root vegetables to fresh basil, mint, oregano, and more. The sky is the limit. 

Colorful lettuce growing in a garden bed.
Beautiful colorful lettuce grows in our garden beds.

Looking for ways to use less water in your flower gardens or vegetable gardens? Take a look.

My Vegetable Garden Plan:

Grow Root Crops

Grow mostly root crops (potatoes, beets, carrots) because they are easy for us to store in our cold room. We’ll still be eating them the following March. 

They are easy to grow and don’t require a lot of maintenance during the busy Spring and Summer. Here’s how to grow and store potatoes.

Grow Lots of Peas

Plant lots of shell peas  – there’s nothing like eating garden fresh (yes frozen) peas in January. When I’m planning a vegetable garden, I always make sure to have lots of room for them.

We like to grow them along our fences so they will climb them. Here’s how to grow peas in the garden!

Peas in bloom, growing up a wire fence.
Plant peas along the fence line, so they can climb!

 I know a lot of people prefer snap peas, the ones where you eat the whole thing, pod and all. I confess although I love to eat these fresh, I am not such a fan of eating them after being stored in the freezer.

I’m picky when it comes to eating veggies – I love all kinds, but I love the flavor of them fresh or al dente for sure. I so dislike eating soggy mushy veggies.

It is so important to grow what you like eat! Seriously think about that when you are planning a vegetable garden.

Don’t bother wasting space for planting food in your veggie garden you and your family don’t really enjoy eating. It’s a waste of space that could be filled with food you love to eat.


Shelled peas in a bowl on a red cloth.
Late afternoon on the porch shelling peas.

  I love shell peas, but I know they take a lot of time to shell them once you get them picked. Big deal…I’ll easily handle sitting on my porch for a couple of hours with a big bowl full.

Sounds like a self imposed late afternoon rest to me. Just don’t come along and grab a handful after I’ve picked them, cuz I tend to get pissy about that. Shell ’em yourself, I always say.

I blanch and freeze peas and then we enjoy them all winter long.

Grow Some Carrots

If your family loves carrots, plant a couple wide rows and you will easily have enough to last through the winter.

Here’s how to grow and store carrots. You really can still be eating garden carrots in March or even April of the following year!

Grow Lots of Salad Greens

As for the leafy greens, I’ll just be planting one half row of lettuce (which will give us lots) and half a row each of swiss chard and spinach.

I like to plant these just as soon as the soil can be worked, so that we get an early crop. Leafy greens are cool-season crops, so we can plant those in mid-April, if we are lucky enough with the snow melting.

We’ll let some grow to full size but we will be trimming lots of leaves for salad greens.

Since lettuce, spinach, kale and other leafy greens are more shade tolerant than other veggies, they can be planted on the north side of the garden, out of full sun.

Beans growing in a wide row.
We keep Remay cloth close at hand in case of frost.


Grow Some Beans

I’ll plant at least one wide row of green beans. We need to keep the Remay cloth handy for covering on cool nights here, as beans don’t like how low the temperature can dip.

We want to can up lots of pint jars full of green beans as we are starting to run low of those in our cold room. Here’s how to pressure can green beans.

Grow a Few Broccoli and Cauliflower Plants

And I will plant a few broccoli and a few cauliflower, maybe six of each. Maybe a half row of turnips, too.

A man's hand sits on a huge cabbage to show the size.
My son’s hand shows how huge this cabbage is.


Grow Enough Cabbage for Sauerkraut

One row of cabbage so I can make up a couple of batches of sauerkraut come the fall. We grow big cabbages here in the Cariboo!

Sauerkraut is so easy to make. Here’s how to make Sauerkraut.

Grow a Bit of Corn, Squash and Zucchini

We will probably grow some corn – maybe 3 dozen plants or so. Corn does best planted in a block, as this helps with pollination. Growing corn here is always risky, because it really is a warm season crop.

Where we live, there is almost always a threat of frost for 10 months of the year, so we only grow it if we can afford the room it takes. It’s disappointing to watch the corn grow and then see it killed by a surprise frost!

Although we can (and do) grow Zucchini in our garden bed, we just don’t risk growing winter squash. And, because of the sprawling vines, it takes up too much room in the greenhouse. So for us, we buy winter squash.


Want to keep track of everything you do in your garden this year, so you’ve got a perfect record to use next year?

Look at this Vegetable Garden Planner!

Vegetable Garden Planner Printable: Grow Your Best Garden Ever

Growing Vegetables In the Greenhouse

In the greenhouse, I’ll have several varieties of peppers, both hot and sweet. Also some cherry tomatoes; all heirloom varieties. I haven’t checked on how much tomato sauce I still have on hand, so I’ll need to do that today.

The biggest thing is making sure to remove weeds, treat insects and pests that might be eating your leafy greens, and ensure your soil has nutrients to feed to your plants.

If I need to can up more, we’ll take a road trip closer to the coast where we can pick all day for very little money.

A vegetable garden growing with lots of food.
Click to save to your Pinterest board

We’ll bring a couple hundred pounds home and get the stock pot going to make homemade tomato sauce and pizza sauce.

It’s too cold at nights here to plant tomatoes outside – they have to be grown in greenhouses and mine is just not big enough for the quantity we use.

man weeding large vegetable garden
Click to save to your Pinterest board.


Garlic growing in a raised bed
Garlic grows in raised beds and is mulched with straw

  With food prices rising everywhere, I encourage you to plant your own garden this year. Just start small so you don’t get overwhelmed.

When you are planning a vegetable garden, think about what your family likes to eat and plant that! Root crops are easy to grow, easy to store and get expensive to buy in the winter. Wouldn’t it be great if you had your own supply?

Serious about growing food this year? Look at our book and start planning!

Grow Enough Food for a Year


Gardening Posts You Want to Read!

Worried about deer? Here’s our offbeat and cheap way to keep deer out of our garden.

Take a look at our printable Vegetable Garden Planner! It has everything you need for success.

Here are our top picks for growing herbs – whether you grow them outdoors in your garden bed or indoors!

For more info about garden layout, container gardening, square foot gardening, mulching methods, trellis gardening, raised bed gardening, be sure to read more about How to Grow Enough Food for a Year – it’s all covered (and lots more!) in there.  

Start planning a vegetable garden now and you’ll be ready for planting!


    Published Oct, 2019; latest update March 2026

Filed Under: Grow Your Own Vegetables

Canada Thistle Control – Organic Weed Killer Recipe

By Annie

Learn about Canada Thistle control so you can get rid of this weed without chemicals.

If you live on country acreage, you may be familiar with Canada thistle, an invasive weed that grows in many parts of Canada and the US. Thistles offer deep spreading roots with wind-borne seeds that can turn a whole lawn or pasture into a thorny battleground!

We’ve been successful in controlling it over time, due to the natural dislike I have for the plant and therefore, my willingness to work my plan to get rid of Canada thistle naturally, organically, here on our property.

Whether you have hay fields or are looking for Canada thistle control in lawns in your yard, here are solutions to help you get rid of thistle for good. Infestations can occur quickly in lawns and even in pastures. 

Thistles have a quick seed production, and they create new shoots quickly, so you can go from a little to a lot quickly.

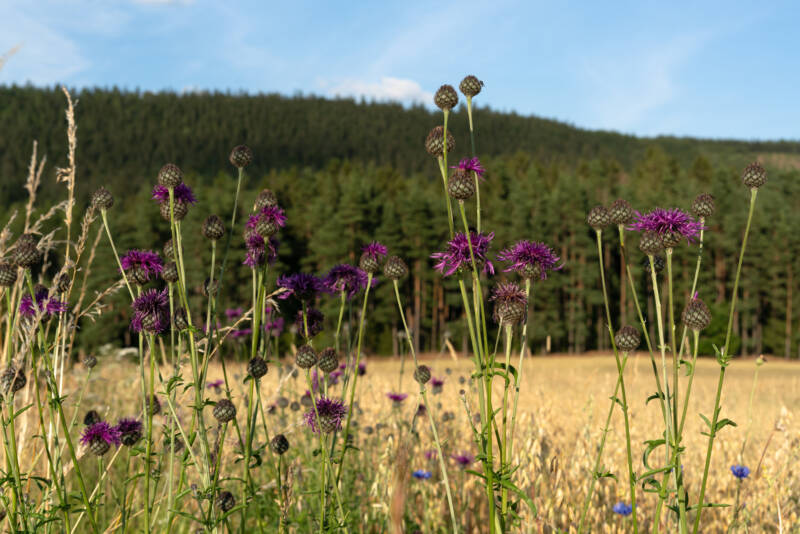
Canada Thistle in a field
Canada Thistle flowering in a field.

Canada Thistle and Scotch Thistle Control

Both Canada Thistle and Scotch Thistle love to grow along our roadsides, and since the wind does carry the seeds, we will likely always have a few plants here in our fields. But, we know how to get rid of it. So if you’re wondering how to get rid of Canadian thistles easily, fast, and organically, read on.

I have found a couple of ways to get rid of a lot of it. And every year, my workload becomes lighter because there are fewer Canada thistle seedling coming up! Mowing doesn’t attack the root system, so if you want to say goodbye to the buds popping up, follow my system.

We also have Scotch thistle here, another invasive plant. These plants are much thicker and larger than Canada thistle. They both like to grow on soil that has been disturbed, such as road sides, logging roads, burned off areas, etc.

And, for the fertility of your soil and hayfields, thistles need to be removed permanently so that the grasses will benefit and grow. Of course, you can use chemicals to get rid of thistles and any other kind of weeds, however, chemicals are something we don’t want here. 

We find natural organic ways to get rid of weeds; improving the soil always helps as then the grasses grow so well they literally crowd out the weeds.

Canada Thistle Control

I have learned two main ways to get rid of Canada thistle weed, and I want to share both of them, but first, a few points about the plant itself.

Canada thistle (scientific name is Cirsium arvense) is a perennial plant, belonging to the Asteraceae family of plants. It grows in thick patches, spreading by its creeping roots. A very noxious weed that is found a lot in North America. Some areas see a lot in spring, late June, July,  August, and more of the hotter months of the year. So having an effective control plan is essential in controlling them.

Canada Thistle Identification 

Canada Thistle in bloom in a field.
Canada Thistle has smaller leaves and stem than Scotch Thistle has.

What does Canada thistle look like? The plant can grow up to 7 feet but is often found at shorter heights. It has green leaves with sharp spiny edges and can be hairy on the underside of the leaves. 

It is very easy to spot this weed when it is flowering! The Canada thistle flower is like a purple pompom, which really helps when it comes to searching for this weed in fields. The flowers stand out like, well, sore thumbs.

Scotch Thistle Identification

Scotch Thistle plant in bloom
Onopordum acanthium plant commonly known as Cotton thistle or Scottish Thistle

Scotch Thistle is also known as Cotton Thistle. It is a large plant, thick and tall, topping out at about 10 feet. It has a grey green colour and sharp thorns along the stem. If you’ve got these growing, you’ll see them!

I use the same eradication methods to get rid of Scotch Thistle as I do Canada Thistle.

Why is Canada Thistle Bad?

You want to get rid of all Canada Thistle plants in your garden, acreage and fields. Canada Thistle is on the list of noxious plants in the province of BC. 

Since this thistle is an invasive species, it can do damage to fields over time. Alfalfa fields are known for the spread. They love the shade, vegetation, and thrive. This can also bring unwanted insects like weevils into the crop. Not only will it compete (and eventually win) against the grass you seeded, Canada Thistle also seriously depletes the soil of nutrients.

This is counterproductive especially when it comes to fields planted with wheat and other grains. It is undesirable in hay fields as well.

Should I pull Canada thistle?

While you can pull the plants, I will share more ways to control the regrowth and spread of this exotic species. 

Late spring or early summer is the time of year when you will find that pulling a Canada thistle offers the best return for removing the plant. Some things to know about the foliage is that you need to wear thick gloves as they have a lot of spines on them that poke. 

These plants have an extensive root system, so making sure you dig at least 6-8 inches down or deeper is going to help reduce the chance of reproduction. 

Make sure to bag and throw away all that you dig up, as any fluff, flowers, and such can cause more spreading and growth of a new parent plant. Do not compost the buds or seeds. This helps with the control of Canada thistle.

Canada Thistle Control: Cutting Thistle Plants

The first control method for eradicating Canada Thistle or Scotch Thistle is by cutting the plant down. This method works very well, especially if some of the flower pods have begun setting seeds.

I do not bother to hunt down small thistle plants for cutting. It is far easier to wait until the plant is actually in flower! I do this for a couple of reasons:

  • It is much easier to spot the plants when they are in flower! The bright purple blooms really stand out, and it is very easy to find the plants for cutting down.
  • I like to wait until the plant has spent a lot of its energy into flowering. A plant’s natural desire is to flower so it can then set seed, thereby reproducing to “make babies” the next year. So, I wait until the plant is putting everything it has into flowering – that is THE perfect time to cut it down. 

Cutting Blooming Thistle Plants

So, I find the plant in bloom (and hopefully it has not yet finished bloom and has moved on to setting seed) and then I use a pair of large sharp gardening loppers like these ones (the shears with long handles) to cut it down as close to ground level as I possibly can.

Now, the plant is at a real disadvantage! It’s completely in shock, because the only thing left is pretty much the root. It’s always beneficial to get rid of as many leaves left at ground level as possible. No leaves, no flowers, nothing but a root = a shocked plant.

Now, it has to find extra energy to completely rebuild itself. And it can do that, but it usually takes time. And once it does begin rebuilding itself, you cut it again.

Usually by the time you have cut it twice, it will die as it just cannot keep having to rebuild itself. The odd time you may need to cut a third time but usually it only takes two cuttings before the roots give up and die off.

Removing Thistle Plants that have gone to Seed

Never ever let a Canadian Thistle go to seed on your property if you can at all help it! One plant carries thousands of seeds and each will be able to start a new plant.

If one is too far gone and the seed heads are ready to let go, cover the plant with a large heavy duty garbage bag, then cut it down at the base.

This way, the seeds will let go while they are in the bag. This is a really safe way to get rid of thistle that is past the flowering stage.

We tend to bag up all the thistle plants and bring them to the dump. We sometimes burn the plants, but only if they are still in the flower stage. Once they move into setting seed, we do not burn them – it is much safer to get rid of the plant completely. We don’t want any seeds flying away!

Weed control should be done regularly! If you don’t want to have to cut down each of the thistle plants, my other option is to use a homemade all natural spray.

You can completely get rid of the weeds just by being able to stay on top of the spraying schedule, using this Canada thistle control with vinegar and soap.


Thistle Killer Recipe – Homemade Organic

This recipe will work on both the Scotch thistle and the Canada thistles – actually, it will work on any type of weed you have, including it’s ability to kill Poison Ivy plants. A great alternative to herbicides and other harsh chemicals you might find in 2,4-D, Roundup, and other herbicide treatments. This organic recipe works great on the persistence of these thistles.

You may need to repeat the spraying. You probably will. It’s organic right? So no chemicals can mean less toxicity.

Tips: If possible, use this spray during the hottest part of the day, when the plants are thirsty – the spray will be more beneficial.

Spray when there is no chance of rain in the forecast.


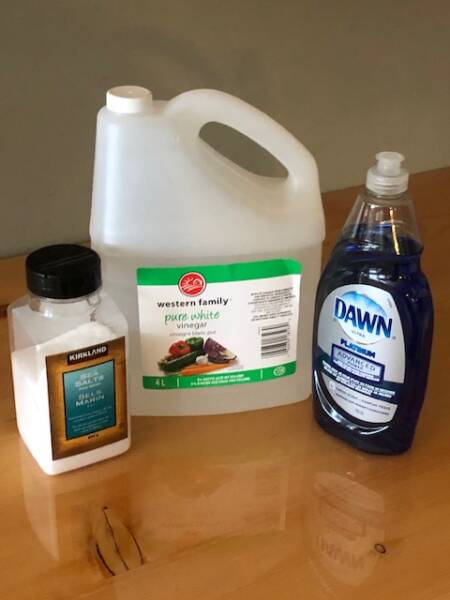
Vinegar, salt and dish soap to make weed killer
Organic homemade weed killer ingredients for Thistle control.

All Natural Weed Killer Ingredients

  • 3 cups white vinegar
  • 1/2 cup table salt
  • 1 tablespoon liquid detergent or soap (I use Dawn) for stick-to-itiveness.

Directions to Mix Homemade Weed Killer

  1. Mix vinegar and salt until the salt is completely dissolved. Stir in liquid dish soap, and pour into a spray bottle.
  2. Spray onto the green growing leaves of the plants.
  3. Wait a week, then repeat on any plants that are still alive. Best time to apply: during a dry spell.

For use on larger areas, simply triple or quadruple the recipe to give the quantity you need. Then, put the liquid into a backpack sprayer like this one. Make sure to get the stems and all other areas of the plant.

Canada Thistle in bloom in a field.
Click to save to your Pinterest board.

Canada Thistle Rash

Some people seem to be more sensitive than others to working with, and touching Canada Thistle and Scotch Thistle plants. Wearing long sleeves and long pants, plus wearing heavy leather gloves will go a long way towards being able to work with thistles. Try to be cautious of the flower-bud stage and not let the flower or plant touch your skin directly.

These tips will help if you do end up being in direct contact with the plant – Soothing Poison Ivy Rash 

Use this Canada Thistle Weed Killer on a regular basis throughout the growing season and you will see a huge difference in one year.

It’s one of the best and most natural ways to practice Canada Thistle control.


Originally published May 2022; latest update February 2026

Filed Under: Gardening

Meyer Lemon Bundt Cake

By Annie

This Meyer Lemon Bundt cake never lasts long at our house – family and friends love a slice of this with a hot coffee!

This is one of the best Meyer lemon cake recipes I have ever made. So lemony and sweet, it makes a perfect afternoon treat or dessert after dinner.

If you love the citrus flavor of lemon cakes, give this recipe a try! If you’re after a yummy cookie recipe, try these Lemon Meltaway cookies.


Meyer Lemon Bundt cake sliced on a white plate.
One of the best Meyer lemon cakes I have made!

Fifteen minutes prep time and another 30 minutes cooking time – then let it cool before decorating the top with a smattering of confectioners sugar.

Lemon Bundt Cake Ingredients

  • all purpose flour
  • baking powder
  • salt
  • sour cream
  • granulated sugar
  • eggs
  • meyer lemon zest
  • vegetable oil
  • vanilla extract
  • meyer lemon juice

Lemon Cake Topping Ingredients:

  • meyer lemon zest
  • powdered sugar


Lemon Bundt Cake Instructions

Preheat the oven to 350°F. Grease or use cooking spray to grease a bundt cake pan. In a medium bowl sift together the flour, baking powder, and salt.

Lemon cake ingredients in a mixing bowl.

In a large bowl, or in the bowl of your stand mixer fitted with the paddle attachment, whisk together the sour cream, sugar, eggs, lemon zest, oil, vanilla, and lemon juice.

Add the dry ingredients (flour mixture) to the wet and mix the cake batter on medium speed until just combined.

Baked cake in a bundt pan.
Baked Lemon cake after 30 minutes in the oven.

Pour the batter into the prepared bundt pan , being sure to scrape the sides of the bowl. Then bake for 30 minutes or until a toothpick inserted in the center comes out clean. Let the cake cool for 5-10 minutes.

Cooled baked Lemon cake on a cookie rack.
After cooling, turn the Lemon cake out of the pan and onto a cooling rack.

After 10 minutes, turn the lemon cake out of the bundt pan onto a cooling rack to let it cool completely.

Icing sugar sprinkled on a baked Lemon bundt cake.
Sifted icing sugar sits on top the Lemon cake.

Once the cake is cooled completely, it’s time to decorate the top!

Topping for Lemon Bundt Cake

The easiest and quickest way is to use powdered sugar. Just sift confectioners sugar over the top of the entire cake.

After the top is decorated, move the cake to a pretty serving dish or cake stand. After that, add the zest of one lemon over the bundt cake and it is ready to serve.


Meyer Lemon Bundt Cake sprinkled with sugar
Click to save to your Pinterest board.


Lemon cake variations and FAQ’s:

What is the best type of frosting for lemon cake?

Some people prefer the dusting of powdered sugar on this cake, but you can certainly use a glaze, that you drizzle over the loaf instead.

If you would rather have a Lemon glaze over the cake, this Rosemary Lemon Glaze is delicious! I use this when I make my other Meyer Lemon Loaf!

Can I use regular lemons instead of Meyer lemons?

You can certainly substitute regular lemons for Meyer lemons, just keep in mind that the Meyer lemons are much sweeter!

Can I make Lemonade from Meyer lemon juice?

Yes you sure can, and here’s all you need to know to make homemade Lemonade!

How can I preserve lemon juice?

If you’re lucky enough to have lemon trees in your yard, check out here for how easy it is to freeze fresh lemon juice!

Can I make Meyer Lemon pound cake in a loaf pan?

Yes you can turn this into a pound cake! Just mix as the recipe calls for, then pour batter into two prepared pans. The baking time may vary, so keep an eye on the loaves.


This Meyer Lemon Bundt cake is a delicious way to enjoy fresh Meyer Lemons in season!

Meyer Lemon Bundt cake on a white plate

Meyer Lemon Bundt Cake

Yield: 1 cake
Prep Time: 15 minutes
Cook Time: 30 minutes
Additional Time: 10 minutes
Total Time: 55 minutes

This Meyer Lemon Bundt cake is easy to make, great for tea time and a delicious way to use fresh Meyer Lemons.

Ingredients

  • 3 cups all purpose flour
  • 4 teaspoons baking powder
  • 1 teaspoon salt
  • 2 cups sour cream
  • 2 cups granulated sugar
  • 6 eggs
  • 3 teaspoons lemon zest
  • 1 cup vegetable oil
  • 1 teaspoon vanilla
  • 3 teaspoons meyer lemon juice
  • powdered sugar

Instructions

  1. Preheat the oven to 350°F. Grease bundt cake pan.
  2. In a medium bowl sift together the flour, baking powder, and salt.
  3. In a large bowl, or in the bowl of your stand mixer fitted with the paddle attachment, whisk together the sour cream, sugar, eggs, lemon zest, oil, vanilla, and lemon juice.
  4. Add the dry ingredients to the wet and mix until just combined.
  5. Bake for 30 minutes or until a toothpick inserted in the center comes out clean.
  6. Let the cake cool for 5-10 minutes before turning it out of the bundt pan onto a cooling rack to let it cool completely.
  7. Once the bundt cake is cooled completely, move cake to serving dish.
  8. Sift powdered sugar over the top. Then zest one lemon over the bundt cake
Nutrition Information:
Yield: 8 Serving Size: 1
Amount Per Serving: Calories: 850Total Fat: 42gSaturated Fat: 9gTrans Fat: 1gUnsaturated Fat: 29gCholesterol: 173mgSodium: 599mgCarbohydrates: 109gFiber: 1gSugar: 71gProtein: 11g

Did you make this recipe?

Please leave a comment on the blog or share a photo on Pinterest

© Annie
Cuisine: American / Category: Recipes

Filed Under: Recipes

Dutch Oven No Knead Bread Recipe

By Annie

Here’s a no knead bread recipe you can make overnight – in the morning, just pop it in your Dutch oven and bake.

If you love homemade bread as much as we do, here’s a treat. Skip the kneading and try this no knead Dutch oven bread recipe instead – easier on you and it tastes delicious, especially warm out of the oven.

Doesn’t this look good? 


Dutch Oven No Knead bread with melted butter on it sitting on a plate
This dutch oven no knead bread recipe is easy to make.

Instead of buying an artisan bread at your bakery or grocery store, make your own rustic loaf of bread. This bread has a wonderful flavor and texture with a golden crust.

Here’s how to bake bread in a Dutch oven.

Dutch Oven No Knead Bread Recipe

You can use either a cast iron Dutch oven or an enamel Dutch oven – your choice! Just make sure you have a lid; this bread won’t bake properly with the lid!

No Knead Bread Ingredients

Here’s all the ingredients you need to whip up a batch of this bread!


  • flour  (you can use all purpose flour but for best results, use bread flour. You can use white flour or whole wheat flour)
  • salt (table salt is fine; you can also use sea salt)
  • active dry yeast RAPID RISE (instant yeast)
  • warm water
  • olive oil


Instructions for Dutch Oven Bread

Oil drizzled on dough for bread
Drizzle oil lightly on top and let sit overnight.

Add water, yeast, salt and flour to a large mixing bowl. Using a wooden spoon, begin to stir until the flour is well mixed and looks shaggy and sticky. Once the mixture looks like shaggy dough (in that it’s mixed but not smooth), it’s ready for the next step.

Gently form the bread dough into a round ball. Lightly drizzle olive oil over the dough. Cover with a clean kitchen towel or plastic wrap and let sit at room temperature overnight.


placing dough in a parchment lined dutch oven for baking
Either oil your Dutch oven or use parchment paper to prevent sticking.

Baking Dutch Oven Bread

When you are ready to bake your loaf the next day, start by preheating the oven to 350 degrees.

Pop the Dutch oven in the oven and let it get hot. After 30 minutes, carefully remove the Dutch oven from the oven and increase the heat to 450 degrees.

Lightly drizzle olive oil around the rim of the Dutch oven. Be careful as the Dutch oven will be HOT! Note: You can use a piece of parchment paper instead of oiling the Dutch oven.

Wet your hands, and scoop the dough out of the bowl. Drop the dough into the Dutch oven.


No knead bread warm out of oven on a cutting board.
This no knead bread looks incredible!

Bake for 30 minutes with the lid on. Remove the lid and bake for an additional 15 minutes, until the loaf is golden brown. After resting in the Dutch oven for 10 minutes carefully remove the bread from the Dutch oven.

Set your loaf on a wire rack to let it cool.

Slice with a sharp knife and slather with butter – this easy no cook Strawberry Jam is wonderful on a slice of warm bread!

Or serve alongside a large bowl of homemade soup (like this delicious Salmon chowder) or chili. This bread is lovely with butter, parmesan cheese and fresh herbs, like sprinkles of rosemary or thyme.


Dutch Oven Bread FAQ’s:

What’s the best size of Dutch oven for bread?

The best sizes for a Dutch oven for baking bread is between 5 quarts and 7 1/2 quarts. These are large enough to hold the dough for a loaf of bread. The 6-quart Dutch oven is a popular size.

How do I get the bread out of a Dutch oven if it sticks?

This shouldn’t happen if it was well oiled, but if it does, here’s what to try. Put the lid back on and let it sit, and hopefully the steam will help release the bread.

If this doesn’t do it, try prying it out, or check here for some good tips on getting the loaf out.

What’s a good quality Dutch oven for baking bread?

This one – Lodge is a fantastic company that stands behind every piece of cast iron cookware they sell. So here’s a great cast iron Dutch oven you can buy online – read the reviews!

How can I turn this into a campfire bread recipe?

You can also turn this into a campfire bread in a Dutch oven! Be sure to start with hot coals not actual flames.

Let the dough rise for at least an hour (instead of overnight), then preheat your Dutch oven in the campfire for 30 minutes.

Bake the bread for about one and a half hours until the crust is golden brown. The cook time will vary depending on the heat in your fire.

Can you bake bread in enameled cast iron?

Yes you certainly can! The tight fitting lid of these enamel Dutch ovens are great, because it will trap the steam inside and that’s what you want for making a great loaf of bread. Here’s a Lodge enamel Dutch oven you can buy online. 

More Country Living Recipes

Looking for a different quick loaf recipe? Try this easy Banana bread – it’s moist, delicious and perfect with a hot cup of coffee!

Try this home made Pizza Dough recipe – it makes 3 crusts, so use what you need, freeze the rest for an easy meal next week!

This is our favourite home made fresh Salsa! And we’ve included all the canning instructions so you can process shelf stable Salsa for your pantry!


Easy no knead dutch oven bread on a plate
Click to save to your Pinterest board!


Dutch Oven No Knead Bread Recipe

Warm Dutch Oven no knead bread with melted butter sitting on a white plate

Dutch Oven No Knead Bread Recipe

Yield: 1 loaf
Prep Time: 5 minutes
Cook Time: 45 minutes
Additional Time: 1 day
Total Time: 1 day 50 minutes

Here's a no knead bread recipe you can make overnight - in the morning, just pop it in your Dutch oven and bake.

Ingredients

  • 3 cups of flour
  • 1 teaspoon of salt
  • 1 package of active dry yeast RAPID RISE
  • 1 ½ c of warm water
  • Olive Oil

Instructions

  1. Add water, yeast, salt and flour to a large mixing bowl.
  2. Begin stirring until the flour is well mixed and looks shaggy and sticky.
  3. Lightly drizzle olive oil over the dough.
  4. Cover and let sit at room temperature overnight.
  5. When you are ready to bake, preheat the oven to 350 degrees.
  6. Pop the Dutch oven in the oven and let it get hot.
  7. After 30 minutes, carefully remove the Dutch oven from the oven and increase the heat to 450 degrees.
  8. Lightly drizzle olive oil around the rim of the Dutch oven. Be careful as it will be HOT!
  9. Wet your hands, and scoop the dough out of the bowl.
  10. Drop the dough into the Dutch oven.
  11. Bake for 30 minutes with the lid on.
  12. Remove the lid and bake for an additional 15 minutes.
  13. After resting in the Dutch oven for 10 minutes carefully remove the bread from the Dutch oven.
Nutrition Information:
Yield: 11 Serving Size: 1
Amount Per Serving: Calories: 136Total Fat: 2gSaturated Fat: 0gTrans Fat: 0gUnsaturated Fat: 1gCholesterol: 0mgSodium: 194mgCarbohydrates: 26gFiber: 1gSugar: 0gProtein: 4g

Did you make this recipe?

Please leave a comment on the blog or share a photo on Pinterest

© Annie
Cuisine: American / Category: Recipes


originally published Feb 2022; latest update October 2022

Filed Under: Recipes

  • « Previous Page
  • 1
  • …
  • 4
  • 5
  • 6
  • 7
  • 8
  • …
  • 53
  • Next Page »

Connect With Us!

  • Email
  • Facebook
  • Instagram
  • Pinterest
  • Twitter

Search this site

Generic selectors
Exact matches only
Search in title
Search in content
Post Type Selectors
Search in posts
Search in pages

Our Most Popular Posts

Garlic cloves in oil

How to Preserve Garlic in Oil – and Other Ways to Store Garlic

a open jar of pickled brussel sprouts on a counter

Easy Pickled Brussels Sprouts Recipe (Water Bath Canning)

Privacy Policy

Read about our Privacy Policy

Disclosure

Please note that some of this site’s links are affiliate links, and CountryLivinginaCaribooValley.com is a participant in the Amazon Services LLC Associates Program, an affiliate advertising program designed to provide a means for us to earn fees by linking to Amazon.com and affiliated sites. At NO ADDITIONAL COST TO YOU, I will earn a small commission, if you purchase them. I recommend them as they are good products.

Theme Design By Studio Mommy · Copyright © 2026