Country Living in a Cariboo Valley

Homesteading in BC

  • How to Get Started
  • Vegetable Gardening
  • Preserving Food
  • Recipes
  • Homemade Wine Recipes
  • About Us
  • Work With Me
  • Shop
    • Vegetable Garden Planner Printable: Grow Your Best Garden Ever
    • Grow Enough Food for a Year
    • Delicious Dandelions: A Recipe Collection
    • Dirt to Dollars: Selling at the Farmers Market
    • 8 Pounds in 8 Weeks: Raising Chicks for the Dinner Table
    • Making Wild Wine
    • Build a Hanging Chicken Feeder
    • 15 Things to Know About Living in the Country

How to Reduce Water Consumption in the Garden

By Annie

Looking for a good source to learn how to reduce water consumption in the garden? This post has lots of ideas that will teach you how to use less water when growing your own plants at home!

How Can I Use Less Water in the Garden?

It’s becoming increasingly clear that gardeners around the world need to plan for a drier future. Growing populations and shrinking water supplies in regions from western China to the American Colorado River basin are increasing the pressure for gardeners to reduce water use in their landscaping.

Water rationing, once used only in emergencies, is now a part of daily life in many areas of the US, Canada and Australia.

Perennial garden in bloom with water saving mulch.
We’ve got lots of water saving tips for your garden and yard below.

Experts predict that increasing pressure on world water supplies will bring strict limits on water consumption in gardens even in areas that get year-round rainfall.

As a result, common pastimes as simple as gardening might start to suffer. But even in the face of all of this information, there are ways to reduce water consumption and continue the hobby or lifestyle of gardening.

The following tips are some of the many ways to use less water in the garden and still grow all your favorite plants while remaining conscious and careful of water usage.


WATER EFFICIENT VEGETABLE GARDENING

A row of pretty green leafy plants.
Follow these simple tips to reduce water consumption while maintaining a gorgeous and lush garden!
  • To start, if possible choose plants that are specifically known for requiring less water to grow. According to the Institute of Agriculture at University of Nebraska-Lincoln, some great options include asparagus, Swiss chard, peppers, eggplants, and mustard greens. Tomatoes, squash, and melon also tend to have nice deep root systems that can more easily pull water from the soil around them.
    • Some other options, depending on the climate where you live, include cactus, radishes, garlic, and zucchini.
  • Use mulch in your plant beds! Mulch helps prevent evaporation, which means you’ll need less water to properly nurture your plants. Mulches can also prevent weeds from growing, which would be an additional source that steals the water meant for your garden.
  • Arrange your plants in a way that positively influences water usage. For instance, planting seeds in a grid pattern as opposed to longer rows means a higher density of plants overall, which means watering in that area will affect more of them.
    • For a specific example of a smart planting arrangement, plant corn, squash, and beans together. The corn stalks act as the support for the beans to grow on, the beans will make the soil rich in nitrogen, and the squash helps cover the soil to prevent weeds from growing.
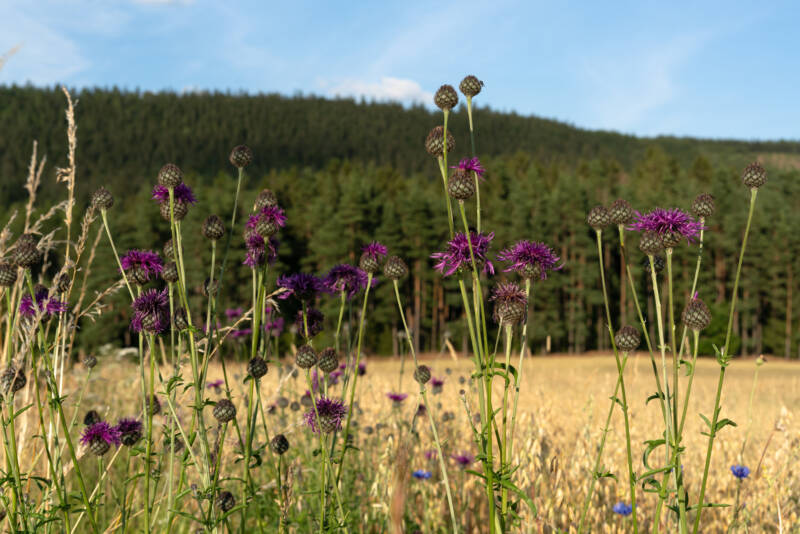
  • When all else fails, learn which plants are native to your climate and opt to plant those over anything else. Because they’re accustomed to growing wherever you live, they won’t require as much water or attention to thrive.


OUTDOOR WATER SAVING TIPS

Three differently sized plastic barrels for collecting rain water.
If you’re wondering how to use less water in the garden, solutions like these rain water collectors can help make use of the natural moisture that might otherwise go to waste.
  • These water totes are designed to catch rain water from house downspouts. They come in various sizes and at a variety of price points, and can be used to prevent all of that lush rain water from going to waste.
  • Inspect any and all facets of your watering system. Be sure there aren’t any leaks or blockages that may be wasting water without your knowledge.
  • Add a nozzle to your garden hose. By forcefully stopping the water from coming out of the hose when you’re done using it, you’ll save gallons of water you didn’t even know you were wasting! My favorite hose nozzle is this one.
  • Let your grass grow a little taller by adjusting mower settings. More natural shade from taller grass means less evaporation from the sun.


Water Saving Garden Design

If you’re creating a brand new garden space, now is the perfect opportunity to incorporate water saving into the design. Here are a few different ways you can really reduce the amount of water you need:

Plan Ahead by Xeriscaping Your Garden

An outdoor chair and table in a garden.
Xeriscaping is a fantastic way to reduce water consumption by eliminating unnecessary water use without sacrificing the garden or yard you want.

The idea behind xeriscaping is to use as little water as possible in your garden. The most effective way to reduce your water consumption is to plant drought-tolerant plants that don’t need much watering. You can also cut back on the size of your lawn to save water and put your yard to better use.

If you really want to grow some thirstier plants like a vegetable garden or a few flower beds, go ahead and create a few irrigated areas. Then, restrict your watering to those areas.

Fill in the rest of the landscaping with drought-tolerant plants that can thrive without watering. Look into native plants in your specific areas as they are usually drought tolerant.


Have a Smaller Lawn to Reduce Watering

A small dog sitting in a lush green lawn in a small modern backyard.
If possible, try to reduce the size of your yard and garden. After all, the less plants you have, the less water you’ll use!

A lush green lawn is nice, isn’t it? A nice soft carpet where you can walk barefoot is just lovely. With xeriscaping, you can certainly still have a lawn. And if you have pets, you may well need the lawn! But why not make it a small area?

Incorporate it into your sitting area so you can sit barefoot on the grass and read your book. Or hang a hammock above a nice small patch of lawn.

Use Hard Landscaping Techniques

Use permanent ground cover like small coloured gravel or make a rock river bed. Sculptures or large pots sitting on top of wood boxes look beautiful.

Many of the items used to create winter interest in your yard would fit perfectly in a xeriscaped landscape.

USE A SOAKER HOSE INSTEAD OF OVERHEAD

A soaker hose will allow water to evenly distribute along the entire length and also sink right down into the roots of your plants. This is much more efficient than an overhead irrigation system, which may end up distributing water to areas that don’t need it.

Several rows of tomatoes frowing in a greenhouse with soaker hoses running along each row.
A soaker hose deposits water much closer to the roots of your plants, which means you use less water to get the same moisture deep down into the root systems.
WATER AT THE RIGHT TIME OF DAY

Whenever possible, water your plants in the morning. This will allow the water to properly soak into the soil before the sun gets too intense and evaporates it all.

As an added bonus, any excess moisture on plant leaves will then dissipate after they’ve drank their fill. Allowing for the removal of this excess moisture can help prevent certain diseases in plants caused by bacteria and fungi that are drawn to the moisture.

On the flip side, you could also water your plants later in the evening once the sun has started to go down. This will also prevent over-evaporation and ensure all of that water goes to your lovely plants!

Tips for Successful Mulching

Two hands setting down straw in a garden as mulch.
Aside from mulch, you can also use materials like straw, pine needles, or grass clippings to help lock in moisture and use less water in the garden.

Done properly, mulch is very good for your garden. Done wrong, it can damage your plants. These tips will help you get the most from your mulching:

  • Make sure soil is moist before you mulch. If your area has dry seasons, try to mulch before the dry season starts and the soil dries out. Avoid using fine-textured shredded wood waste, like sawdust. This can mat together and keep moisture from reaching the soil, especially if you’re using drip irrigation that applies water a little at a time.
  • Spread mulch to the right depth. Too much mulch can prevent air from reaching the soil and encourage mold growth. Too little reduces its water-saving benefits. Most types of mulch should be spread about three inches deep. If you use mixed green waste, spread it no more than two inches deep.
  • Keep mulch away from the base of woody plants. The base of trees and shrubs need air.
  • Avoid mulch that has a sour smell. If it smells bad, it may not have been stored properly.
  • Leave some areas unmulched so beneficial insects that nest in the soil can reach the ground.
A blooming shade flower bed that has been grown using water saving measures.
Save this pin to your Gardening Pinterest board for later.

Simple measures like these can save significant amounts of water in your garden. And, whether you pay for your actual water usage or you are able to use a well on your property, it is always important to try and conserve as much water as possible.

Hopefully, these water conserving tips will help you to be able to use less water on a regular basis, while still growing vegetables, fruits and berries in your gardens.

A growing vegetable garden with water saving soaker hoses.
Use soaker hoses or drip irrigation to save water during gardening season.

Filed Under: Gardening, Grow Your Own Vegetables

Homemade Rooting Hormone – 7 Recipes to Make Your Own

By Annie

 Homemade rooting hormone is ideal for propagating plants and shrubs – here are 7 recipes to make your own!

There are plenty of different ways to make homemade rooting hormone, instead of buying a commercial product. These natural rooting recipes here are used to help significantly improve the growth of roots when you’re cloning a plant or growing from root cuttings, a stem cutting or leaves, such as begonias or primroses.

Homemade Rooting Hormone – Different Ways to Make Your Own

Rooting hormone on end of plant cutting being placed in soil.
Rooting hormone recipes that make propagating plants successful.

While I typically use willow water for my organic rooting hormone, sometimes these other options prove to be easier for a lot of gardeners. If you are an organic gardener interested in growing healthier and stronger roots, then check out these different ways to make homemade DIY rooting hormone today!

We’ve got seven different recipes for making rooting hormone for plants listed below. So make one (or more) of these recipes and give it a try. Want to buy it instead? We’ve even got a recommendation for what we feel is the best root hormone available on the market and you can buy it online.

How can I make natural rooting hormone at home?

You can use the below ingredients to make do it yourself rooting hormone at home and increase your chances of success when propagating plant cuttings. I have listed a handful of ways to maximize your root growth from cuttings with simple supplies most of you have at home.

Honey Rooting Hormone

A honey pot and honey stick with summer flowers on rustic wooden table
Honey works well for plant propagation.

To make honey rooting hormone you’ll need to place 1 tablespoon of honey into 2 cups of boiling water. Allow this mixture to cool and store inside an airtight container for up to 2 weeks. You’ll need to store this honey rooting hormone away from light when storing it for later use.

Apple Cider Vinegar Rooting Hormone

You’ll want to be careful when using apple cider vinegar for homemade rooting hormone; too much will kill the plant. Mix 3 teaspoons of apple cider vinegar into one gallon of water.

You’ll need to keep this stored in an airtight container at room temperature. Then, when you are ready to use, dip your plants into the apple cider vinegar rooting hormone and transfer them to a rooting medium.

Using Aspirin 

While this option isn’t as natural as the other options, using aspirin as a rooting hormone is doable for people who may not have access to use the other more natural mixtures right now.

You’ll add one regular strength 325 mg aspirin to 1 gallon of warm water. You’ll need to let your cuttings soak in this liquid rooting hormone for several hours before planting.

Aloe Vera Rooting Hormone

Aloe vera leaves cut sit in a bowl, with the gel exposed.
Fresh aloe leaves and aloe gel can be used for rooting plant cuttings.

The rooting stimulant, salicylic acid is a natural plant hormone that is found in aloe plants.

Take some of the natural gel from your aloe vera plant and place it in the blender with some water. You’ll only need a little aloe vera gel and a little water mixed together.

Then take root rooting hormone and allow the cuttings to soak in a jar or small container in this blended-up mixture for several hours before transferring to your potting soil.

Using Saliva 

Homemade Rooting Hormone Recipes with cut aloe leaves
Aloe Vera can be used for propagating new shrubs and plants.

This is one of the options that may not be as fantastic as some of my other recommendations, but using saliva on plants works. I’ve heard of people licking their cuttings to help enhance root growth, but that could take hours!

Instead, simply spit on the bottom of the cuttings and place in your root medium to use this saliva homemade rooting hormone option.

Willow Water Rooting Hormone

A weeping willow tree growing by a pond.
The stems of willows make an excellent rooting hormone.

This is by far my favorite homemade rooting hormone option; willow water or willow bark tea as some may call it. It’s a little trickier to make homemade willow water, but you can follow my DIY willow water rooting hormone recipe here.

Basically you take fresh cuttings of willow pieces, break them down and use those chunks to make the water propagation solution for great root development. If you’ve got access to willow trees, try it!

Coconut Water

Yes, coconut water can be used as a natural rooting solution. It has lots of great properties including phosphorus and contains auxin, making for a natural rooting recipe that works as well as any commercial type. Just dip fresh cuttings into fresh coconut milk (not canned)

Using Cinnamon

Cinnamon as a rooting hormone works best along with some other method, so this is used in conjunction with one of the homemade natural rooting hormone options listed. This spice will help naturally fight off fungus and bacteria on your cuttings so that the roots can grow healthy.

You can mix a little cinnamon powder with your willow water or apple cider vinegar to maximize root growth and encourage new roots to form.


Shrub cutting dipped in rooting hormone.
Our favourite brand of rooting hormone.

You can purchase commercial rooting hormones from a local nursery or an online garden shop. This brand of rooting hormone is excellent (we think it’s the best rooting hormone available commercially). We used this years ago when we grew an entire laurel hedge from cuttings. Want to see how we did it? For under $10 at the time, we grew an entire fast growing hedge.

You can also buy various types of rooting hormone powder, like these brands. However using natural remedies to boost root growth from cuttings is an ideal option for keeping the plants healthy and minimizing the pesticides or non-natural poisons that can be included in some store-bought rooting hormone options.

Use any of these homemade rooting hormone recipes to grow plants from cuttings this year.

I hope that this list of different ways to make organic rooting hormone has encouraged you to think of new ways to boost root growth with your cuttings. 

Rooting solution used on a now growing healthy berry bush.
DIY Plant Rooting Solution Recipes


Originally published Jan, 2023; latest update April 2025

Filed Under: Gardening

Canada Thistle Control – Organic Weed Killer Recipe

By Annie

Learn about Canada Thistle control so you can get rid of this weed without chemicals.

If you live on country acreage, you may be familiar with Canada thistle, an invasive weed that grows in many parts of Canada and the US. Thistles offer deep spreading roots with wind-borne seeds that can turn a whole lawn or pasture into a thorny battleground!

We’ve been successful in controlling it over time, due to the natural dislike I have for the plant and therefore, my willingness to work my plan to get rid of Canada thistle naturally, organically, here on our property.

Whether you have hay fields or are looking for Canada thistle control in lawns in your yard, here are solutions to help you get rid of thistle for good. Infestations can occur quickly in lawns and even in pastures. 

Thistles have a quick seed production, and they create new shoots quickly, so you can go from a little to a lot quickly.

Canada Thistle in a field
Canada Thistle flowering in a field.

Canada Thistle and Scotch Thistle Control

Both Canada Thistle and Scotch Thistle love to grow along our roadsides, and since the wind does carry the seeds, we will likely always have a few plants here in our fields. But, we know how to get rid of it. So if you’re wondering how to get rid of Canadian thistles easily, fast, and organically, read on.

I have found a couple of ways to get rid of a lot of it. And every year, my workload becomes lighter because there are fewer Canada thistle seedling coming up! Mowing doesn’t attack the root system, so if you want to say goodbye to the buds popping up, follow my system.

We also have Scotch thistle here, another invasive plant. These plants are much thicker and larger than Canada thistle. They both like to grow on soil that has been disturbed, such as road sides, logging roads, burned off areas, etc.

And, for the fertility of your soil and hayfields, thistles need to be removed permanently so that the grasses will benefit and grow. Of course, you can use chemicals to get rid of thistles and any other kind of weeds, however, chemicals are something we don’t want here. 

We find natural organic ways to get rid of weeds; improving the soil always helps as then the grasses grow so well they literally crowd out the weeds.

Canada Thistle Control

I have learned two main ways to get rid of Canada thistle weed, and I want to share both of them, but first, a few points about the plant itself.

Canada thistle (scientific name is Cirsium arvense) is a perennial plant, belonging to the Asteraceae family of plants. It grows in thick patches, spreading by its creeping roots. A very noxious weed that is found a lot in North America. Some areas see a lot in spring, late June, July,  August, and more of the hotter months of the year. So having an effective control plan is essential in controlling them.

Canada Thistle Identification 

Canada Thistle in bloom in a field.
Canada Thistle has smaller leaves and stem than Scotch Thistle has.

What does Canada thistle look like? The plant can grow up to 7 feet but is often found at shorter heights. It has green leaves with sharp spiny edges and can be hairy on the underside of the leaves. 

It is very easy to spot this weed when it is flowering! The Canada thistle flower is like a purple pompom, which really helps when it comes to searching for this weed in fields. The flowers stand out like, well, sore thumbs.

Scotch Thistle Identification

Scotch Thistle plant in bloom
Onopordum acanthium plant commonly known as Cotton thistle or Scottish Thistle

Scotch Thistle is also known as Cotton Thistle. It is a large plant, thick and tall, topping out at about 10 feet. It has a grey green colour and sharp thorns along the stem. If you’ve got these growing, you’ll see them!

I use the same eradication methods to get rid of Scotch Thistle as I do Canada Thistle.

Why is Canada Thistle Bad?

You want to get rid of all Canada Thistle plants in your garden, acreage and fields. Canada Thistle is on the list of noxious plants in the province of BC. 

Since this thistle is an invasive species, it can do damage to fields over time. Alfalfa fields are known for the spread. They love the shade, vegetation, and thrive. This can also bring unwanted insects like weevils into the crop. Not only will it compete (and eventually win) against the grass you seeded, Canada Thistle also seriously depletes the soil of nutrients.

This is counterproductive especially when it comes to fields planted with wheat and other grains. It is undesirable in hay fields as well.

Should I pull Canada thistle?

While you can pull the plants, I will share more ways to control the regrowth and spread of this exotic species. 

Late spring or early summer is the time of year when you will find that pulling a Canada thistle offers the best return for removing the plant. Some things to know about the foliage is that you need to wear thick gloves as they have a lot of spines on them that poke. 

These plants have an extensive root system, so making sure you dig at least 6-8 inches down or deeper is going to help reduce the chance of reproduction. 

Make sure to bag and throw away all that you dig up, as any fluff, flowers, and such can cause more spreading and growth of a new parent plant. Do not compost the buds or seeds. This helps with the control of Canada thistle.

Canada Thistle Control: Cutting Thistle Plants

The first control method for eradicating Canada Thistle or Scotch Thistle is by cutting the plant down. This method works very well, especially if some of the flower pods have begun setting seeds.

I do not bother to hunt down small thistle plants for cutting. It is far easier to wait until the plant is actually in flower! I do this for a couple of reasons:

  • It is much easier to spot the plants when they are in flower! The bright purple blooms really stand out, and it is very easy to find the plants for cutting down.
  • I like to wait until the plant has spent a lot of its energy into flowering. A plant’s natural desire is to flower so it can then set seed, thereby reproducing to “make babies” the next year. So, I wait until the plant is putting everything it has into flowering – that is THE perfect time to cut it down. 

Cutting Blooming Thistle Plants

So, I find the plant in bloom (and hopefully it has not yet finished bloom and has moved on to setting seed) and then I use a pair of large sharp gardening loppers like these ones (the shears with long handles) to cut it down as close to ground level as I possibly can.

Now, the plant is at a real disadvantage! It’s completely in shock, because the only thing left is pretty much the root. It’s always beneficial to get rid of as many leaves left at ground level as possible. No leaves, no flowers, nothing but a root = a shocked plant.

Now, it has to find extra energy to completely rebuild itself. And it can do that, but it usually takes time. And once it does begin rebuilding itself, you cut it again.

Usually by the time you have cut it twice, it will die as it just cannot keep having to rebuild itself. The odd time you may need to cut a third time but usually it only takes two cuttings before the roots give up and die off.

Removing Thistle Plants that have gone to Seed

Never ever let a Canadian Thistle go to seed on your property if you can at all help it! One plant carries thousands of seeds and each will be able to start a new plant.

If one is too far gone and the seed heads are ready to let go, cover the plant with a large heavy duty garbage bag, then cut it down at the base.

This way, the seeds will let go while they are in the bag. This is a really safe way to get rid of thistle that is past the flowering stage.

We tend to bag up all the thistle plants and bring them to the dump. We sometimes burn the plants, but only if they are still in the flower stage. Once they move into setting seed, we do not burn them – it is much safer to get rid of the plant completely. We don’t want any seeds flying away!

Weed control should be done regularly! If you don’t want to have to cut down each of the thistle plants, my other option is to use a homemade all natural spray.

You can completely get rid of the weeds just by being able to stay on top of the spraying schedule, using this Canada thistle control with vinegar and soap.


Thistle Killer Recipe – Homemade Organic

This recipe will work on both the Scotch thistle and the Canada thistles – actually, it will work on any type of weed you have, including it’s ability to kill Poison Ivy plants. A great alternative to herbicides and other harsh chemicals you might find in 2,4-D, Roundup, and other herbicide treatments. This organic recipe works great on the persistence of these thistles.

You may need to repeat the spraying. You probably will. It’s organic right? So no chemicals can mean less toxicity.

Tips: If possible, use this spray during the hottest part of the day, when the plants are thirsty – the spray will be more beneficial.

Spray when there is no chance of rain in the forecast.


Vinegar, salt and dish soap to make weed killer
Organic homemade weed killer ingredients for Thistle control.

All Natural Weed Killer Ingredients

  • 3 cups white vinegar
  • 1/2 cup table salt
  • 1 tablespoon liquid detergent or soap (I use Dawn) for stick-to-itiveness.

Directions to Mix Homemade Weed Killer

  1. Mix vinegar and salt until the salt is completely dissolved. Stir in liquid dish soap, and pour into a spray bottle.
  2. Spray onto the green growing leaves of the plants.
  3. Wait a week, then repeat on any plants that are still alive. Best time to apply: during a dry spell.

For use on larger areas, simply triple or quadruple the recipe to give the quantity you need. Then, put the liquid into a backpack sprayer like this one. Make sure to get the stems and all other areas of the plant.

Canada Thistle in bloom in a field.
Click to save to your Pinterest board.

Canada Thistle Rash

Some people seem to be more sensitive than others to working with, and touching Canada Thistle and Scotch Thistle plants. Wearing long sleeves and long pants, plus wearing heavy leather gloves will go a long way towards being able to work with thistles. Try to be cautious of the flower-bud stage and not let the flower or plant touch your skin directly.

These tips will help if you do end up being in direct contact with the plant – Soothing Poison Ivy Rash 

Use this Canada Thistle Weed Killer on a regular basis throughout the growing season and you will see a huge difference in one year.

It’s one of the best and most natural ways to practice Canada Thistle control.


Originally published May 2022; latest update February 2026

Filed Under: Gardening

How to Make Willow Water – for Rooting Plants and Watering Plants

By Annie

You can make willow water, then use it for a DIY rooting hormone!

Have a favorite shrub or bush you would love to have two or three more of, to plant in your yard? Use this awesome DIY method to make rooting hormone from willow branches or willow twig and get your plant cuttings off to their very best start.

Taking cuttings from shrubs you already have is a great way to increase the number of plants you have at no cost. Or maybe you have a neighbor or friend who needs to trim their shrubs and has some cuttings for you.

Make Willow Water to use as rooting hormone
Fresh cuttings standing in Willow Water to help with rooting.

That’s the perfect way to propagate cuttings to grow your own shrubs and plants for free. And it’s not hard to learn how to take cuttings from shrubs.

It’s always a good idea to dip or soak the cut stems in some type of a rooting hormone. There are properties within the rooting hormone that stimulates root growth and plant health.

And you do want your cuttings to be as healthy as possible so they grow into healthy mature bushes for using in your yard landscaping.

There are several different kinds of shrub rooting gels that you can buy and later we will recommend our top rooting gel that we have used many times. For now, let’s discuss how to make your own pussy willow water.


Make Willow Water – DIY Rooting Hormone

Did you know that you can make your own rooting hormone using willow water made from willow trees? This willow rooting hormone recipe is completely natural and easy to make.

Here’s how to make rooting hormone to use for propagating cuttings from shrubs! And….it’s all about the willows!

If you have willows growing anywhere near you and you can take some cuttings from new willow shoots you can use this powerful plant to supercharge your new (or established) plants!

Whether you have upright willows or a weeping willow, willow tree rooting hormone can be made from either type.


Where Do Willows Grow Naturally?

Willows, from the genus Willow Salix, can grow in a weeping form but also more upright. Not to be confused with the American water-willow flower, these trees are often naturally found growing near lakes and rivers, because willows really do love the water.

They grow in the Northern Hemisphere throughout North America, Europe, and Asia. Willow trees grow best in locations that provide ample sunlight and moisture.

Willows growing in wet field
Line of living willows grow along the fence line below the barn.

You can see a hedge row of living willows in the photo – long ago, there was a ditch dug along that fence line to carry water away from the pasture. 

Since willows love water so much, they started growing along the ditch. If you are looking at for property and notice a lot of willows (or a line of willows), that suggests strongly there is water on the property. Where there are willows, there is water.


Overall Benefits of Using Willow Water as Rooting Hormone

Making rooting hormone from willows helps plants and cuttings to take root faster. This simple root hormone water recipe will encourage plant rooting of plant cuttings so they can grow into new plants for use on the homestead.


What Time of Year is Best to Make Willow Water?

You can make and use homemade willow water at any time of the year. However, Spring is definitely the best season to make willow water.

During the spring season, your willows will have fresh limbs to clip and have plenty of time to restore themselves before the winter season arrives.

Willow Water Rooting Hormone used for healthy plants
This natural rooting hormone is a great way to ensure your plants are healthy and safe from any potential threats.

Does Willow Water Really Make a Difference to the Growth? 

Rooting hormone, like willow water, is typically used on cuttings to help them root quicker. It also helps a plant resist certain pathogens that may be harmful. Some cuttings will grow faster using this hack, whereas other plants may not. 

When testing most plants, especially shrubs and perennial plants with willow water, I’ve found the roots grow quicker and in larger supply when using the willow water rooting hormone.


Watering Plants with Rooting Hormone

Willow water can help with your existing plants, too. Some people put aspirin in rainwater to help their established plants root better (because it has acetylsalicylic acid, or ASA, similar to a compound found naturally in willow hardwood), but you can make this natural fertilizer instead and use that on your plants.

Adding some willow water to your already established pants will encourage strong root growth for healthier plants that will thrive.

Willow water is an excellent option for rooting hormone to use on cuttings and other plants that need a little boost in root growth for plant propagation.


How Does Willow Water Work as a Rooting Hormone?

Synthetic rooting hormone contains high concentrations of auxins like Indolebutyric Acid which promote growth. And willow trees just happen to be an excellent natural source of Indolebutyric Acid (IBA), especially the new shoots.

The Willow tree also contains Salicylic Acid which is a source of defense. Its presence is what will allow your Willow Water to protect your cuttings from threats like infection from bacteria and fungi.

Willow trees as a natural plant are known for their rapid growth, largely because of the high quantity of these components. And it is because of them that Willow Water is such an effective tool in getting your shrub trimmings to take root and grow.

If you have access to a willow tree, you can make rooting hormone any time you need it for its beneficial effect – throughout the year. However, there’s a good reason your willow water will be strongest in the springtime.

The fresher the growth of the trimmings from the willow branch you use – the better! That is where the presence of the growth hormones is the strongest, and it will make your “potion” even more potent.


How to Make Willow Water Rooting Hormone

Willow Water Recipe

  1. Simply harvest the newest stems and twigs you can. Keep in mind that your Willow Water yield will be approximately three times the volume of the trimmings you pull. So, if you are hoping to make three cups of rooting hormone, you’ll want to gather around a cup of trimmings. Want pruning tips to correctly take cuttings from shrubs and plants?

    Natural Willow rooting hormone is ideally made from the newest stems in Spring.
    Natural Willow rooting hormone is ideally made from the newest stems in Spring.
  2. Break down your trimmings before soaking, in order to release their essence. You can do this by removing the leaves and cutting the stems and twigs into pieces one inch or smaller.
  3. Or you can do this by breaking and crushing them with a hammer. Either way works. Just keep the willow bark on, no need to remove it!
  4. Once cut up, put your trimmings in a glass container or Mason jar with boiling water. You are looking for a two to one ratio here. So, again, if you have around a cup of willow trimmings, add two cups of boiling tap water to your jar.

    Plant cuttings sitting in homemade rooting hormone
    Set cuttings from shrubs into this natural rooting hormone solution for root growth.
  5. After the water is added, let the water cool a bit so you can handle the jar. Set it in a safe location where it can catch sunlight for two to three days.
  6. Once your jar is done steeping, filter out your trimmings with a sieve or strainer before using or storing your Willow Water. Fix with a tight-fitting lid to keep it fresh.


How to Use Willow Water

Use this DIY willow water mixed 1 to 1 with fresh water to soak cuttings in liquid when you want them to make roots. Alternately, you can simply dip the plant cuttings into the water before setting them in the earth. You can also use another growth medium like peat moss, perlite, or sand.

I like to plant the rooted cuttings close together (basically in a nursery bed) for the first year instead of planting in their final spot. This way, I can keep a closer eye on the plants, make sure they are settling in well and I can feel confident they are going to grow well.

Store any unused Willow Water in a cool, dark place. If you want other rooting recipes, take a look at these 7 recipes for homemade rooting hormone.

If you don’t want to go to the trouble of making your own rooting hormone, we can recommend a really good rooting gel that you can buy – you can get it on Amazon. It’s called TechnaFlora Rootech Cloning Gel.

Rootech Gel
This rooting hormone gel works great as an alternative to making your own.

This one is our favorite commercial rooting hormone, by far. We used it when we started growing a laurel privacy hedge from cuttings. You can read through the step by step process of starting a hedge from cuttings right here. 


Use this DIY hack to make willow water when starting new cuttings!

More Useful Articles

  • Learn to take cuttings from established hedges, shrubs and plants – tips are right here!
  • Looking for more Gardening Tips? Here’s an article with lots of information found on our site.
  • Here’s just how to care for pruning shears so they last for years!
  • Dealing with overgrown shrubs in an overgrown yard? Use these hacks to get your yard and garden in shape.
  • Learn more about willow trees here.


Cuttings sitting in Willow Water to grow roots
This willow water solution is the perfect way to naturally protect new shoots or propagating plants!


Originally published September 2021; latest update November 2022

Filed Under: Gardening

Top Gardening Tips for Beginners

By Annie

 These top gardening tips for beginners can be a guide on
what to consider before buying any plants.

If you are a beginner gardener or new to gardening, you may have already been tempted to visit your local garden center to load up with beautiful flowers, fruit trees or vegetable seedlings, right?

Hold up a minute….do you know those particular plants and shrubs will thrive in your yard? I mean, you can always take the chance. It might work, but the odds might be against it.

Gardening tips for beginners to grow vegetables
These gardening tips for beginners will help you grow your best garden ever!

Gardening Tips for Beginners

Not every plant included in your gardening zone will thrive in every single yard! It depends on several things – read on for some of our easy gardening tips for beginners to learn when it comes to creating a beautiful yard.

And further down, you’ll find links to many of the relevant articles here about:

  • growing vegetables
  • planting flowers
  • creating flower beds
  • how to build a small greenhouse
  • and even more!

When it comes to gardening, you are better off to begin with a plan in order to save time, money and unnecessary heartache in the future.

Once you figure out a few things about your particular yard, you will have a much better idea of what shrubs, perennials and annuals you should spend your money on.

You’ll also be more confident that whatever you do purchase has a good chance of surviving in your own yard. Not every yard is the same, as we will see!

Here are our best 5 tips new gardeners should keep in mind before running off to the garden store:

Gardening Tips for Beginners


What Are Your Neighbours Growing?

That being said, take notice of what your neighbours are growing. This is a great initial source of proven suggestions for the new gardener.

If your neighbours grow buddleia, hebe, lilac, their hydrangeas are blue and their Japanese acers are grown in pots, then there’s a very good chance that their soil is alkaline.

This is a good “tell” that your native soil is also probably alkaline. A simple soil pH meter will confirm this, but trust your eyes as a first impression.

Alkali-loving plants will not grow well at all in acidic soil (and vice-versa) after a few years, so don’t waste your money but…

A naturally acid garden bed can contain neutral/alkaline areas or vice-versa. Just amend the soil in that particular bed to change the pH of the soil there.

You just need to know where these spots are and keep a written garden plan for future reference! 

A soil test will tell you for sure – invest in a test kit!


Work with Nature

It is always cheaper and lower maintenance to know your garden area and create your garden based upon what nature has already provided.

If you don’t work with nature, there will likely be a lot of importing of soil, rock, drainage material etc.

An extreme example of this is to have a site with a high water table and the gardener who wishes to grow cacti or Mediterranean herbs.

The only way to succeed would be to grow all the plants in containers and not the natural ground. Otherwise, you would be buying replacement stock every year!

In order to save money, try your best to work with what you already have. If money isn’t an issue, amend your soils with lots of healthy compost and organic fertilizer.


Raised Garden Beds growing vegetables
Using raised beds is a great alternative when you have poor soil.

Raised Beds are Perfect for Gardening in Poor Soil

It is quite common to have raised beds containing soil and a level of drainage that is very different from the rest of the plot. This enables very different plants to grow that would not be successful growing in the ground.

Many gardeners choose this method, especially if their native soil is terrible, full or rocks or pure sand. Instead of doing all the work to bring the soil up to good health, they work with what they have.

Which is nothing good (in the soil) – so consider planting in containers instead and fill those pots with healthy compost and soil.

A raised bed has the added advantage of bringing the plants to a more accessible level that makes gardening much easier. This works perfectly for older people who love gardening and raised beds are not hard to make.

In areas with high winter rainfall, it’s easy to add a seasonal cover to a raised bed to protect more tender plants from frost too much rain.

Want to keep track of everything you do in your garden this year, so you’ve got a perfect record to use next year?

Look at this Vegetable Garden Planner!

Vegetable Garden Planner Printable: Grow Your Best Garden Ever

Design Your Garden with 3D in Mind

Don’t forget the third dimension! Plant a clematis or honeysuckle beneath a shrub or climbing up a tree to provide extra interest at trunk height. 

If this plant flowers in mid-summer, add a pair of climbers that flower early and late summer for added colour throughout the season – and they will occupy the same ground space!

Don’t forget! Not all clematis and honeysuckle are climbers. Clematis hendersonii is a purple/blue ground cover clematis, while Lonicera involucrata should be treated as a herbaceous bush with its double-barrelled flowers of red and yellow.

Want to lead the eye to a certain garden spot? Tall, narrow conifers can make ideal natural frames for your path or a view.

Know Your Soil Temperature

A soil thermometer is a very useful device. You can leave one in the ground to tell you when to take out your borderline tender plants in the autumn and when to plant out in spring. A ground thermometer can also explain why your more tender plants are not surfacing!

Even with warm spring temperatures, it takes awhile for the soil to warm up. The soil has been resting over the colder winter and it may take longer than you think to warm up enough for perennials to pop up again.

Questions for Beginner Gardeners to Ask Themselves

Before you go and buy any trees, shrubs or perennial flowers, ask yourself these questions? Find out the answers and make some notes. 

  • In which direction does your garden face?
  • From which direction does your prevailing wind come from in summer? What about in winter?
  • What are the expected seasonal temperatures in your front and back yard? Are they different?
  • Can you describe your soil? Is it clay? Shale? Sand? Is it light? Heavy?
  • Is your yard well drained? Where are any areas that collect water in the winter that won’t drain away.
  • Is your ground acid, alkaline or neutral?

So, now you know some of the best tips for beginner gardeners to keep in mind and start figuring out. Where do you want to go from here? 

Here are links to some of our best vegetable gardening, fruit gardening and flower gardening posts. You’ll find lots of gardening tips for beginners in these articles! Here’s how to use less water in the vegetable garden.


Freshly harvested vegetables
Read these articles with more tips for beginning gardeners.

Vegetable gardening tips for beginners:

How to Grow Potatoes – learn our hack for growing 3 pounds of potatoes from 1 single potato.

How to Grow Peas – plant them along a fence line to save having to string up netting.

Grow All My Food for a Year – serious about growing vegetables? You want to read this….

How to Grow Rhubarb – Call it a vegetable, call it a fruit…Rhubarb is the perfect perennial for cold weather climates.

How to Grow Beans – we grow pole beans in a greenhouse – these tips work for wherever you will grow pole or bush beans.

Our Vegetable Garden Plan – Here’s how we decide what to grow and how much to grow.

How to Grow Carrots – Seed them a little thicker, then thin and eat baby carrots till the others grow big!

How to Grow Peppers – Sweet or hot, in pots or in the ground, here’s all you need to know.

How to Grow Onions – If you grow them from sets, it saves a lot of time!

More Articles about How to Grow Vegetables

How to Grow Garlic – This 4 part series covers planting, growing, harvesting and curing garlic.

How to Grow Beets – use them small for pickling beets or let them grow bigger for side dishes.

Vegetable Garden Planner and Journal – Everything you need to keep you on schedule from seeding to harvest!

How to Grow Cabbage – Start to grow cabbage from seed then transplant into the garden.

How to Grow and Transplant Tomatoes – Yes, here’s why you always need to transplant tomato seedlings.

The 8 Fastest Growing Vegetables – yup, you’ll be eating these within 25 – 60 days!

How to Grow Zucchini – You may only need a couple plants, but there are some growing hacks you really need to know.


strawberries growing on plants
Read these articles to learn gardening hacks for growing fruit.

Learn how to grow fruit:

How to Grow Strawberries – Big, juicy strawberries – our hacks for growing big strawberries

How to Grow Honeyberries (Haskap Berries) – So healthy and delicious in smoothies or baking.

Berries in the North – We can grow ’em big here!

How to Grow Raspberries – and how to maintain and control those wild Raspberry canes!

Transplant a Saskatoon Bush – native to our area but sometimes we want to move them over a few feet!

How to Plant Fruit Trees – We planted apple trees; these hacks work for any kind of fruit tree.


Serious about growing food this year? Look at our book and start planning!
 

Grow Enough Food for a Year


A bunch of pretty blooming tulips.
Read these articles for more flower gardening tips for beginners.

Flower Gardening Tips for Beginners

How to Plant Flower Bulbs – plant in Fall, enjoy pretty flowers every Spring!

Learn to Grow Hops – Beautiful to look at, but there’s something you need to know before planting!

Create a New Flower Bed – Sun loving perennial flowers take center stage.

Perfect Plants for Shady Areas – great for side yards or anywhere with low light.

How to Grow Valerian Herb – So fragrant, this perennial will become a favourite.


pruning shears
More gardening tips and articles for you

More Gardening Tips

Pruning Tips – for shrubs and fruit trees

DIY Recipes for Homemade Rooting Hormone – use these to start new shrubs

How to Rejuvenate an Old Overgrown Garden – great ideas for restoring a beautiful yard

How to get rid of Canada Thistle in your yard

A Pretty Winter Garden – these shrubs add winter interest and colour!

Gardening Hacks to Get the Most from a Small Garden – grow an amazing garden in a tiny space

Gardening Gifts for Hardcore Gardeners – Love a Gardener? Here you go…

Putting the Garden to Bed – Garden season’s over? Do these things before you take a rest.

All Natural Weed Killer Recipe – even works on poison ivy!

How to Improve Heavy Clay Soil – plant this and you’ll see a big improvement

Plant Clover instead of Grass – Bring amazing benefits to your garden by using clover, here’s why.

More Gardening Resources for you


Hopefully these top gardening tips for beginners have helped! Get your garden growing today!


Gardening for beginners with flowers and vegetables

Filed Under: Flowers, Gardening, Grow Your Own Fruit, Grow Your Own Vegetables

  • 1
  • 2
  • Next Page »

Connect With Us!

  • Email
  • Facebook
  • Instagram
  • Pinterest
  • Twitter

Search this site

Generic selectors
Exact matches only
Search in title
Search in content
Post Type Selectors
Search in posts
Search in pages

Our Most Popular Posts

Garlic cloves in oil

How to Preserve Garlic in Oil – and Other Ways to Store Garlic

a open jar of pickled brussel sprouts on a counter

Easy Pickled Brussels Sprouts Recipe (Water Bath Canning)

Privacy Policy

Read about our Privacy Policy

Disclosure

Please note that some of this site’s links are affiliate links, and CountryLivinginaCaribooValley.com is a participant in the Amazon Services LLC Associates Program, an affiliate advertising program designed to provide a means for us to earn fees by linking to Amazon.com and affiliated sites. At NO ADDITIONAL COST TO YOU, I will earn a small commission, if you purchase them. I recommend them as they are good products.

Theme Design By Studio Mommy · Copyright © 2026