Country Living in a Cariboo Valley

Homesteading in BC

  • How to Get Started
  • Vegetable Gardening
  • Preserving Food
  • Recipes
  • Homemade Wine Recipes
  • About Us
  • Work With Me
  • Shop
    • Vegetable Garden Planner Printable: Grow Your Best Garden Ever
    • Grow Enough Food for a Year
    • Delicious Dandelions: A Recipe Collection
    • Dirt to Dollars: Selling at the Farmers Market
    • 8 Pounds in 8 Weeks: Raising Chicks for the Dinner Table
    • Making Wild Wine
    • Build a Hanging Chicken Feeder
    • 15 Things to Know About Living in the Country

Slow Cooker Apple Butter Recipe

By Annie

Make this Slow Cooker Apple Butter for a sweet and perfectly spiced topping with a rustic flair, perfect to pair with breakfasts, desserts, and more!

Step into the cozy and aromatic world of homemade apple butter! As the crisp days of autumn approach, there’s nothing quite like the comforting aroma of fresh apples and warm spices wafting through your kitchen.

Read this post and learn the art of crafting velvety-smooth apple butter using your trusty slow cooker or crockpot. 

Apple Butter poured on biscuits with an open jar of apple butter beside.
Apple Butter is so easy to make in your crockpot!

From the first slice of apple to the final jar of luscious spread, I’ll take you through the steps of simmering, blending, and savoring the essence of the fall season.

This homemade apple butter recipe will help you create jars of warmth that can be enjoyed all year round, given as gifts, and more. A batch will get you about 4 pints.

To keep your apple butter safe and delicious for even longer, be sure to read this post on the best Canning Tips so you can properly preserve your homemade spread!

Slow cooker apple butter spread on various breakfast foods.
Homemade apple butter is the perfect fall spread for a special and delicious breakfast or brunch!

Why You’ll Love this Crock-pot Apple Butter Recipe

With the fall season coming up, I’m reminded of apple butter makin’ days. But why take the hard route when you can easily make this apple butter recipe in the slow cooker?

There’s something undeniably heartwarming about the scent of apples and spices filling the air. Combine sweet apples with sugar and spices like cinnamon, nutmeg, and cloves for the ultimate autumnal spread.

We like to use this apple butter poured over cream cheese, then scoop it with some quality crackers. But we’ve even used this over grilled pork chops – delicious!

I’d like to try in brushed onto a rack of ribs, or slathered on a turkey sandwich! You can use it as an ice cream topping, or spoon a bit onto yogurt. It’s also quite wonderful on biscuits!

Crock-Pot apple butter in a jar, with some poured on a biscuit that sits on a wood table.
Slow Cooker Apple Butter is delicious on bread, oatmeal, yogurt and ice cream.

Whether you’re a busy parent, a dedicated foodie, or simply someone who loves the joys of slow cooking, this 5-ingredient recipe is your ticket to a jar of apple bliss.

With a prep time of roughly 30 minutes, followed by about 7 hrs cooking time, you’re looking at a total time of 7 1/2 hours.

Let your slow cooker works its magic by turning simple apples into a luxurious and decadent spread. You’ll love how easy this apple butter is to make!

So, grab your favorite varieties of apples, break out the slow cooker, and get ready to experience the joy of creating a delicious treat that captures the essence of autumn!


Equipment Needed

  • Crockpot
  • Knife
  • Vegetable Peeler – a paring knife would also suffice, but peeling apples is simpler with the correct tool.
  • Crockpot Liner – this will make it much easier to clean up your slow cooker.
  • Immersion Blender – a typical stand blender could also be used, but an immersion blender will make it an easier process.
  • Cutting Board
  • 4 1-Pint Mason Jars and Lids or 8 ½-Pint Mason Jars and Lids
  • Measuring Cups
  • Measuring Spoon


Apple Butter Ingredients

Ingredients for slow cooker apple butter.
With only a few simple ingredients, you can easily get started with the slow cooking process.
  • Apples – clean, peel, core, and slice your apples. I used Granny Smith for this recipe, but feel free to substitute with an apple variety or varieties of your choosing.
  • Sugar
  • Light Brown Sugar – a deeper and more rich flavor can be accomplished with dark brown sugar, but I recommend starting with light and adjusting once you’re familiar with the flavors.
  • Cinnamon – this classic spice pairs perfectly with apples and instantly conjures the flavors of fall and apple cider.
  • Nutmeg – enhances the cinnamon and adds a somewhat nutty and earthy flavor.
  • Cloves – a pungent and aromatic spice that will give your apple butter a distinctly warm flavor profile.


How to Make Apple Butter

  1.  Chop apples into 1-inch cubes and place in lined crock pot. You can buy slow cooker liners here.

    Chopped apples in a lined slow cooker.
    Use a crockpot liner to make cleanup an absolute breeze!
  2. In medium bowl, combine granulated sugar, brown sugar, cinnamon, nutmeg, and cloves. Pour mixture over apples and stir until combined well.

    Mixing together apples with sugars and spices.
    Combine apples with a simple mixture of sugars and spices and turn on the slow cooker.
  3. Cover and cook on high for 5 hours, or low for 10 hours, stirring occasionally, until the apples are tender and dark brown.
  4. Uncover and puree with an immersion blender until smooth.

    Using an immersion blender to blend apple butter.
    An immersion blender eliminates the need to transfer your apple butter to another appliance in between steps!
  5. Continue to slow cook apple butter on low uncovered for 2 hours, stirring occasionally, until thickened.

    Slow cooker apple butter finished in the crockpot.
    The finished product will be thick and decadent with a gorgeous warm aroma!
  6. Using measuring cup, pour into clean jars or containers, cover, and store in the refrigerator up to 1 month in airtight container.


Crock Pot Apple Butter FAQs

What are the best apples for Apple Butter?

I used Granny Smith Apples, but other apple butter recipes will also recommend varieties like Gala, Fuji, Golden Delicious, and Honeycrisp.

Cortland apples, McIntosh and Braeburn apples are all good choices. It comes down to personal preference, but when combining apples, brown sugar, and spices, it’s hard to go wrong!

How long will Crock Pot Apple Butter last without canning?

Your apple butter will last up to a month if stored properly in an airtight container in the fridge. It can also be stored in the freezer in freezer-safe bags for up to a year. Thaw in the fridge overnight to enjoy from frozen.

Is a Crockpot the same as a slow cooker?

Yes, these two terms are often used interchangeably. Technically, Crockpot is a brand that makes slow cookers, so you may have a slow cooker from a different brand. At the end of the day, they’re the same thing!

Can I preserve this apple butter to last longer?

This apple butter can be canned using the water bath canning method. If done correctly and with quality materials, canned apple butter can be preserved for up to a year and a half before it starts to go bad.

Check out this guide on Canning Supplies if you’ve never done this before and would like a solid starting point.


Apple Butter in a mason jar opened
Best Apple Butter recipe perfect for the fall season. Store in fridge or freezer.

Popular Variations and Substitutions

  • For a bit of extra sweetness, add some vanilla extract or even vanilla bean paste to your apple butter.
  • This recipe calls for light brown sugar, but dark brown sugar can also be used if you prefer a deeper and more rich flavor.
  • Another option for some natural sweetness would be to use maple syrup instead of granulated sugar. This will give your homemade apple butter another layer of fall flavor.
  • You can leave the peels on your apples or remove them. The immersion blender will blend it all together in the end!
  • Use apple butter as a spread for toast, English muffins, waffles, or pancakes. Spoon a dollop on top of your morning oatmeal. You can even pair it with cheese for a sophisticated appetizer, or use it as an ingredient in baking!
Pouring homemade apple butter into a jar.
Transfer your apple butter to glass jars or other containers and use it for yourself or give away for homemade gifts!

More Recipes You’ll Love

  • Apple Walnut Muffins with Streusel – Can’t get enough of sweet apples for the fall? Try these absolutely delicious muffins with a sweet topping, perfect for a special breakfast or dessert!
  • Pork Chops and Apples – stuffed with cornbread and surrounded with apple slices.
  • How to Dehydrate Apple Slices – it’s so easy to use your dehydrator to preserve apple snacks!
  • Pumpkin Cranberry Banana Bread – You’ll adore this autumnal twist on classic banana bread featuring a moist bread with sweet and slightly tangy cranberries.
  • Cranberry Orange Relish – This simple 4-ingredient topping is great to serve alongside a holiday meal or even as a refreshing summer appetizer.
  • Caramel Apple Jello Shots – If you’re looking for a sweet and boozy treat to enjoy alongside your homemade apple butter, try these apple jello shots with a yummy caramel topping!


Homemade Apple Butter in Slow Cooker Recipe

Slow Cooker Apple Butter in a mason jar being brushed onto a bun

Slow Cooker Apple Butter Recipe

Yield: 4 pints Apple Butter
Prep Time: 30 minutes
Cook Time: 7 hours
Total Time: 7 hours 30 minutes

This Slow Cooker Apple Butter is the perfect way to turn fresh fall apples into a decadent and luxurious spread!

Ingredients

  • 6 1/2 pounds apples – cleaned, peeled and cored (Granny Smith used)
  • 1 cup granulated sugar
  • 1 cup light brown sugar, lightly packed
  • 1 tablespoon ground cinnamon
  • 1/2 teaspoon ground nutmeg
  • 1/4 teaspoon ground cloves

Instructions

  1. Chop apples into 1-inch cubes and place in lined crock pot.
  2. In medium bowl, combine granulated sugar, brown sugar cinnamon, nutmeg, and cloves.
  3. Pour mixture over apples and stir until combined well.
  4. Cover and cook high 5 hours, or low 10 hours, stirring occasionally, until the apples are tender and dark brown.
  5. Uncover and puree with an immersion blender until smooth.
  6. Continue to cook on low uncovered for 2 hours, stirring occasionally, until thickened.
  7. Using measuring cup, pour into clean jars or containers, cover, and refrigerate for 1 month in airtight container.

Notes

  • Recommend apples - Gala, Granny Smith, Honeycrisp, Fuji, or Golden Delicious.
  • Can be frozen in freezer bag to last longer.
  • This apple butter can also be canned using the water bath canning method. Properly preserved apple butter will last 18 months or so.
  • Add vanilla extract or vanilla bean paste for additional flavor.
  • Maple syrup can be substituted for granulated sugar.

Nutrition Information:
Yield: 128 Serving Size: 1
Amount Per Serving: Calories: 24Total Fat: 0gSaturated Fat: 0gTrans Fat: 0gUnsaturated Fat: 0gCholesterol: 0mgSodium: 1mgCarbohydrates: 6gFiber: 1gSugar: 5gProtein: 0g

Did you make this recipe?

Please leave a comment on the blog or share a photo on Pinterest

© Annie
Cuisine: American / Category: Recipes

Filed Under: Recipes

Lemon Poppy Seed Muffins

By Annie

Make these classic Lemon Poppy Seed Muffins for a sweet and fluffy treat that’s great as a breakfast, perfect for a snack, or even suitable for a yummy dessert after a hearty dinner!

Get ready to wake up your taste buds with these delectable Lemon Poppy Seed Muffins. Sunny and citrusy, these muffins are an ideal way to start your day on a lemony and delicious note.

This lemon poppy seed muffin recipe is packed with the refreshing flavors of lemon and the delightful crunch and slightly nutty flavor of poppy seeds.

And if you can’t get enough of lemony treats, try this yummy Meyer Lemon Bundt Cake as well! You can find of all our Country Living recipes here.

Lemon Muffins with Poppy Seed on a counter
Lemon Poppy Seeds Muffins are fluffy, crunchy and delicious.

Whether you enjoy your muffins with a cup of coffee or as an afternoon pick-me-up, these lemon muffins with poppy seeds are sure to become a staple in your cookbook. Enjoy the delicate balance of flavors in a fluffy and satisfying muffin!


Lemon poppy seed muffins on a counter.
These classic lemon poppy muffins are sweet, fluffy, and perfect any time of day!

Why You’ll Love these Healthy Lemon Poppy Seed Muffins

When it comes to muffin recipes, this one is an absolute classic. The combination of lemon and poppy seeds creates a blend of sweet, tangy, and nutty flavors in a light and fluffy muffin.

Every home baker should know how to make the perfect lemon poppy seed muffin, and this recipe will help you achieve that!

You’ll need just a handful of simple ingredients, many of which you probably have in your pantry already. These lemon muffins with poppy seeds can also be customized and lightened up for an even healthier version of the yummy treat.
 
Great as a way to start your morning or as a tasty afternoon snack, these lemon poppy muffins are an iconic baked good that will fill your kitchen with a fantastic citrusy aroma!
 
Another delicious Lemon recipe is this one for yummy Lemon Meltaway cookies with lemon zest and an unbelievable glaze.

Ingredients for the Best Lemon Poppy Seed Muffins

Lemon poppy seed muffin ingredients on counter.
You probably have most of the necessary ingredients in your pantry already, so these muffins are just within reach!
 
  • Milk – helps the muffin batter come together.
  • Eggs – acts as a binding agent in the muffin batter.
  • Butter – gives your muffins a deliciously buttery flavor and moist consistency.
  • Fresh Lemon Juice – bottled juice can also work, but the most fresh and delicious flavor comes from fresh squeezed lemon juice.
  • Lemon Zest – provides even more tangy lemon flavor and makes these muffins really pop.
  • Sugar – adds some sweetness to counteract the sour lemon.
  • Flour – helps form the muffin batter; all purpose flour is ideal for muffins, but pastry flour can also be used for a more tender and delicate result.
  • Baking Powder and Baking Soda – help the muffins rise and become lighter and leavened.
  • Poppy Seeds – using poppy seeds adds a subtle and nutty flavor that pairs perfectly with the lemon flavor for a classic and delicious combination.


Recipe for Lemon Poppy Seed Muffins

  1. Start by preheating your oven to 350 degrees. Then line your jumbo muffin pan or free standing silicon muffin cups with liners and set aside.
  2. In a bowl, mix all the dry ingredients – flour, baking powder, baking soda and poppy seeds. Mix it up and then set aside.

    Flour and poppy seeds on counter.
    Start by combining the dry ingredients.
  3. In another bowl blend your milk, eggs, butter, lemon juice and zest, and sugar. Once well combined, slowly fold the dry ingredients into the wet ingredients until well incorporated.

    Mixing muffin batter in a glass bowl.
    Be sure to combine the wet ingredients thoroughly before mixing in the dry ingredients until just combined. Don’t overmix!
  4. Pour your lemon poppy seed batter into your jumbo muffin tin, and bake for 20 to 22 minutes.

    Muffin batter in muffin liners.
    Leave a bit of room in the muffin liners, as the muffins will rise a bit as they bake.
  5. You’ll know the muffins are done when a toothpick can go into a muffin and come out clean. Do not overbake these lemon muffins or they will dry out.


Poppy Seed Muffin FAQs

Are poppy seed muffins good for you?

Though these muffins do have ingredients like butter and sugar, the lemon and poppy seeds do provide some nutritional benefits. Poppy seeds have linoleic and oleic acids, are a good source of fiber, and contain a good amount of B vitamins.

How many calories in a lemon poppy seed muffin?

Each one of these muffins has a little over 200 calories. They may taste light, but the recipe as-is definitely has a good amount of calories per muffin!

Can I eat lemon poppyseed muffins while pregnant?

Yes, these muffins are safe to eat when pregnant. The reason some may wonder about this is because poppy seeds have trace amounts of opiates. However, the amount is so small that it wouldn’t even show up in a blood test.

Can babies have lemon poppy seed?

Similarly, babies are safe to eat these muffins! As long as you’re using food grade poppy seeds and only using the instructed amount, there’s nothing dangerous about ingesting these muffins.

Baked Poppy Seed Lemon Muffins on a counter
Best Lemon Poppy Seed Muffin Recipe you will ever make!

Popular Variations and Substitutions

  • To lighten up these muffins, there are several substitutions that can be made. Instead of butter, use Greek yogurt or light sour cream. Replace the sugar with some honey or maple syrup. Use a fat free milk or even a dairy free milk. Just be aware that some of these substitutions might affect the consistency and texture of your muffins. Experiment until you find something that works!
  • Looking to make these muffins more of a true dessert? Once they’ve cooled to room temperature, top with a sweet lemon glaze. Combine lemon juice, vanilla extract, and powdered sugar to create a yummy glaze topping!
  • Mini Lemon Poppyseed Muffins – make the batter as instructed, but use mini cupcake liners or muffin liners instead of a traditional muffin tin. The baking time may be shorter, so keep an eye on them
  • Keto Lemon Poppyseed Muffins – for a low carb and keto friendly version of these muffins, use almond flour instead of all purpose. Replace the butter with a cup of sour cream, and use a low calorie sweetener like erythritol or another of your choosing.
  • Blueberry Lemon Poppyseed Muffins – add some fresh blueberries to your batter.
  • Lemon Almond Poppyseed Muffins – for a bit of extra crunch, top unbaked muffins with slivered almonds. You can even mix the almonds with a bit of lemon juice and some sugar for a sweet and nutty finish.


Lemon poppy seed muffins on a counter.
Great as a breakfast treat or afternoon snack, these Lemon Poppy Seed Muffins are a must-try baked item for any home baker!

More Lemon Recipes You’ll Love

  • Lemon Loaf with Rosemary Glaze – This unique and lemony cake comes complete with an herbal rosemary glaze for an elegant and delicious dessert to serve with tea or as a light treat after dinner.
  • Mediterranean Lemon Chicken – With only a few required ingredients, this super easy chicken dinner is the perfect way to serve a healthy and satisfying meal any night of the week.
  • How to Freeze Lemon Juice – This guide will teach you how to freeze lemon juice so it’s fresh all year round.
  • Homemade Lemonade – Craving a tangy and refreshing beverage in the summer? Check out this post to learn how to make the best homemade lemonade from just sugar and lemon juice!
  • Lemon Madeleines – These soft and tender mini cakes are dipped in a layer of sweet white chocolate for a tasty appetizer or light dessert.


Lemon Muffins with Poppy Seeds

Lemon Poppy Seed Muffins in a bowl on a table

Lemon Poppy Seed Muffins

Yield: 12 Lemon Poppy Seed Muffins
Prep Time: 10 minutes
Cook Time: 20 minutes
Total Time: 30 minutes

These super tasty lemon poppy muffins are tender, fluffy, and have the perfect balance of sweet, tart, and nutty flavors!

Ingredients

  • 1 cup milk
  • 2 eggs room temperature
  • ½ cup melted butter
  • 1/4 cup lemon juice
  • 2 tablespoons lemon zest
  • ¾ cup granulated sugar
  • 2 cups all-purpose flour
  • 1 teaspoon baking powder
  • 1 teaspoon baking soda
  • 2 tablespoons poppy seeds

Instructions

  1. Start by preheating your oven to 350 degrees.
  2. Line your jumbo muffin pan with liners and set aside.
  3. In a bowl mix all your dry ingredients – flour, baking soda, baking powder and poppy seeds. Mix it up and then set aside.
  4. In another bowl blend your milk, eggs, butter, lemon juice and zest, and sugar.
  5. Once well combined, slowly fold in the dry ingredients until well incorporated.
  6. Pour your lemon poppy seed batter into your jumbo muffin tin, and bake for 20-22 minutes, or until a toothpick can go into a muffin and come out clean.

Notes

  • Do not overbake these lemon muffins or they will dry out.
  • Use lighter ingredients like sour cream or Greek yogurt instead of butter, honey instead of sugar, or almond flour instead of all purpose.
  • Top with a homemade lemon glaze for an even sweeter treat.

Nutrition Information:
Yield: 12 Serving Size: 1
Amount Per Serving: Calories: 223Total Fat: 10gSaturated Fat: 5gTrans Fat: 0gUnsaturated Fat: 3gCholesterol: 53mgSodium: 230mgCarbohydrates: 30gFiber: 1gSugar: 14gProtein: 4g

Did you make this recipe?

Please leave a comment on the blog or share a photo on Pinterest

© Annie
Cuisine: American / Category: Recipes

Filed Under: Recipes

Cranberry and Orange Relish Recipe – 4 Ingredients

By Annie

This Cranberry and Orange Relish recipe calls for a bold and sweet combination of flavors that results in a tangy dip, spread, or topping that you’ll love serving! Just as good as a side dish for a holiday meal as it is for a spring or summer appetizer.

Unique and delicious, this orange cranberry relish is a simple recipe that yields a relish with the perfect balance of tart and fruity flavors. You can pair this relish with a variety of side dishes, or use it to add flair to your next charcuterie board.

And if you’re looking for even more fantastic recipes to try, check out the Recipe Archives for lots of delicious ideas!

Cranberry orange relish on a counter with ingredients.
Orange cranberry relish is a simple and unique dish that’s as versatile as it is delicious!


However you use it, this simple fruity relish is bursting with the flavors of cranberry and orange. Perfectly sweet and tart, you may even want to eat this relish by the spoonful! Forget ordinary cranberry sauce and try this orange cranberry relish instead.

Why You’ll Love this Cranberry Relish with Orange

This is without a doubt the best cranberry relish recipe ever! How can I be sure? The results are always incredibly delicious, it’s easy to put together, and it only requires four ingredients.

Family, friends, and guests will be impressed by this unique and tart relish. Little do they know, it was so simple to make!


Cranberry Orange Relish in a bowl
Cranberry Orange Relish is a delicious twist on traditional cranberry sauce.


Combine tart and citrusy orange with bold and bright cranberries for the perfect marriage of flavors. Apples help to form a base for this relish, and a bit of sugar pulls together all of the tart, fruity ingredients.

Use this relish wherever you would enjoy cranberry sauce, as an addition to an appetizer spread, or a topping for other side dishes or main entrees.

Regardless of how you use it, you’ll always want to have some cranberry relish on hand once you try this recipe!


Ingredients for Cranberry and Orange Relish

Ingredients for cranberry orange relish on a counter.
You’ll only need four simple ingredients for this tasty relish!
  • Fresh Cranberries – typically eaten around the holiday season, cranberries provide a bold and tart flavor with the perfect amount of sweetness and brightness. You’ll want to use fresh cranberries for the best relish.
  • Apple – milder in flavor, apple helps to form the base of the relish and balances out some of the tartness from the cranberries and orange.
  • Orange – adds acidity and an extra punch of brightness along with its signature aromatic and fragrant citrus flavor.
  • Sugar – a bit of sugar can go a long way here; sugar will aid in balance out the sharpness of the tangy fruits and will bring this relish together perfectly.


How to Make Fresh Orange Cranberry Relish

  1. Prepare all ingredients, beginning with the cranberries. Grind cranberries with a blender or food processor until finely chopped.

    Blended cranberries in a bowl.
    Be sure to blend your cranberries up into small enough pieces. But feel free to experiment with the consistency of your relish.
  2. Chop the apple with a blender or grater, again until chopped finely.

    Chopped apple in a bowl.
    Finely chopped apple gives this relish a boost of mild and familiar sweetness.
  3. Grind orange with a blender.

    Blended orange in a bowl.
    This relish includes not just orange juice, but the actual orange itself for a distinctly citrusy flavor.
  4. Mix together in one bowl and add the sugar. Stir well till combined.


FAQs

Can you freeze cranberry orange relish?

Yes, this relish can be frozen! Be sure to store it in an airtight container of some kind and store for 2-3 months. To use it again, allow the relish to thaw in the fridge overnight, or for a few hours at least.

Your relish can also be kept in an airtight container in the refrigerator for up to two weeks.

Can orange cranberry relish be made ahead of time?

Relish keeps well, so this is a fantastic recipe to make ahead of time. Whether you make it one day in advance or a week, you’ll have a delicious and flavorful relish that’s bursting with flavor and ready to eat!

How to eat cranberry and orange relish?

This unique relish has a wide variety of uses. First, you can use it as a substitute for cranberry sauce. Serve it with your Thanksgiving turkey with stuffing, mashed potatoes, and roast turkey.

It can be used with sweet dishes to enhance their sweetness. Spoon some cranberry relish over top of oatmeal, pancakes, French toast, or other breakfast classics. It can also be layered with granola (here’s how to make your own granola) and yogurt for a flavorful breakfast or brunch parfait.

On the other hand, this relish is also great alongside savory dishes. It pairs well with meat dishes like ham, pork, chicken and turkey. Use it after the holidays on leftover turkey sandwiches!

Finally, you could add some cranberry relish to a block of cream cheese and serve with some really good quality crackers or with a charcuterie board for a yummy appetizer. Feel free to experiment with different ways to use your relish!


Orange Cranberry Relish in a bowl with a spoon.
Make this easy 4 ingredient Orange Cranberry Relish!


Popular Variations and Substitutions

  • For a more complex relish, use brown sugar instead of white sugar. This is especially tasty with holiday meals or even desserts like pies.
  • Add a bit of ground cinnamon and honey for delicious ramped up flavor.
  • Add some fresh ginger for a zingy flavor that gives your relish a completely different taste.
  • If you want a somewhat thinner relish with a bit of punch, mix in a bit of orange liqueur. This accentuates the citrus flavor and provides a bit of extra bite.


Cranberry orange relish in a bowl with a spoon.
Excellent to pair with holiday side dishes or to serve as a yummy appetizer, this orange cranberry relish will be a crowd favorite wherever you take it!

More Recipes You’ll Love

  • Pumpkin Cranberry Banana Bread – This upgraded version of banana bread is an excellent baked good to make in the fall as a breakfast treat.
  • Apple Walnut Muffins with Streusel – Sweet and moist, these tasty muffins are topped with a cinnamon and sugar streusel and have an extra crunch from walnuts.
  • Meyer Lemon Bundt Cake – You’ll love the bright and refreshing lemon flavor of this easy and gorgeous bundt cake!
  • Cranberry Brie Bites – For another tasty and elegant appetizer that features cranberry, try these handheld bite-sized cups with cranberry sauce and Brie cheese.
  • Cranberry Moscow Mule – Still can’t get enough cranberries? Use them for this fruity take on the classic mule cocktail!
  • Homemade Cranberry Sauce – want to make your own? Here’s how!


Cranberry and Orange Relish Recipe Card

Cranberry Orange Relish in a blue bowl with single cranberry for garnish

Cranberry Orange Relish

Yield: 4 cups
Prep Time: 15 minutes
Total Time: 15 minutes

This Cranberry Orange Relish is a simple, 4-ingredient dish that can be served with elegant dinners or as a fun and bright snack dip!

Ingredients

  • 2 2/3 cups cranberries
  • 1 1/2 apples
  • 1 orange
  • 1 cup sugar

Instructions

  1. Grind cranberries with a stick blender.
  2. Peel and chop the apple with a blender or grater.
  3. Peel, section then grind the orange with a stick blender.
  4. Add sugar.
  5. Stir well together and let sit for 10 minutes before serving.

Notes

  • Add a splash of orange liqueur for an extra bite and additional citrus flavor.
  • Experiment with the cosistency of your relish by bleding your ingredients to different amounts.
  • For additional flavor, add ingredients like brown sugar or freshly chopped or ground ginger.

Nutrition Information:
Yield: 8 Serving Size: 1
Amount Per Serving: Calories: 139Total Fat: 0gSaturated Fat: 0gTrans Fat: 0gUnsaturated Fat: 0gCholesterol: 0mgSodium: 1mgCarbohydrates: 36gFiber: 2gSugar: 31gProtein: 0g

Did you make this recipe?

Please leave a comment on the blog or share a photo on Pinterest

© Annie
Cuisine: American / Category: Recipes

Filed Under: Recipes

Canning Tips – Making Home Canning Easier

By Annie

Looking for Canning Tips that will streamline your process and make your life easier? Keep reading to find out some of the best ways to improve your canning process!

Canning is a lot of work and can be quite exhausting and hot, especially if you are doing multiple batches. Sometimes, almost the whole day is spent in the kitchen, putting up mason jars of fresh vegetables, fruits and jams.

The good news is that there are a few things you can do to make canning easier and more enjoyable so you can fill your pantry with healthy home-canned food. These simple canning tips to make canning easier will help with everything from prep time to managing the summer heat so you can preserve more food this summer.


Canning tips like these will give you jars of food like these home canned green beans.
These canning tips will help you safely preserve shelf stable food.

The 7 Best Canning Tips

1. Clean Your Kitchen Before Canning

It is so important to have a clean space to work in. Not only should you have maximum use of all your counter tops, your sinks should be free of any dishes or utensils.

Canning tips: A clean kitchen with clear countertops ready for canning.
One of my most important canning tips is to maintain a clean and tidy work area. This will make the process much easier to keep track of!

Wipe down all your counter tops well before you start canning. You will be reducing the number of bacteria present in the kitchen that could contaminate the canning project.

The most useful part of cleaning your kitchen before you begin canning, is that you can freely move around and grab anything you need. You don’t want to be dealing with a sink full of dishes or odds and ends on the counter.


2. Gather Everything You Need Before You Start

Read your canning recipe through from start to finish. Then go through it again. This time, gather all the equipment you are going to need as you come across it in the recipe.

Taking the time to gather everything from your canning tools to the ingredients of your recipes before you start canning will definitely make the entire process easier and flowing properly.

Canning tips: Lots of empty jars and seals sitting on a counter.
If you gather all of your materials before the process begins, it will eliminate time spent looking for all of the necessary tools and materials.

I find it is always helpful to have extra large slotted spoons right on the counter in case I quickly need another clean one. Same thing with clean tea towels.

It’s much easier to be able to just grab it off the counter without having to go into the drawer. Especially because you may find you have sticky fingers from dealing with filling jars!

It is much easier to get the canning done without having to deal with looking for things over and over. Canning can be much more enjoyable when you can work smoothly.


3. Keep an Extra Pot of Water Boiling on the Stove

Whether you are water bath canning or pressure canning you can benefit from a large stockpot of boiling water on the stovetop while you work. A large pot of boiling water can easily sterilize tools or soften the seals on lids. Keep in mind to never put a cold glass jar into a pot of boiling water.

Lifiting a lid off a pot of boiling water.
An extra pot of boiling water is a great idea for any canning process. It can quickly and easily clean and sterilize any necessary tools.

If you are water bath canning, a pot of boiling water on the stove can help to keep your canner running at the proper water level for as long as you need to without risk.

Simply use that boiling pot of water to keep the water level up in your canner without cooling the water and stopping the boiling process.

I like to have a large soup ladle on hand in case I need to add water to the canner. When I use my really large canner, I use a clean empty saucepan to dip into the extra pot of water. 


4. Have the Right Canning Tools

You may be looking at ways to save money when you first start canning. But it is always a good idea to invest in the right canning tools to get started. This should include a canning pot with rack.

The canning rack goes on the bottom of the canner, then the full jars placed on it. Canning jars should never be placed right onto the bottom of your canner.

If you do not have a canning rack, many people have success with using a clean kitchen towel to keep jars off the direct heat at the bottom of the canner.

A 5-piece canning kit box on a counter.
It’s worth investing in quality tools for safe and efficient canning.

Look for a canning tool kit like this one. It has the everyday tools like a jar lifter, bubble popper, lid lifter, and funnel you need to ensure that you can easily fill and move jars and lids around without burning yourself on the hot jars.

Norpro makes a good quality kit, and you can get the Norpro Canning Essentials Kit here on Amazon.

A ladle and a strong pair of tongs can help, and are a necessity in my canning kitchen.

You can find a more complete list of the canning tools we use all the time

here at Canning Supplies


Jars of home canned food on a counter.
Preserving tips to help make canning easier.

5. Always Choose the Freshest Ingredients

While you can make jam and other home-canned foods using less-than-perfect product, you need to take the time to clean and trim away any bruises and damaged parts that would lower the quality of the overall product when it is done.

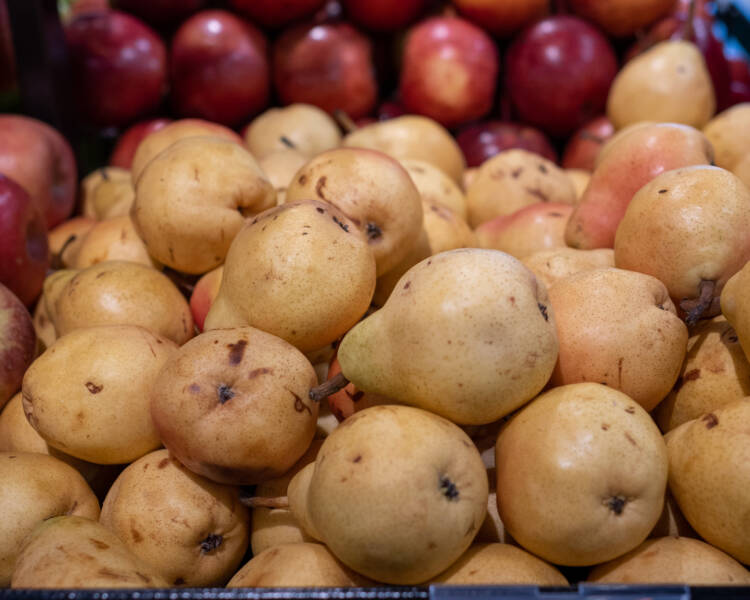
A collection of pears and apples.
Using fresh ingredients is another way to ensure safe canning with excellent results.

Sometimes you can find great deals on slightly bruised fruits and if you can take the time to properly trim them, you can save a lot of money.

Whether you are canning fresh produce directly from your garden or you’ve found a great deal at the grocery store, make sure your ingredients are fresh, clean and any bruised areas are removed. 


6. Enlist Some Help with Canning Projects

While small-batch canning projects are easy to do on your own, if you are planning on making a large batch of anything to preserve for your family, it can be a great idea to enlist the help of your family.

A woman and a girl holding cans of foods.
Make canning a family activity. They say many hands make light work!

Even kids can help wash and trim produce or stir a simmering pot of jam while you work your way through the process.

Canning goes much faster when it is a team effort. No one in the family able to help? Try splitting the work with a friend to help fill both of your pantries while you work together. 

It makes for a great afternoon of canning and visiting that can’t be beat!


7. Take Your Canning Outside

The peak of the canning season takes place in the hot summer months. This means it can be incredibly difficult to can without heating your home up and making everyone inside miserable.

Canning tips: an outdoor water bath and someone removing a can of peaches.
Be sure to take things outside whenever possible to prevent overheating your home!

The good news is that you can easily can outside over a gas burner allowing you to keep your home cooler and even giving you more space to work on a hot summer day.

If you do not have central air or do not want to raise your power bill this is one of the best things you can do to make home canning easier.

A propane burner sitting on a dark surface.
A simple propane burner is a great way to move your canning process wherever it’s most convenient.

We often can outside on our porch, using a propane burner. These work fantastic and we use ours all the time. You can find our propane burner on Amazon.

We just hook the burner up to the 5 gallon propane bottle we use for our barbecue.

Canning outdoors works very well for us, keeping all that extra heat out of the house during the warm summer months. It also ensures that no mess from the process makes it inside.


Even More Canning Tips

Looking for specifics on how to can certain foods? Try one of these handy posts that includes more canning tips and info on materials and supplies!

  • Best Canning Supplies for Preserving Food
  • Canning Salmon at Home
  • How to Can Fresh Cherries
  • How to Preserve Garlic in Oil
  • Canning Homemade Sauerkraut
  • How to Store Home Canned Food – Tips You Should Know
  • 43 Must-Try Home Canning Recipes


Filed Under: Canning

How to Store Home Canned Food

By Annie

Here’s how to store home canned food plus tips for safely storing jars full of food.

Canning takes a lot of time, energy and work. To make the most of your home canning you need to take the time to store your canned goods properly to help protect your hard work from being damaged.

Home canned food stored safely on a shelf.
Learn how to store canned food safely – read on for our best tips.

This means you need to be sure that your shelves are strong enough to support the weight and that you follow the advice below for safely storing your canned goods. Using heavy metal shelves like these is a very good idea!

Why how you store your home canned goods is so important

You spend a long time canning food for your family and to watch it all become destroyed from poor storage can be devastating. Many people have made the mistake of using weak shelves or stacking jars too high.

Some have placed their home-canned jars in temperatures that fluctuate too much, which can cause damage to the jars and even break the seals of canning jars.

Store home made jams on a shelf in a cool dark place.
Store jams and jellies on a shelf in a cool dark place.

If you do not store your canned food properly the seals are more likely to break and allow bacteria and mold to grow inside of your jars. This is extremely dangerous and depending on how you have your jars stored. Plus, it can even go unnoticed until it is too late.

Storing your jars properly helps the seal stay intact and makes it easier to catch a broken seal before you open your jars and feed them to your family. Taking the time to store your jars the right way helps to get the most out of your hard work.

Storage temperature for home-canned goods

Keeping your canned goods in a place where they will be kept at a steady temperature is vital to keeping strong seals and preventing jars from breaking. In most homes, the basement will be the best place to keep your jars of food.

This is because your basement doesn’t tend to fluctuate in temperature much throughout the year. The heat will not get intense enough to break the seals of jars while the food itself will not freeze inside the jars, possibly causing them to break.

Home canned pickled onions
Homemade pickled red onions can be stored after being canned in a water bath.

If you do not have a basement, a temperature-controlled room in the interior of your home is the best place to keep them. For those with central air, your pantry is sufficient.

If you live in a hot climate and only have cooling in some areas of your home, consider storing your jars in a room with air conditioning.

Light in your food storage areas

Light is not the friend of your home-canned food. This is because the light tends to speed the breakdown of organic materials and in turn speeds the breakdown and soiling of your canned foods.

The sun can bleach the color of the food leaving it looking dull and really unappetizing. The heat of the sun can even cause the temperature of the jars to rise which can lead to broken seals.

Jars of tomato sauce being canned in a water bath canner.
If you go to the trouble of preserving food, be sure to store it safely!

If you do not have a room out of the way of the light of the sun to spare your canned goods, use thermal curtains to help block the light. An added bonus is that this can make your shelves blend into any room better, allowing you to store canned food in more areas of your home unnoticed.

Should you take the rings off full canning jars?

Canning rings – should they be left on the full jar or removed? This has been a debate for many years. Some people choose to leave the rings on their jars because it makes it easier to store the rings but this comes with several risks.

If the ring is left on your jars the seal on the lid can break while the ring keeps the seal in place. As the temperature fluctuates again the jar can reseal (although not tightly) with bacteria inside.

This is extremely dangerous and the risk can be remedied by removing the rings when storing your jars.

Home canned food on a shelf
Store home canned food safely with these tips.

Another issue with leaving the rings on is rust. If there is moisture in the air, the rings can develop rust on them. Should the rings rust from moisture in the air, it can be nearly impossible to remove the rings and lids from the jars.

The rust can spread to the lid as well damaging the seal of your jars leading to the introduction of bacteria and causing the food inside your jars to spoil.

Can you stack canning jars for storage?

Stacking of jars full of home canned food is another common debate among many home canners. The worry with stacking is that stacking the cans will keep the lids from moving should the seal break and that the pressure of the cans can lead to the jars seal breaking.

Stacking canning jars is generally frowned upon if you have the space to single-layer them.

Most jar manufacturers state that stacking jars are safe in a limit of 2 to 3 jars high. To do this safely, it is recommended that you place a layer of cardboard between the layers of jars. This will allow the lids to slide should they lose their seal to keep them from resealing.

Jars of home canned vegetables on a table
Home canning and preserving of fresh food can save thousands of dollars every year.

A great way to do this is to return your jars to the boxes they came in and stack those two high on your shelves. This helps save on space needed for storing full canning jars. Another bonus is that you don’t need to store the boxes in a different place.

This is the way we do it at our house. This also helps keeps the jars in the dark, which is better for the food you have canned. I write the box contents on a piece of paper and tape it to the outside of the box.

This way, I can easily see what kind of food is in the box. Makes it easy for quickly grabbing a jar or two from our cold room to bring to the kitchen.

Knowing how to store home canned food properly will help you reduce possibilities of having any problems with your full canning jars!

Head over here to our Preserving Food article to find every link to our canning and preserving recipes.

Need to organize your deep freeze? Check out the easiest way to defrost and organize your chest freezer or upright freezer.

Learn more about preserving and storing home canned food here at the National Center for Food Preservation.

Looking for our delicious recipes? Find all our baking and cooking recipes right here!


Filed Under: Canning

  • « Previous Page
  • 1
  • 2
  • 3
  • 4
  • 5
  • 6
  • …
  • 53
  • Next Page »

Connect With Us!

  • Email
  • Facebook
  • Instagram
  • Pinterest
  • Twitter

Search this site

Generic selectors
Exact matches only
Search in title
Search in content
Post Type Selectors
Search in posts
Search in pages

Our Most Popular Posts

Garlic cloves in oil

How to Preserve Garlic in Oil – and Other Ways to Store Garlic

a open jar of pickled brussel sprouts on a counter

Easy Pickled Brussels Sprouts Recipe (Water Bath Canning)

Privacy Policy

Read about our Privacy Policy

Disclosure

Please note that some of this site’s links are affiliate links, and CountryLivinginaCaribooValley.com is a participant in the Amazon Services LLC Associates Program, an affiliate advertising program designed to provide a means for us to earn fees by linking to Amazon.com and affiliated sites. At NO ADDITIONAL COST TO YOU, I will earn a small commission, if you purchase them. I recommend them as they are good products.

Theme Design By Studio Mommy · Copyright © 2026