Country Living in a Cariboo Valley

Homesteading in BC

  • How to Get Started
  • Vegetable Gardening
  • Preserving Food
  • Recipes
  • Homemade Wine Recipes
  • About Us
  • Work With Me
  • Shop
    • Vegetable Garden Planner Printable: Grow Your Best Garden Ever
    • Grow Enough Food for a Year
    • Delicious Dandelions: A Recipe Collection
    • Dirt to Dollars: Selling at the Farmers Market
    • 8 Pounds in 8 Weeks: Raising Chicks for the Dinner Table
    • Making Wild Wine
    • Build a Hanging Chicken Feeder
    • 15 Things to Know About Living in the Country

How to Grow Peas in the Garden or in Containers

By Annie

Learn how to grow peas from seed in the garden or in containers!

Peas are one of the easiest vegetables to grow in your vegetable garden or in grow bags. Since peas are quite often one of the first vegetables ready for harvest, this delicious veggie is an early spring treat.

Today I’m going to show you how to grow peas from seed so that you can enjoy this crisp, fresh veggie all garden season long. And actually, all winter long too! We’ve got an article that explains the easiest way to preserve peas.

shelling garden peas on a warm afternoon

We plant peas in full sun; however, they will grow in partial sun as well. We plant climbing peas, but you can also grow bush varieties if that works better for you.

How to Grow Peas from Seed

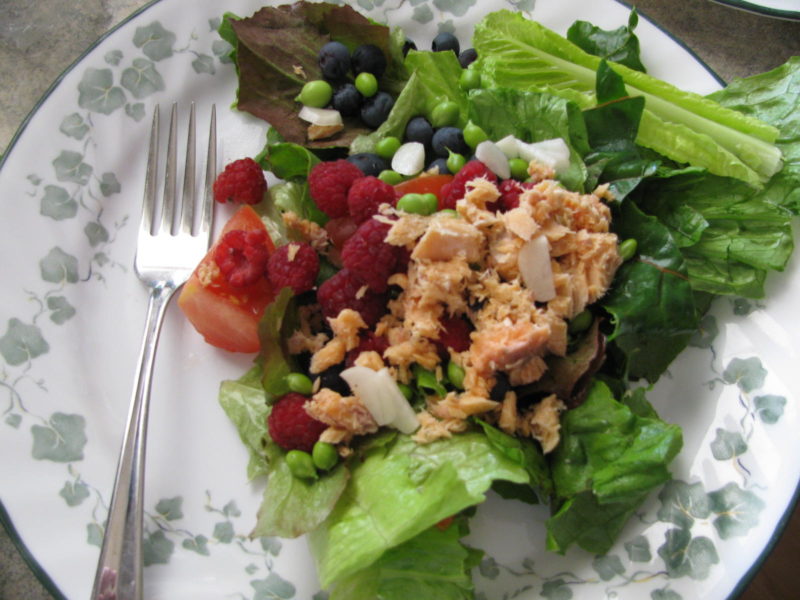
We love to eat fresh peas, often right in the garden. But, we use a lot of fresh peas in a salad along with fresh tomatoes and peppers. We also love to preserve peas to use as an easy vegetable side dish any time of the year.

The fresh flavor and tenderness of just picked garden peas cannot be beat!

Pick Your Pea Variety

There are two types of peas to grow, non-edible or edible pod (like sugar snap peas). With these two types, you’ll find the options of dwarf or bush.

Dwarf peas (such as Tom Thumb or Sugar Ann) grow to be about 16-30 inches tall while the bush peas can grow upwards of three feet or higher.

You’ll find that the taller peas will grow slower throughout the season, while your dwarf pea’s variety will grow in abundance quickly.

We always grow heirloom peas – that way, every year we can save our own pea seed. Saves us money and we are able to stay away from GMO seeds.

Also we always grow shelling peas, but a lot of people like snow peas – these have edible pods and you don’t have to bother shelling. It’s important to grow what you like and what you will eat, right?

Green peas in a pod growing on a pea vine in a garden.
Save this pin to your Pinterest Garden board.


Plant Peas Early

Peas can thrive in cool weather, making them one of the first crops to plant. As soon as you can get into the garden for planting, get your pea seeds in the ground. 

They say a good rule of thumb is to plant your peas by St. Patrick’s Day. If not by then, just make sure you plant your peas about one month before your region’s frost-free date.


Start Outdoors

While you can sow seeds inside and then transplant, young pea plants tend to not do well when transplanted from indoors to outdoors. Even in our northern climate, we directly sow peas right into the garden.

It is much easier to start growing peas by seed right in the garden instead of transplanting seedlings.


a double row of peas growing in the ground


Prepare The Soil

Peas will grow faster if the soil is kept around 60 degrees Fahrenheit while a 40 degree Fahrenheit soil will extend the harvest date out a few weeks.

Be sure to use plenty of compost to get your soil to a pH level of 6.0-7.5 as this is the most tolerable level of soil for peas. Add lots of compost with nitrogen or organic fertilizer.

Mulching Pea Plants

You may find mulching the pea patch will help to keep the soil temperature lower, plus of course, it will help with suppressing weeds.

You can use straw, leaves or grass clippings as an inexpensive mulch.

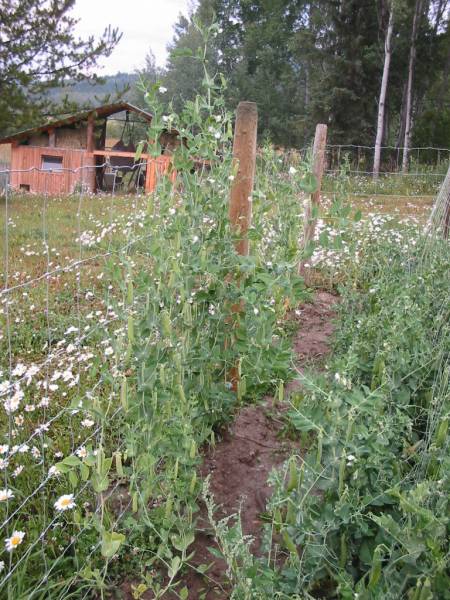
Plant Peas in Double Rows

To get the best bang for your buck, plant peas in double rows. See the photo above for what I mean. If you already go to the trouble of hanging some type of pea fencing why not double your yield?

This is an important part of your garden plan – how much food can you fit in a smaller space?

That photo also gives a good idea of how close to plant peas. I like to plant very close together!


Use Stakes or Pea Fencing

Peas growing along a fenceline for support.


Since peas will grow like a vine, it’s important to give your plants a place to grow upward. The pea tendrils will attach themselves to the fence and continue to grow. 

You can use garden stakes or decorative fencing in your spring garden.

We usually use T posts (because we have lots on hand) and chicken wire or page wire. Or we grow them along an existing fence, which makes it even easier.

This will ensure your peas have ample space to grow upwards and harvest plenty of vegetables for your healthy eating pleasure.

Making sure your peas have good support also means easier (and cleaner) picking when it is harvest time.


Growing Peas in Containers or Pots

Peas have shallow roots, meaning they don’t need to be grown in really deep pots. You won’t get as much of a harvest growing peas in containers, but you certainly will get a harvest! 

Just be sure to give your peas some vertical support, using perhaps a trellis or grow them in pots along a deck. Peas will grow around the pickets of your deck or fence just fine.

Plant seeds close together; 1/2 inch is fine when you are growing peas in pots.


Peas in a garden growing up mesh netting


Water Once a Week

Finally, it’s important that you don’t let your peas get too damp. A good deep watering once per week will ensure your harvest grows healthy.

When your pea pods are maturing in the hotter weather season you’ll want to increase the water to make certain your peas produce healthy pods.

Lastly, be sure to read the seed packet for the best tips to grow your peas in your edible garden.

These tips shared today will help you learn how to grow peas but the key is to confirm these details on your seeds package before planting your peas.

Growing peas may be a slight learning experience as you work to determine the best variety of peas to grow in your area and whether you want an early harvest or later summer harvest.

Ask gardening friends or neighbours what variety of peas they find do well in your area.

Since peas enjoy being grown close together you won’t need as much square footage space and can easily enjoy growing these peas closely to keep weed growth down.

These are just some of the basic tips to help you grow peas this year. I hope that I’ve provided ample information to get you started in the right direction to grow peas.


How to Harvest Peas

Two great types of pea varieties we grow here are Bounty and Tall Telephone. If we can plant in very early spring, we are usually able to harvest fresh peas off the vine in June.

If given enough water, we have been able to pick peas all summer long and into very early October.

Peas are harvested by picking the full pea pods off the vine. Carefully hold onto the plant itself with one hand and use the other to pick off the pod.

How to Preserve Your Own Food

Would you like to learn about how to preserve your own food? This link will take you to an article that details EVERY post on this website about preserving.

Whether it’s canning, freezing or pickling, you will find links that explain every process.

Want to know the easiest way to preserve peas? Take a look – make this the year you start growing some of your own food!


Originally published March 2020; latest update March 2026


Filed Under: Grow Your Own Vegetables

How To Improve Clay Soil for Gardening

By Annie

If you’re looking for tips on how to improve clay soil, check out these frustration-free ideas!

Here in the Cariboo region of British Columbia, we have clay based soil in our lawn that we are always trying to amend. I had never seen heavy clay soil before we moved here.

Over time we learned how to improve clay soil. Here’s how we were able to improve soil fertility in our home garden.

How to Improve Clay Soil

Before I share how to fix your soil, here is a bit of history of what our soil (and first time garden) was like when we moved here to the Valley.

We came here at the beginning of June and maybe 3 days later, we had our first garden in. We planted mostly potatoes which are good for breaking up the soil.

This is something to keep in mind if you are breaking in a first year garden with hard, lousy soil. Plant potatoes! Plant lots of potatoes.

Head on over here if you want to learn how to grow potatoes.

Potatoes growing in a garden bed.
Growing potatoes is a great way to break up heavy soil

I didn’t think we would have much of a harvest that year. But the garden did better than we thought it would and we grew some beets,  peas, salad greens and even pole beans.


Buckwheat plant growing to be turned under to improve soil
These two plants are natural ways to improve your clay soil!

A great resource for homesteading and gardening was Carla Emery’s book Encyclopedia of Country Living.

I am still often looking something up in this awesome book. It is full of widespread information about different aspects of homesteading.

This book covers everything I needed to know about growing food, preserving food and even raising animals. There is lots of information about the importance of building your soil.


Why is Clay Hard to Grow In?

Solid clumps of clay are hard to garden in! Because of the shape of clay particles (flat and condensed instead of round, as something like sand, silt, or loam might be), compaction is a large problem, especially when wet or under any kind of pressure.

A garden bed full of heavy clay soil is like mud when there’s been a good rainfall. Then, when it does dry out, it is like concrete.

This prevents things like air, moisture, minerals, and nutrients from filtering in and out, which is a surefire way to stunt any plant growth.

Great ways to promote better drainage and aeration in clay soil is by top dressing with any (or a combination) of these components:

  • pine bark
  • gypsum
  • mulch
  • composted leaves
  • grass clippings


Buckwheat growing in garden to improve soil
If you’re frustrated with the quality of your clay soil, grow these two plants to improve it.


How to Amend Clay Soil for Vegetable Gardens

There are a number of soil amendments you can make to enrich your clay and loosen it up. Use aged manure or compost.

Using Cover Crops to Improve Soil

Growing some cover crops that are rich in the nutrients your soil needs is a great way to use organic matter to improve soil quality. Getting a garden soil test is a great first step.

A large vegetable garden growing in summer
With a little patience and work, even the most dense and difficult clay soil can be turned into a great base for growing.

Great choices for cover crops include:

  • Buckwheat
  • Fall Rye (or Winter Rye)
  • Clovers, both red and white
  • Alfalfa

Grow Buckwheat

We use buckwheat as a form of green manure and you can read about how we grow and use it. It works very well for us as we have a shorter gardening season (Canada Zone 3) and it matures so quickly.

buckwheat growing in garden
Growing buckwheat is a great way to naturally improve the quality of clay soil.

Buckwheat grows especially well in moist, cool climates and cold areas. It’s also a good grain choice if you have poor soil, especially if it’s dense clay, because the roots break up the clay and make it loose.

A real advantage to Buckwheat is we use it to cover areas from early harvested vegetables. So, it’s a cover crop that we can grow in a few weeks, let it set seed and use as Buckwheat flour. Or turn under the entire plant to add nutrients.

Just don’t let it set seed and then dig it under or you’ll have  a lot of Buckwheat growing in that spot.

Grow Rye Grass

We have always used fall rye as a green manure for the garden. We sow it in the fall and in spring, once growth starts again, we work it in to the soil by tilling.

Some people are opposed to tillage on such heavy clay, but we are adding lots of air and other materials like the green manures. It doesn’t take long and you will see the soil become lighter with a good ability to drain properly.

fall rye being tilled under in garden
Once planted, the right green manure will make all of the improvements for you!

If you don’t have a tiller, you can use a shovel or a garden fork instead. Dig deep and turn over the entire root system. Leave the stems and leaves (full of plant nutrients) to decompose further into the soil.

This has been a big help for us and we also use it in harvested areas of the garden during the gardening season. It grows quickly, which is another bonus.

If you grow Fall Rye just don’t let it get to tall before cutting. The stalks can get tough and that makes it difficult to cut down. Cut it before it gets over 2 feet tall; there are plenty of nutrients in plants that size.

Other Soil Building Organic Materials to Improve Bad Soil

  • Well aged manure, including chicken, pig, cow and horse.
  • Well aged kitchen compost.
  • Old bedding from animal pens is done as well. The hay/straw breaks down and adds to allow air into the soil.


Basket full of leafy greens and broccoli fresh picked
After some work, we managed to make our clay soil work for all of our purposes!

We get wonderful harvests from our gardens. Vegetables, berries, perennial veggies like asparagus and rhubarb.

We grow enough to fill our cold room and eat lots of great fresh food!

Each year the garden soil has improved and we can tell by the texture. It’s lighter and fluffier than last year, and last year was better than the year before.

The more compost, green manure, straw etc. we add – the better the soil will become. And this has to be an ongoing project; otherwise, the good soil will again get depleted.

Another Benefit of Using Cover Crops

Using some type of plant material to help improve your soil, has another benefit. That is keeping your soil covered. Try to not leave soil bare and exposed to the elements; erosion will easily happen and whatever is good in your top soil will be gone.

Keep your soil covered (as in fully planted) and it will help not only the soil ph but will keep any soil microorganisms in better health. 

If you can’t seed a cover crop for whatever reason, consider covering exposed parts of your garden with a layer of straw.


Fix clay soil so you can plant vegetables or flowers. Amend the soil using these 3 types of plants! #gardening #soil #DIY
Fix clay soil so you can plant vegetables or flowers. Amend the soil using these 3 types of plants!

Homesteading Articles You’ll Love

  • Want to learn about canning your own food? Read about how to use a pressure canner to can meats and also how to can fish.
  • Water bath canning is the easiest way to start to learn how to home can. 
  • Here’s how to build a Greenhouse – we extended our growing season for under $200!
  • Learn more about rye grass benefits.


So now that you know how to improve clay soil, hopefully you can use these tips to lighten your soil and get better garden harvests.


a garden of healthy soil instead of clay soil
Clay soil may be difficult to plant in, but it’s not impossible! Follow these tips for a bountiful harvest.


originally published 2011; last updated April 2025

Filed Under: Grow Your Own Vegetables, How To Tagged With: Soil

Growing Garlic in the Garden (4 Part Series)

By Annie

Thinking of growing garlic in your garden? You, my friend, are a person after my own heart. Here’s everything you need to know about how to grow garlic.

What is Garlic?

To start, in case you’re not already familiar with the plant, here’s some basic information! Part of the Allium genus, garlic is a type of flowering bulbous plant. Botanically it is considered a vegetable, and it’s closely related to other plants like shallots, onions, leeks, chives, Welsh onions, and Chinese onions.

The taste of garlic depends on whether or not it’s been cooked. Raw garlic tends to have an extremely pungent and borderline spicy flavor. When it’s cooked, the flavor mellows out and takes on nutty and delicious notes.

For this reason, the unique and somewhat mustard-like flavor profile is utilized in a wide variety of dishes from cultures all around the world.

Health Benefits of Garlic

In my house, garlic is a staple for so many meals. Not only does it add a wonderful flavor to recipes, but it’s a healthy superfood.

It’s packed with vitamins C, B6, manganese, and selenium as well as a good source of antioxidants (I’m looking at you, allicin!).

To top it all off, since it is so flavorful, garlic can be used in place of salt (or at least enable you to cut down on your salt intake), which is a big part of keeping your blood pressure at a healthy level.

Plus it’s low-calorie so adding it to your meals won’t do much to increase your caloric intake.


Why Grow Your Own Garlic?

Garlic bulbs curing in a shallow basket
Growing your own garlic is a fantastic way to save money and produce delicious and easily accessible garlic in your own backyard!

When it comes to garlic, there’s not much we haven’t tried. I personally love the mellow taste and aroma it produces when you roast it in the oven.

You can roast it, grill it and add it to almost everything you cook (we especially love adding roasted garlic to our roast beef and potatoes – yum!). Check out all the great ways to cook with garlic!

Thinly sliced garlic cloves added to salad.
Just a few slices of garlic add a lot of flavour to this salad.

We slice it up very thin and use just a bit in fresh salads where it adds a wonderful zing! We pretty much eat it in some form. Every. Single. Day.


Garlic growing in the backyard garden.
This 4-part guide is loaded with tips and advice for growing and harvesting your own garlic. It even includes ideas for how to store, preserve, and eat it!

But you don’t have to go as big as we did – you can grow garlic in your backyard for your own personal use. It’s super easy! And if you use garlic as much as we do, think about the money you’ll save by avoiding supermarkets!

Plus, it’s extremely convenient to grow your own, and there are a numbers of ways you can store and preserve garlic so you’ll have fresh, home-grown garlic to use and enjoy all year long.

Garlic Varieties

There’s a large selection of varieties of garlic you can plant. There are 3 main types of garlic variety: softneck garlic, hardneck garlic, and elephant garlic.

Softneck varieties are what you’ll typically find in grocery stores, and hardneck varieties produce scapes that can be used for a number of things (see part 2 to the guide).

The hardneck type is typically what I like to plant, but softneck types are also good options!

Elephant garlic is a completely different type of garlic that yields large bulbs and, unlike true garlic, is more closely related to leeks.


How to Grow Garlic – A 4 Part Series

Hardneck garlic growing in a fenced garden bed.
With just a little patch of land, you can pack in lots of garlic bulbs and have a large crop for a small area!

If you’re curious about growing garlic in your backyard, I want to invite you to check out the 4-part series I wrote.

It will teach you everything you need to know about growing garlic, how to grow garlic from a clove, how to plant it, harvest it, dry it, and store garlic.

If you’re a complete novice at growing garlic, you should start with part 1. Otherwise, you can skip to whichever part fits your needs best.

Garlic is so easy to grow and it takes up hardly any room at all. It can be grown in a garden, a flowerbed, a container on your deck–anywhere that gets full sun.

Anywhere you have a spare 6 inches of soil to dig, you can plant, grow and harvest a head of garlic. So make this year the year you start to grow it instead of buying garlic!


Growing Garlic (Planting and Spacing Garlic) – Part 1

a Huge garlic braid hanging in the kitchen
A full braid of garlic curing in the kitchen can also make a rusting and beautiful piece of decor.

In Growing Garlic – Part 1, you’ll learn:

  • How much space you need to plant garlic cloves (spoiler: not much!)
  • That garlic is grown anywhere from early fall, like September and October, or in the early spring, depending on the climate you live in
  • How to prepare the soil and plant garlic bulbs in a raised bed (e.g. adding compost, manure, or fertilizer, layers of mulch or straw, etc.)
  • How far apart you should plant your individual cloves
  • Avoiding pests and promoting weed control
  • What to expect as your garlic plants grow
  • What to do to get nice, big garlic heads
  • My recipe for Bacon-Wrapped Garlic Bites (because…yum!)

Ready to get started? Read Growing Garlic – Part 1.


What to do with Garlic Scapes – Part 2

In Growing Garlic – Part 2, you’ll learn how to deal with garlic scapes. These stalks need to be removed starting in June and July, so here’s how to use all those delicious garlic scapes you’ll end up with.

A curled garlic scape right after being snapped off the plant.
Garlic scapes are a fortunate byproduct of hardneck varieties of garlic. These stems can be used in a variety of ways so no part of the plant goes to waste!

Every year we make Pickled Garlic Scapes! When canned safely and properly, you can keep them on hand for years! They are great in a Caesar, Bloody Mary or this Cranberry Vodka Spritzer as a garnish.

The stem, or garlic scape, is also great for:

  • Sandwiches
  • Burgers
  • Grilled meats
  • Stir-fries
  • Pesto sauce
  • Veggie trays
  • Potato salad
  • Tuna salad
  • Cheese and crackers
  • Serving with other veggies like tomatoes and beans

Start pickling with Growing Garlic – Part 2.


Harvesting and Curing Garlic – Part 3

Growing Garlic – Part 3 will teach you how to harvest garlic and provides tips for storage. In it you’ll learn:

  • How to tell when garlic is ready to harvest (once leaves turn yellow)
  • The easiest way to get dirt off your garlic plantings
  • How to bundle and hang your bulbs
  • Preventing bacteria from spreading to other bulbs
  • How long to hang your bulbs up to dry
  • How to get your bed ready for replanting

Learn about harvest in Growing Garlic – Part 3.

Garlic growing in a garden with shrubs and flowers.
With these 4 in-depth posts, you’ll become an expert on plantic and harvesting your own garlic. Get started today!

Sorting Garlic for Eating and Planting- Part 4

Last, but not least, in Growing Garlic – Part 4, you’ll learn:

  • How to sort through your garlic cloves
  • Choosing which bulbs you will eat
  • How to choose which bulbs you will replant in your garden
  • My recipe for Bacon-Wrapped Garlic Bites (seriously, they are soooo good!!)

Learn how to keep your garlic garden flourishing in Growing Garlic – Part 4.


Learning more about how to grow garlic: Part 2

Growing Other Plants:

If you enjoy planting and harvesting your own garlic, there are a number of other plants that are similarly easy to grow! Onion, shallots, and chives are all great options if you’re looking to expand your garden further.


Garlic braids hanging in kitchen
Feel free to peruse the 4-part guide and become an instant expert on growing garlic!


originally published 2020; latest updated Sept 2022

Filed Under: Garlic, Garlic (4 Part Series), Grow Your Own Vegetables

10 Tips to Get the Most out of a Small Vegetable Garden

By Annie

When you have a large backyard garden, you can easily plant whatever crops, vegetables or herbs you like. When your garden is small, you will need to be more creative if you want to get the most out of your small vegetable garden.

Small garden spaces can still be utilized to maximize the output you can derive from them. Here are some small vegetable garden ideas that will teach you how to utilize a small plot of land effectively.

Get the Most from a Small Vegetable Garden

Radish is planted tightly between broccoli plants
Check out these 10 tips for how to get the absolute most out of your small vegetable garden!

1. Practice Companion Planting

Companion planting allows you to plant two or more crops in the same patch of land. Some crops do well together.

For instance, you can combine carrots and beets. Since beets have a shorter growth period, you will harvest them faster and leave the carrots to continue growing.

Tomatoes are also excellent companion plants as they grow tall. You can easily plant some other crop underneath them.

Here are some other tips for companion planting…plus, just click the name to take you all the details on how to grow them!

  • Carrots: plant with beans, garden peas, tomatoes, onions, and lettuce
  • Corn: plant with squash, potatoes, peas, melons, and cucumbers
  • Onions: plant with lettuce, carrots, and beets
  • Garlic: plant with beets, carrots, radishes, peppers, spinach, and eggplant
  • Tomatoes: plant with basil, squash, cucumbers, and carrots
  • Peppers: plant with basil and onions
  • Zucchini: plant with peas, beans, radishes, and corn
vegetables in a small garden
You don’t need a lot of space to produce delicious homegrown produce. This guide will give you lots of suggestions for maximizing even a small garden!


2. Consider Vertical Planting to Get the Most out of a Small Garden

Find ways to grow up! Vertical planting works better for vines or crops that crawl. Excellent examples include squashes and cucumbers. This is a great way to take advantage of compact garden layouts.

Use trellis for support and train them to grow along a support structure, such as a fence. This will hardly take up any space at all. You may even have space for something else to grow on the open space on the ground, like other veggies, flowers, and more.

A yellow bird sits on a wire fence in a small garden.
Attracting wildlife like birds is a great way to naturally improve your garden and help control pests.


3. Attract Wildlife to Your Garden

Wildlife is a wonderful addition to your small garden space. Waking up to the sound of birds chirping in the morning is a beautiful feeling. Leaf-heavy trees and shrubs are a great way to provide shade that animals will love.

Some animals and birds also act as natural pest controls. Hanging squirrel proof bird feeders from the trees will attract the birds to your garden.

a man holds harvested beets
Planting vegetables that aren’t readily available is a great way to expand your diet!


4. Plant What is Not Accessible to You Easily

Find out what you cannot purchase easily in your local store and consider planting this in your garden.

You have to prioritize since you will not be able to plant everything in the small garden. Find out what is more valuable to you and then plant it.

a tightly planted row of beans in a garden
Some veggies are high-yielders and produce lots of produce from a single plant. Aim for these varieties to take advantage of space!

5. Look for Varieties that Maximize Space

Plants grow differently. Some grow bushy while others grow more constricted. Good examples of bushy plants include cabbages, cauliflowers and broccoli.

Example of plants that maximize space include carrots, onions or radishes. Prioritize those that maximize space. And plant closely together – you can always thin some plants later after early harvesting. This will make room for the rest of the plants to continue growing.

You can also choose to plant specific dwarf varieties which inherently take up less space and make a great addition to a garden.

trays of seedling plants sit by a window.
Starting certain types of plants indoors can save on space and also ensure that you can closely monitor them in infancy.

6. Plant your Seedlings Indoors

Get a jump start on the garden season. Instead of creating a seedling bed outside, consider doing it indoors and then transplanting to the garden you prepare outside. Meanwhile, get your garden bed ready by amending the soil if needed. Well composted manure or bagged compost will help build soil health.

Read here to learn how to improve your soil, even if it is heavy clay soil like we have.

You may also consider buying seedlings from a nursery and then transplanting. Some good crops to start indoors: brussels sprouts, peppers, celery, cauliflower, cabbage, and broccoli.

Some herbs are also fairly easy to grow indoors, like thyme, basil, oregano, and parsley. Want to start an indoor herb garden? Read here to learn the easiest herbs to grow inside.

vegetables growing in a small garden plot
Use these simple and easy tips to make your small vegetable garden into a major source of fresh produce!


7. Use Railings for Planters

We usually overlook using the rails on our decks, balconies and patio. You can create good planter boxes on these railings and expand your gardening space considerably.

Make sure the railings are strong enough to hold the boxes. And make sure the garden boxes are deep enough to hold the plants roots! Certain vegetables have much longer roots than others.

spinach, carrots and lettuce growing in garden rows
Be sure to do some research on all of the vegetables you want to grow so you can properly prepare for how much space you’ll need.


8. Prioritize High-Yield Crops to Get the Most out of a Small Vegetable Garden

Since you may not be able to plant everything you want on the small piece of land, you may consider prioritizing crops which will give a higher yield.

Crops like lettuce, kale, chard, and radishes are perfect for this. They have a shorter growing span and they deliver high yields.

Seeding a new row every month will ensure you have plenty for the entire growing season. It’s a great way to get the most out of a small garden. Succession planting is a huge component of making the most of a small garden space!

Tomatoes growing in containers on a deck
Sometimes your veg garden can also be contained to pots and planters, which means you can place them just about anywhere!


9. Make Use of Pots and Containers

Pots and containers are an excellent way of extending your gardening space. You can prop them against the fence or place them on the patio.

Pots and large patio containers are excellent for growing crops and herbs that do not grow deep. We have grown lots of cherry tomatoes in large pots on a sheltered deck.

These grow bags are a fantastic way to add more growing space, even on apartment balconies.

Rhubarb Garlic and Chives grow in a raised bed
Now that you’ve got lots of info on how to grow crops in a small garden, I hope yours yields plenty of tasty produce!


10. Use Raised Beds to Get the Most out of a Small Vegetable Garden

Raised beds can actually give you more gardening area. When plants grow and need more space to thrive, they just fall over the side of the bed.

They will keep growing and producing and this results in more crops per square foot.

You can create raised beds using timber or steel. You won’t want to use pressure treated lumber to make raised beds. Chemicals can actually leach into the food you are growing.


Awesome Resources for Growing Vegetables:

Real ways to conserve on water in your gardens.

Our book will give you exactly what you need to know to grow a year’s worth of food in your backyard. Eat healthy organic food, save thousands of dollars and preserve extra fruits and vegetables to eat all winter long!

The perfect companion for that book, although not essential is our Vegetable Garden Planner. Plot your growing areas, record watering and fertilizing schedules, what vegetables to use companion planting with and lots more info to have the very best vegetable garden harvests as possible.

Hopefully you’ve got some great vegetable garden ideas for small spaces after reading these tips for growing a small garden! This book on Square Foot Gardening will also give you lots of tricks for increasing your harvests.

Planting a small garden will enable you to eat fresh healthy food at a fraction of the cost of buying produce. Even if you are limited to a small patio, you can grow pots full of salad greens and tomatoes!


More Articles on Gardening

  • Ever wondered how big of a container a Pepper plant really needs? Here’s an example of small container gardening.
  • Looking for Gardening gifts? Check out our Gift Guide for Gardeners.
  • Here’s the complete run down of how I plan a food garden for the year.


Filed Under: Grow Your Own Vegetables

How to Grow Carrots

By Annie

Learn how to grow carrots in your vegetable garden or in containers.

It’s not hard to grow carrots in raised beds in your vegetable garden. You can also easily grow carrots in pots on your patio. We’ve got all our best tips to grow straight carrots in this comprehensive guide.

Enjoy fresh carrot greens throughout the season and enjoy an early summer harvest of beautiful carrots for dinner. By late summer, you’ll be eating carrots as often as you like!

We’ve got the information you need to grow straight carrots (emphasis on straight!) and we’ll also share great tips for how to prepare carrots for long term storage in your cold room or root cellar. 

Plus, we’ll show you how to save carrot seed from this year’s plants to save for planting the next year.

Fresh harvested carrots on a counter after learning how to grow carrots.
Everything you want to know to grow carrots in the garden!

Aside from classic orange carrots, you can also plant other carrot varieties like yellow or purple carrots for some color variety and some subtly different flavors.

How to Grow Carrots

If your family loves carrots, you will find it’s well worth to plant some this year. They do need a few simple things (more on that below) but once they get growing, the maintenance becomes much easier.

Carrots love to grow in cool weather so they can be seeded as soon as you can work your soil in early Spring. Carrots love cold climates (although of course they also grow in more temperate climates); don’t be afraid to get your seeds in early. Once your soil can be worked, your are good to go.

You’ll be able to harvest fresh carrots from mid summer right through fall and into the beginning of winter is some gardening zones. Keep reading for specific tips and tricks we use every year here in our carrot patch.

What’s the Trick to Growing Carrots?

There are a few simple tricks and tips to growing carrots and we’ve listed them below for you!

How do Home Gardeners Grow Straight Carrots?

The number one tip of all our tricks is this:

You NEED rock free soil in the bed.

Growing healthy carrots also takes great soil, but you can never grow straight uniform carrots in soil that has lots of rocks and pebbles. If there are rocks, your carrot plants will find a way to fork around them and you will end up with some funky looking carrots.

So, before you seed, do the best job you can of removing any rocks!

Harvested carrots in a wicker basket.
Easier to grow straight carrots if your soil is loose and rock free.

What Month to Plant Carrots?

When to plant carrots depends on where you live and the last frost date for your area. You can sow seeds roughly 2-3 weeks before your last frost date. 

Soil temperature should not be a large concern, if you use the above information to guide you.

Check your seed packet for any specific information for the variety of seed you have. 

What Kind of Soil Do Carrots Love to Grow in?

Check to make sure the soil has a fairly neutral pH and low levels of nitrogen (you don’t want too much nitrogen); opt instead for soil rich in potassium and phosphate by using lots of organic compost or organic fertilizer.

You may also consider mulching the soil after your plants are up, to help retain soil moisture and also provide some weed protection. Another good layer of protection is some kind of fencing or row covers, which will block rabbits and other pests like insects who will find the carrots and dig down to eat them.

Carrots like to grow in full sun in loose fertile moist soil, that is well-draining. So work to provide a a spot with loose soil to about a foot deep, then sow your Carrot seed in there. In about 70 days you can pull up beautiful long carrots, depending on the variety.

a handful of harvested carrots from the garden
Here’s the one tip you need to grow large carrots.


Sowing Carrot Seed

Plant carrots by sprinkling seeds about 2-3 inches apart, then cover with soil. You can use your hand to cover the seed or do as we do. Just hand sprinkle a garden bed of carrot seed, then very lightly drag a rake across the bed. We then throw a little extra soil on top.

If you do it this way, you may find it helpful to mix your carrot seed with some fine sand, which helps with distributing the seed.

Germination and Weeding of Carrots

Remember that Carrots take awhile to germinate, so don’t worry if you cannot see a sign of germination for 10 days or so.

We sometimes seed a few Radishes in the rows as well. Radish germinates quickly, so we can tell where the Carrot leaves will come up.

This is very helpful when we are trying to do early weeding. Carrots (more than any root vegetable) are a bit of a pain to weed the seedlings. I find it turns into spending some time in the patch on my hands and knees, but the end result is worth it.

How to Thin Carrots

Thin the patch once the carrots roots are big enough to nibble on as baby carrots. Enjoy the foliage in salads.

As the season progresses, just keep harvesting carrots by thinning them, always removing those that are growing too close together.

The last carrots in the garden will have wonderful root growth, nice and thick and great for storing long term to eat over winter.

how to grow carrots, vegetable gardening
You can see here how closely the carrots can grow!

Planting Carrots in Beds Instead of Rows

Here’s about 10 rows of Carrots that were planted last year. We scattered seed, instead of planting strictly in rows. We find planting wider beds instead of rows results in harvesting more carrots.

I just make sure we can reach across the bed for weeding, without stepping in it. And we stay on top of thinning the carrots, removing those too close together.

By the way, if you are wondering what is growing above the carrot bed, that is Buckwheat that has just come up. We find a great way to improve garden soil is to use Buckwheat! You can read more about that if you’re interested in building fertility.


carrots sitting on a counter.
Look how beautiful and vibrant these carrots are!

An early harvest of Carrot thinnings and Lovage. Lovage is a wonderful herb and we have a perennial plant, so it keeps returning every year. Each Spring, I cut lots of stems so I can dry Lovage, as well as other herbs.

By the time mid-Summer rolls around, we are able to harvest carrots fresh for our dinner table. We have also used them to make our own homemade Carrot wine!

But we always grow lots so that we can keep some over Winter. I have canned carrots before to eat over winter, but we prefer them fresh or stored in our root cellar.

How to Store Carrots for Winter Use

storing carrots in a bucket with layers of soil.
This is the best way to keep carrots fresh and great-tasting through the winter. Just be sure to wash before eating!

Although we’ve eaten lots of carrots during the season, along comes the fall harvest. We pull up the remaining carrots from the garden for long term storage.

In the picture above, you can see how we store the Carrots. I take a bucket or a heavy plastic tote like this one down to the garden, and put a layer of soil in. This cold room storage method keeps the carrots fresher for longer, rather than storing them in a refrigerator.

Then I use my gardening pitchfork to carefully pry up soil around the carrots. Don’t try to pull them by hand unless you have very loose soil.

It is very easy to snap the greens off the top and then you are left with the root still stuck in the ground.

After getting the Carrots out of the ground, I trim the greens. Do NOT trim them right down, just leave an inch or so. Then put a layer of Carrots into the bucket. Add another layer of soil. Then add another layer of Carrots.

Keep going until your storage bucket is full. Make sure the top layer is soil, enough to completely cover the Carrots. Now they are ready to be stored in the Cold Room or your basement, wherever you can keep the temperature between 32 and 40F.

We do this every Fall and come January, the carrots we get from the Cold Room are just as delicious, firm and sweet as the day we harvested them in October or November.

How to Save Carrot Seeds

blooming carrot leaves.
Carrots can also make a beautiful addition to your garden.

If you grow an Heirloom type of Carrot, why not leave one or two in the ground over Winter? Choose a few carrots and once really cold weather hits, cover the tops with a good layer of mulch to help protect the plant.

The following Spring, remove the much and soon enough, you will see some new growth coming from the Carrot tops. Leave the Carrots alone until the Fall.

You will see your Carrots  start to bloom then flower. When they are finished flowering, they will produce seeds on the top. Gather these and plant them the following year.

You won’t need to buy Carrot seed the next year – you can start planting your own. Do this every year with a Carrot or two and you will never need to buy Carrot seed again.

So, grow carrots this year. They are a great source of Vitamin A, which you need for good eye health and most people like them. Why not plant a row or two this year?

Some Varieties of Carrots

Read seed packets for information specific to the variety such as length of time to maturity, mature size, days to harvest time and more.

  • Nantes – cylindrical and sweet with a crisp texture
  • Red Core Chantenay – sweet with a unique red color
  • Royal Chantenay – a great variety for juicing
  • Danvers – a classic heirloom carrot that’s suited for heavy soil and has a rich dark orange color
  • Imperator – this variety keeps its sweetness and crunch in storage
  • Thumbelina – also called Paris Market, this variety produces round and bite-sized carrots
carrot leaves growing in a garden.
Follow this guide for delicious and crisp carrots!


More Articles You’ll Love

  • How to grow big Potatoes – everything you need to know.
  • Want to grow awesome Onions? Here you go…
  • Zucchini are really easy to grow and you will get huge harvests! Here’s how to grow just enough Zucchini.


originally published 2011; latest update March 2026.

Filed Under: Grow Your Own Vegetables Tagged With: Carrot

  • « Previous Page
  • 1
  • …
  • 3
  • 4
  • 5
  • 6
  • 7
  • …
  • 10
  • Next Page »

Connect With Us!

  • Email
  • Facebook
  • Instagram
  • Pinterest
  • Twitter

Search this site

Generic selectors
Exact matches only
Search in title
Search in content
Post Type Selectors
Search in posts
Search in pages

Our Most Popular Posts

Garlic cloves in oil

How to Preserve Garlic in Oil – and Other Ways to Store Garlic

a open jar of pickled brussel sprouts on a counter

Easy Pickled Brussels Sprouts Recipe (Water Bath Canning)

Privacy Policy

Read about our Privacy Policy

Disclosure

Please note that some of this site’s links are affiliate links, and CountryLivinginaCaribooValley.com is a participant in the Amazon Services LLC Associates Program, an affiliate advertising program designed to provide a means for us to earn fees by linking to Amazon.com and affiliated sites. At NO ADDITIONAL COST TO YOU, I will earn a small commission, if you purchase them. I recommend them as they are good products.

Theme Design By Studio Mommy · Copyright © 2026