Country Living in a Cariboo Valley

Homesteading in BC

  • How to Get Started
  • Vegetable Gardening
  • Preserving Food
  • Recipes
  • Homemade Wine Recipes
  • About Us
  • Work With Me
  • Shop
    • Vegetable Garden Planner Printable: Grow Your Best Garden Ever
    • Grow Enough Food for a Year
    • Delicious Dandelions: A Recipe Collection
    • Dirt to Dollars: Selling at the Farmers Market
    • 8 Pounds in 8 Weeks: Raising Chicks for the Dinner Table
    • Making Wild Wine
    • Build a Hanging Chicken Feeder
    • 15 Things to Know About Living in the Country

How to Make Homemade Pizza Dough – Recipe

By Annie

The evenings and mornings are getting a lot cooler. And once colder weather hits, we often have homemade pizza. Here’s a homemade pizza dough recipe that is super simple.

Our days are still busy although I know it won’t be long now until the garden is completely tucked in for the winter. Then our days get a lot easier, in that the harvesting and a lot of the canning has been done. 

The freezers are full, not only of meat but also berries and frozen greens, broccoli and cauliflower. The sauerkraut has been made and canned up and put away. Later in the Fall will come the time for pulling the berries out of the freezer and making jam or wine or both.

A few years ago, I canned a lot of tomato sauce and we still have a few jars left. We also have quite a few jars of homemade Pizza Sauce on hand and it is so tasty.

How to Make Pizza Dough at Home


Here’s a recipe for Sicilian Pizza Crust – get a batch of dough ready and add whatever toppings you like or have on hand.

adding yeast to warm water to make pizza dough


Dissolve the yeast in the warm water. I like to let it sit for 10 – 15 minutes.

Then stir in the salt and olive oil. Finally, add in the flour.

Knead the dough about one minute, just until it is smooth. Let it sit and rest for about 20 minutes. Then cover and keep the dough warm for 1/2 hour.

I usually turn on the oven, set the bowl with the dough on top and cover with a clean tea towel. 

Cover your pizza pan with olive oil. Extra virgin olive oil is the best kind of oil you can ever use.

Buy it in bulk and transfer some to a small bottle to keep on the counter. Keep it close by and use it all the time.

Your body will thank you for it.


I grew peppers, onions, oregano and garlic to make homemade pizza


Here come the toppings – homegrown onions, peppers, garlic and oregano. I added some store bought mushrooms and some pizza sausage.

Also had to buy the cheese, as we don’t have a cow and don’t have access to the goat cheese we usually get (which is awesome and I wish my friend would come back so we could get more!)


add homegrown herbs to pizza for a wonderful taste explosion


Homegrown Oregano, what is better than using lots of fresh herbs in your food? Bonus  that I just clipped off a branch in order to make the pizza.

There’s nothing like using fresh herbs – try it and put that salt shaker away. Herbs taste much better!


I made my own dough for our homegrown pizza

Home made Pizza Crust

Back to the dough – split the dough into 3 or 4 separate balls – I do 3, because we like a bit thicker pizza crust.

If your family really likes thin crust pizza better, you can get 4 balls of dough out of the recipe.


homemade pizza dough pressed into olive oil covered pizza pan


Press out your dough onto the coated pizza pan. Take the other 2 or 3 balls, put them in separate containers and toss them in the freezer.

Now you’ll be able to quickly make a pizza when you are running out of time or ideas for creative dinners.


make and can your own pizza sauce


The Pizza Sauce – this tastes so good. This sauce is nice and thick and we love it.

I can it in half-pint jars and we use a whole jar on one pizza.


I added peppers, onions, mushrooms and lots of mozzarella cheese


Add your toppings and bake in a preheated oven. Bake it at  425F degrees for about 18 minutes.

Let it cool for 5 minutes and then slice it into pieces.


make your own pizza dough, sauce and grow your own toppings


Pour a nice glass of red wine and enjoy with your dinner. Add a green salad and you are set to go!

 

home made dough rising for pizza crust

Homemade Pizza Dough Recipe

Yield: 3 pizza crusts
Prep Time: 1 hour
Cook Time: 20 minutes
Total Time: 1 hour 20 minutes

This easy Sicilian Pizza Dough recipe makes 3 pizza crusts. Just pop extras in the freezer for a quick meal later.

5.0 Stars (2 Reviews)

Ingredients

  • 1 pkt (2 1/4 tsp. yeast)
  • 2 cups warm water
  • 1 tbsp salt
  • 4 tbsps olive oil
  • 5 cups flour

Instructions

    Dissolve the yeast in the warm water. Let it sit for 10 - 15 minutes.

    Stir in the salt and olive oil.

    Add in the flour.

    Knead the dough about one minute, just until smooth.

    Let dough sit and rest for about 20 minutes.

    Cover and keep the dough warm for 1/2 hour.

    Split the dough into 3 or 4 separate balls, depending on desired thickness.

    Put extra dough balls in separate containers and put in freezer.

Nutrition Information:
Yield: 24 Serving Size: 1
Amount Per Serving: Calories: 115Total Fat: 3gSaturated Fat: 0gTrans Fat: 0gUnsaturated Fat: 2gCholesterol: 0mgSodium: 292mgCarbohydrates: 20gFiber: 1gSugar: 0gProtein: 3g

Did you make this recipe?

Please leave a comment on the blog or share a photo on Pinterest

Cuisine: Italian

Enjoy this homemade pizza dough recipe and make a fast and easy dinner.


Our entire Country Living in a Cariboo Valley Recipe Collection can be found here

Filed Under: Food, Recipes

Being a Tightwad Can Save You Thousands of Dollars

By Annie

Earlier, I wrote about a few ways to stretch out the budget. No matter how much money you have (or don’t have) it’s always a good idea to set a budget and then stick with it.

We always try to keep as much money in our jeans as possible. There is nothing wrong with being a tightwad!

Saving more money is always a good thing.

Here are a few more ways that we save money every month


reduce debt, save money


Buy groceries on sale

Does your grocery store have a monthly case lot sale? If so, this is the time to stock up on the foods your family eats on a regular basis.


a cart full of groceries at the supermarket


We can save up to 45% buying our favourite soup in a case of 12, instead of buying the cans one at a time when they aren’t on sale.

We don’t eat very much processed food, but there are certain things we do buy. Building up a good supply of these items means we are saving a good chunk of money.

It also means we save the gas money and time it takes to make a weekly grocery store run! This equals more money in our wallet.


Buy food in bulk

Who buys toilet paper when it goes on sale? I know I do; it’s something every single person needs and uses, unless you are looking into alternatives. I am not 🙂


a bulk section in a grocery store


However, whenever I am in the grocery store and I see a good sale on toilet paper, I buy at least two 12 packs and maybe more.

I get teased a bit about it, but guess what? We never run out and I never pay full price. That’s a good deal in my book.


Start canning and preserving your own food or fresh food you can buy in bulk

Check out all our canning and preserving posts and start stocking up on food. Buy seasonally when it is much cheaper!

Then, can it in jars and eat it all winter when produce prices are really high.


home preserved fruits and vegetables sit on a counter


Water bath canning is a great way to learn how to start canning your own food. Once you are comfortable with that canning process, try pressure canning.

All meats and fish need to be pressure canned. Some vegetables do as well.

Stop spending money on new clothes

We don’t often buy new clothing. I still have things in my closet that I wore 15 years ago when I worked in an office and had to dress up.

Good thing I have always tended to stay away from trendy and buy more tailored classic clothes, because they still haven’t gone out of style!


clothing hanging in a thrift store


Sometimes, I go to thrift stores. They even have awesome sale days where sometimes you can fill a shopping bag for $1 or $2. How much better can it be?

I can always find work clothes and even nice Tee shirts, shorts and jeans, plus I am saving more money.

If you are looking for something a little more dressy, hit up consignment shops. You can get beautiful clothing for a fraction of the retail price.

Read the store flyers – you will be saving more money

Whether you’re looking for clothing, food, sports equipment or pretty much anything else, it’s a good idea to always check your favourite store websites and flyers and see what’s new and on sale.


a sale flyer from the grocery store sits on a table


These days, almost all the big box stores offer shopping online. It’s easy, you can get things on sale and lots of online stores offer free shipping!

Another bonus is that you can just shop from home, instead of using fuel and valuable time to go to the store.

Read more about how to save money every month:

Find out how this Texan mom feed her family of 3 an all organic diet for less than $200 a month! And you can too!

Want to read about more Budget Stretching Ideas?

Here’s 5 Ways I am Saving Money Right Now!

Find yourself with more month than money? Here’s how we make sure we Have Money at the End of the Month

How to Save Money with a Big Family


Filed Under: Save Money

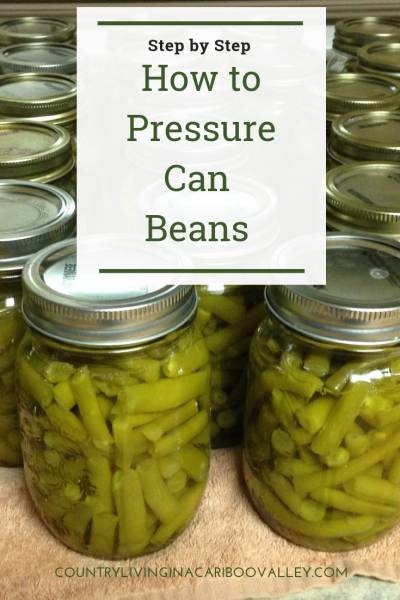
How to Can Green Beans – Pressure Canning

By Annie

Once you learn how to can green beans, you’ll become more comfortable with pressure canning.


We love home canned beans. I love growing and harvesting beans off our Scarlet Runner plants. We like to grow pole beans because the harvesting is so easy. We don’t have to bend down, plus the beans are always clean because they aren’t in touch with the soil.

I want to show you how to can green beans in your own kitchen. Whether you grow them or buy them in bulk, canning beans at home is a great way to preserve some of your own food. But first, let’s talk about how beans need to be canned and that’s in a pressure canner.

Canning fresh beans starts with picking a basket of beans.

When it comes to doing any kind of pressure canning, I am very serious about the process. I don’t mean to scare you – I home can cases and cases of vegetables and we eat from our cold room all winter long.

However, pressure canning is serious business. If it isn’t done properly, the food can spoil. You can make your family very sick by eating improperly canned food.

So learn the process and then treat it like a serious process – each and every time you do home canning. Here’s some more important information about how to use a pressure canner. That article covers using weighted gauge pressure canners and dial gauge pressure canners.

How to Can Green Beans – Equipment Needed

Green beans MUST be canned using a pressure canner. The only exception is if you are making pickles from the beans.

Pressure canning is the only safe method to can most vegetables.

It is unsafe to be:

  • canning beans in a hot water bath canner
  • canning green beans in a pressure cooker

So, yes you need a pressure canner and there are many on the market. We like and have used All American, Mirro, Presto and others. I can recommend any of these brands. I’ve had a Mirro pressure canner for more than 12 years now and just love it. 

How to can green beans from the garden.
Trim the ends of freshly picked beans to get them ready for canning.

Here’s an awesome harvest of 18 pounds of green beans. By the end of the day, we will have lots of pint sized mason jars full of safely home canned beans.


freshly picked greens including kale and lettuce in a basket.
A good harvest of freshly picked greens.

In the coming weeks, I’ll be harvesting and emptying the garden. There is a LOT of food that needs to be brought in. Potatoes, carrots and beets all need to be dug. Want to read about how to store potatoes for months? 

I’ll be glad to get these fresh beans canned up and off my list!

How to Pressure Can Green Beans

cut green beans sit on a cutting board.
Trim the ends of the beans, then slice to the size you like. Around an inch is usually good, but you can go larger or smaller.

I prefer using a hot pack method for doing beans. To hot pack your green beans, cut the ends, snap the raw beans into approximately 1-inch pieces, wash them and then blanch them for a few minutes in a large stock pot with lots of water (you will need that water again when filling jars).

You can also skip the blanching step to raw pack instead–which method you use depends on your preferences.

Getting Mason Jars ready for Canning

Wash canning jars with hot water and soap and rinse them well. For the glass part of the jar, it can also be a good idea to boil water and submerge them to be sure they’re completely sterile.

I usually use pint jars because they fit in my canner, but quart jars may also be an option, especially if you have a larger family.

Then soak the canning seals in hot (not boiling) water for about 10 minutes to soften the rubber. Get the jar rings ready and your canning kit out.

I put 3 1/2 quarts of water into the pressure canner and then begin to fill jars with the hot beans, using a canning funnel. I add the liquid leaving a half inch leaving a half inch to 1 inch of headspace for each jar.

Wiping the rim of the mason jar after filling.
Wipe the rim of the mason jar after filling.

Use a butter knife to move around the inner side of the jar to remove air bubbles. Wipe the rims of the jars (I use a clean piece of paper towel) to help ensure a good seal, put the seals on, twist the screw band on tight and finally set each jar in the pressure canner.

As an optional step, place a teaspoon of canning salt in each jar before adding the beans. Be sure you don’t use regular table salt, as this contains iodine that we don’t want inside our cans or jars.

My canner load is about 7 pints, but you can get taller ones so you can process 14 pints at a time.

Jars of beans sit on a counter after being pressure canned
You’ll have great quality home-grown green beans all year long with this canning method!

Just be sure to have a metal canning rack on top of the first layer of jars. You will want to keep the layers separated from each other.

You don’t want the jars in contact with each other during process time, so keep this in mind when you place your jars into the canner.

A pressure canning coming up to heat.
We like to do our canning outside if we can.

Using a Pressure Canner

Put the lid on and then place the canner on the heat. Put it on high (make sure the weight is NOT on!) and once steam starts pouring out the top, let it go for 10 minutes. Just let the steam keep coming out of the vent.

We do most of our canning outdoors on a propane burner, but you can also use your stovetop burner.

After 10 minutes, add your weight (since we are at 2850 feet elevation, I can everything with 15 pounds of pressure).

If you are below 1000 feet altitude, you will can with 10 pounds weight.

Once the weight has been added, let the pressure canner go until the first release of steam.

Once that happens, you should lower the heat under the canner, likely to between low and medium.

Also set your timer for 20 minutes for pint jars (for beans). Check the time required for each type of  vegetable or meat you want to can.

Meat is usually 90 minutes but it is very important to check the recipe.

Every once  in a while, the pressure canner will let off a big release of steam and pressure.

This is normal. Although scary. Especially when you first start canning. Don’t freak out, all will be well!


Opening the Pressure Canner

Once your timer goes off, turn off the heat under the pressure canner. Then…wait. Do NOT open the canner lid right away or jiggle the weight to release the pressure.

It’s important to let the canner cool down naturally. Only then, do you lift the lid.

Lift the lid AWAY from you. There will still be some steam inside the canner and you don’t want to get hit in the face with it.

Lots of jars of home canned green beans after being pressure canned.
Leave the jars alone for 24 hours after canning.

Remove the jars right away using a jar lifter and set them on a towel or blanket on your counter or wherever they can sit for 24 hours without being disturbed. At all.

Within a short time you will hear the jars pinging. This means they are sealing and that’s a good thing!

Don’t move them or shake the jars – they must be left to settle and seal on their own.

a basket full of beans and below that are jars of freshly canned beans.
This is a comprehensive guide to canning your own green beans from home!

The next day, tap the lids of each jar. You will definitely hear the difference between a sealed jar and an unsealed one. If a jar hasn’t sealed, you can either pressure can it again or just put it in the fridge.

Be sure to use it up within a few days. From the 18 pounds of fresh beans, I ended up with 33 pints of canned beans.


Other Home Food Preservation Instructions

  • How to Can Salmon and Other Fish – for a complete guide on pressure canned fish.
  • Make and Preserve Pickled Beets – quick and easy water bath canning method.
  • How to Make and Can Tomato Sauce – another easy to pick up water bath canning guide.
  • How to Blanch and Freeze Garden Peas – a super easy way to enjoy garden peas all winter!

    trays of blanched peas waiting to be put in freezer.
    You can preserve other vegetables too, like peas.


originally published 2016; updated June 2022

Filed Under: Canning

Easy Homemade Granola Recipe

By Annie

This Homemade Granola Recipe is so simple to make but you can enjoy it in so many different ways. This crunchy and versatile recipe is perfect for breakfast or a filling snack!

Berries and granola sit in a bowl on top of yogurt.
This easy homemade granola is a delicious and crunchy way to fill you up and satisfy you!

Why You’ll Love This Homemade Granola Recipe

Do you like granola? With all the nuts, berries and oats mixing it up together, granola is a healthy and delicious breakfast food. Here’s our homemade Granola recipe. 

Pour some over top of yogurt, or enjoy as a cereal with milk. Granola is filling too, so it will keep you going for awhile.

Here’s a great Homemade Granola recipe that friend passed along to me and we love it.

It’s easy to make and you can add any kind of dried fruits or nuts to the recipe.


Homemade granola in a bowl with yogurt and berries.
This granola is extremely versatile; you can serve it in so many different ways!

Ingredients

  • honey – provides some natural sweetness and helps the granola stick together.
  • oil – allows the granola to get nice and crunchy while baking–use something neutral, like coconut oil.
  • oats – you’ll want to use rolled oats (also called old fashioned or whole oats) for this recipe.
  • mixed nuts and seeds – for this ingredient you can really change things up and make this easy homemade granola your own and add all of your favorites!


Homemade granola with yogurt and blueberries.
This granola is perfect for a hearty breakfast or a nice filling afternoon snack.


How to Make Homemade Granola

  1. Mix together honey, oil, and water.
  2. Add the oats and mixed nuts and seeds. Be sure to stir well to be sure that everything is well coated in the liquid mixture!
  3. Bake around 250 degrees F for an hour and a half, stirring every 15 minutes or so. Low and slow is what will give your granola a toasty crunchiness!
  4. Cool completely and store in something airtight.


Variations and Serving Suggestions

  • Homemade granola goes great over top of yogurt, or you can eat is as a cereal with some milk.
  • You could also add granola to some pancake or waffle batter for added texture and flavor, or sprinkle on French toast.
  • There are a number of oils you could use to make this granola, and each will alter the flavor just slightly. Grapeseed, vegetable, canola, coconut, and sunflower oil are all potential options.
  • In regards to seeds and nuts, there are so many delicious options. For seeds: pumpkin, chia, sesame, sunflower kernels. For nuts: slivered almonds, pecans, walnuts, hazelnuts, peanuts.
  • Other potential add-ins include coconut flakes, dried cranberries or raisins, dried cherries, or dried apricots.
  • Maple syrup can be used instead of honey for sweetening.
  • You might also throw some spices into this granola, like cinnamon or some salt to balance out the sweetness.
  • Serve with fresh blueberries, strawberries, bananas, your your favorite fruit.


More Breakfast Recipes

Our entire Country Living in a Cariboo Valley Recipe Collection can be found here, but check out these other great ideas for delicious breakfast dishes!

  • Easy No Cook Strawberry Jam
  • Pumpkin Cranberry Banana Bread
  • Pickled Eggs
  • Lemon Loaf Cake with Rosemary Glaze


Homemade Granola Recipe

If you enjoy this recipe for easy homemade granola, please be sure to rate it 5 stars below!

Homemade Granola

Homemade Granola

Yield: 9 cups
Prep Time: 15 minutes
Cook Time: 1 hour 30 minutes
Total Time: 1 hour 45 minutes

This healthy Granola recipe makes a large batch so you can store the extra and use later. Or use every day with yogurt or as a trail mix. Add your favourite nuts and fruits to change things up.

5.0 Stars (2 Reviews)

Ingredients

  • 1/2 cup honey
  • 1/2 cup oil
  • 6 cups oats
  • 1/2 cup water
  • 2 – 4 cups mixed nuts & seeds, I used 3 cups and wished I had more

Instructions

  1. Combine the honey, oil and water. I use Coconut Oil (a solid at room temperature)so I heat it up and then mix the first 3 ingredients together.
  2. Add the 6 cups of oats and mixed nuts & seeds (I had 3 cups), give it a good mixing and then spread it out on some cookie sheets.
  3. Bake at low temperature (around 250 degrees) for about an hour and a half. Make sure you give it all a good stir every 15 minutes. Bake it until it's toasty and crunchy. Let it cool completely and store in a canister.
  4. We enjoy it on yogurt with fresh fruit - it's delicious!

Did you make this recipe?

Please leave a comment on the blog or share a photo on Pinterest

© Annie

First Published August 2016; Updated February 2021

Thanks for checking out this recipe. For more, follow me on Facebook, Pinterest, Instagram, and Twitter!


Granola and berries on top of yogurt in a bowl.
Once you learn how simple it is to make your own granola, you’ll never go back!
 
A jar full of granola decorated with flowers and twigs.
Easy homemade granola makes for a lovely gift for loved ones, or just a delicious treat for yourself!

Filed Under: Recipes

Turmeric Garlic Pork Chops – Recipe

By Annie

These Turmeric Garlic Pork Chops are a simple but tasty way to incorporate some turmeric into your diet and enjoy all of the great flavors and health benefits.

Turmeric Garlic Pork Chops alongside grilled vegetables.
These turmeric garlic pork chops are so hearty and delicious!

Why You’ll Love Turmeric Garlic Pork Chops

Here is a fantastic dinner recipe that uses garlic and turmeric; it’s easy and what a fantastic flavor this dish has. Here is a fantastic dinner recipe that uses garlic and turmeric.

We took out some of our homegrown pork steaks from the freezer. Those weaner pigs we raised last year are still rewarding us with great tasting pork. Here’s some great info about about raising and butchering pigs for your family if you’re interested yourself!

Graham wanted a recipe using turmeric with pork, and we found lots of great ideas, but….we haven’t been to the grocery store in a while and we didn’t have all the ingredients we needed.

So, Graham made one up – he loves cooking and often improvises. Here’s what he came up with!


Ingredients

  • turmeric – this spice has a distinct earthy flavor and boosts the immune system, works as an anti-inflammatory, and has a number of other benefits for your health!
  • cayenne pepper – gives your pork chops some added heat and plays perfectly off the spice.
  • garlic – this recipe uses fresh and smoked to give you a great variety and spectrum of flavors.
  • pork chops – pork is a great source of protein and also includes lots of vitamins and minerals that can contribute to cardiovascular health. We usually use bone-in pork chops.


How to Make Turmeric Pork Chops

  1. In a small bowl, combine turmeric, cayenne pepper and smoked garlic and crush, using a mortar and pestle if needed.
  2. Peel and finely dice a head of garlic and set aside.
  3. Rub half of the spice mix into the surface of the pork chops. Turn over and do the same to the other side.

    Pork chops sprinkled with turmeric and baked with garlic.
    Be sure to rub your chops thoroughly with the spice mix and allow them to sit for that flavor to really develop.
  4. Let the pork sit for a few minutes to let the flavor settle into the meat.
  5. Add some butter or olive oil (or vegetable oil) to a grill pan or fry pan, then heat the pan over medium or medium-high heat, seasoning with the diced garlic.
  6. Add the pork chops, turning them over half way through cooking. Make sure the chops are well cooked.

    Pork chops frying in a pan.
    We always use our cast iron frying pan – ours is a Lodge, which is made in the US. It’s been used in our kitchen for years and we use it almost every day!

Serving Suggestions and Variations

  • Serve with fresh garden veggies! We enjoyed freshly picked green beans and zucchini, lightly fried with (of course) more garlic. Broccoli, onions, and carrots also go perfectly with this meal.
  • Add a Cheddar Biscuit Bun or a nice side salad. This is another homegrown meal for us. A homegrown meal made even healthier with all that garlic and turmeric!
  • Use at least one large garlic clove for this recipe; discard it after cooking if you don’t want to serve it. We love the stuff so if anything we always go overboard with it!
  • This spice rub is so simply and easy, so feel free to add other spices if you want to broaden the flavor profile! Black pepper, salt, ginger, kosher salt, paprika, red pepper flakes, cumin, chili powder, and other spices that are strong and warm will pair perfectly with the turmeric.
  • Serve over white or brown rice, cauliflower rice, or noodles.
  • If you really like the flavor, add another teaspoon ground turmeric. It’s good for you!
  • You can glaze the pork cutlets with a cup honey and a bit of Dijon mustard. Some pineapple juice also adds a great flavor!
  • For extra flavor, add about a tablespoon fish sauce or a couple teaspoons oyster sauce while cooking.
  • Garnish with some thyme, parsley, lime wedges or cilantro.
  • Add a squeeze of fresh lime juice for a burst of acidic flavor. Add a bit of lime zest too!
  • This recipe also works well for chicken breasts. We usually chop up a bunch of green onions to add.


Cooked pork chop on a plate with vegetables and a biscuit.
There are so many delicious sides that pair perfectly with these pork chops. Experiment to find your favorite combination!

Other Fantastic Dishes

Our entire Country Living in a Cariboo Valley Recipe Collection can be found here, but here are some highlights!

  • Our Homemade Granola makes for a hearty breakfast – mix it with yogurt or just a splash of milk.
  • These Bacon Wrapped Garlic Bites make a wonderful appetizer along with a glass of wine.
  • This homemade Crab Chowder makes for a filling dinner along with a biscuit and salad.


More Turmeric Recipes

  • Here’s a Smoothie Recipe using Turmeric.
  • How about either hot or cold iced teas?
  • Want to grow your own Turmeric? Here’s how!
  • Mother Earth has lots of information and recipes, why not try a Kraut with Tumeric?

Start incorporating this wonderful healthy spice into your family meals. Boost your immune system and improve your health!


A spoonful of turmeric.
Turmeric is healthy and tastes great on pork chops!


Turmeric Garlic Pork Chops Recipe

If you enjoy this recipe for pork chops, please be sure to rate it 5 stars below!

Turmeric Garlic Pork Chops

Turmeric Garlic Pork Chops

Yield: 4 servings
Prep Time: 20 minutes
Cook Time: 20 minutes
Total Time: 40 minutes

Turmeric and Garlic spice up this pork dish. Perfect for dinner served along with fresh grilled vegetables and home made biscuits,

5.0 Stars (2 Reviews)

Ingredients

  • 1 1/2 teaspoon Turmeric
  • 1 teaspoon Cayenne pepper
  • half a head of fresh or cured Garlic
  • 1 teaspoon Smoked Garlic
  • 4 Pork Chops or Steaks

Instructions

  1. Combine the Turmeric, Cayenne pepper and Smoked Garlic and crush, using a mortar and pestle if needed.
  2. Finely dice the head of Garlic and set aside.
  3. Rub half of the spice mix into the surface of the pork chops. Turn over and do the same to the other side. Let the pork sit for a few minutes to let the flavour settle into the meat.
  4. Heat your pan, seasoning it with the diced Garlic.
  5. Add the pork chops, turning them over half way through cooking.

Notes

  • Serve with fresh garden veggies!
  • Add a Cheddar Biscuit Bun or a nice side salad. A homegrown meal made even healthier with all that garlic and Turmeric!

Nutrition Information:
Yield: 4 Serving Size: 1 Servings
Amount Per Serving: Calories: 499Total Fat: 28gSaturated Fat: 10gTrans Fat: 0gUnsaturated Fat: 13gCholesterol: 185mgSodium: 117mgCarbohydrates: 4gFiber: 1gSugar: 0gProtein: 55g

Did you make this recipe?

Please leave a comment on the blog or share a photo on Pinterest

© Annie

First Published August 2016; latest update Jan 2025

Thanks for checking out this recipe. For more, follow me on Facebook, Pinterest, Instagram, and Twitter!


Cooked pork chops with garlic and turmeric rubbed on them.
This simple but flavorful recipe will become a new favorite!


Filed Under: Recipes

  • « Previous Page
  • 1
  • …
  • 40
  • 41
  • 42
  • 43
  • 44
  • …
  • 53
  • Next Page »

Connect With Us!

  • Email
  • Facebook
  • Instagram
  • Pinterest
  • Twitter

Search this site

Generic selectors
Exact matches only
Search in title
Search in content
Post Type Selectors
Search in posts
Search in pages

Our Most Popular Posts

Garlic cloves in oil

How to Preserve Garlic in Oil – and Other Ways to Store Garlic

a open jar of pickled brussel sprouts on a counter

Easy Pickled Brussels Sprouts Recipe (Water Bath Canning)

Privacy Policy

Read about our Privacy Policy

Disclosure

Please note that some of this site’s links are affiliate links, and CountryLivinginaCaribooValley.com is a participant in the Amazon Services LLC Associates Program, an affiliate advertising program designed to provide a means for us to earn fees by linking to Amazon.com and affiliated sites. At NO ADDITIONAL COST TO YOU, I will earn a small commission, if you purchase them. I recommend them as they are good products.

Theme Design By Studio Mommy · Copyright © 2026