Country Living in a Cariboo Valley

Homesteading in BC

  • How to Get Started
  • Vegetable Gardening
  • Preserving Food
  • Recipes
  • Homemade Wine Recipes
  • About Us
  • Work With Me
  • Shop
    • Vegetable Garden Planner Printable: Grow Your Best Garden Ever
    • Grow Enough Food for a Year
    • Delicious Dandelions: A Recipe Collection
    • Dirt to Dollars: Selling at the Farmers Market
    • 8 Pounds in 8 Weeks: Raising Chicks for the Dinner Table
    • Making Wild Wine
    • Build a Hanging Chicken Feeder
    • 15 Things to Know About Living in the Country

Canning Inventory Checklist – A Free Printable

By Annie

I had to go down to the cold room yesterday to put away a few more filled canning jars. And I realized it is a mess down there! I really needed some kind of printable canning inventory checklist to keep track of our food storage.

I needed a canning list that I can keep in the kitchen and just make a new note every time we can some more food for the pantry. 


dozens of home canned mason jars of food, and eggs, garlic and onions on a stove top


Free Printable Canning Inventory Checklist

I made something yesterday that will help me so much with knowing exactly what is in my canning room. 

And I want to tell you about it so you can download your own free printable canning checklist!


Ever year, we can jar after jar of fruits, vegetables and fish including:

  • pickles
  • jams
  • jellies
  • sauerkraut
  • berries
  • tomato sauce
  • all kinds of vegetables
  • salsa

and other food as well. So it doesn’t take long to forget exactly how many jars of beans I still have on hand. 


getting mason jars of salmon ready to go in pressure canner


Pantry Organization

I love it when my food storage is well organized. I have my cases of empty mason jars stacked in quarts, pints and half pints.

One stack is quarts, another pints, and so on. Usually I keep the boxes of empty jars on one side of the (very small) room.

This helps me know, at a glance, how many empty jars I have on hand. Do I need to buy more? I can tell with one look.

On the other side of the room we have strong shelves along the length of the wall.

On these shelves are the boxes of full jars, labelled on the outside. I usually just tape a labelled paper on the outside with the contents of the boxes.

That way, it makes it easy to reuse the same boxes, just rip of the label and put a new one on when needed.

So I do start out organized. It just never stays that way.

Over the course of the year, it always ends up that full jars get mixed in with empty jars.

And I really needed a better system to keep track of my jar totals.

This canning inventory chart is really going to help me organize our food storage better. And I’d love for it to help you too!


Sign up for our newsletter and

download your own copy of my printable

Canning Inventory Checklist


printed Canning checklist to keep track of home canned food


How I can Benefit from my Canning Checklist


Every time I finish a pressure canning session, I will just add it right away to the inventory list. 

And when I do water bath canning and end up with more jars of pickles, I can add that to the list!

There’s 6 columns set up – item, how many jars and I’ve included the size of the canning jars.

Since I’m using pencil, I can update the amount when I need to.

This checklist can be a great balance with your canning goals at the beginning of the season. What’s left to can?

Do we need another 12 jars of chicken broth?


A canning inventory checklist in front of home canned jars.


Download your copy of this Canning checklist and get your canning organized!


Sign up for our newsletter!

Sign up here and then download your

Free printable Canning Inventory Checklist!


Looking for Canning articles?


Here are links to every article about food preservation on this site.


Filed Under: Canning

Quick Pickled Pearl Onions Recipe for Canning or Fridge

By Annie

These easy and flavorful Pickled Pearl Onions are the perfect recipe for anybody who’s new to canning.

With just a couple of simple ingredients, you can have your own pickled onions to use in drinks, condiment trays, or cooking. Here’s a quick and easy pickling recipe.

Water bath canning is a great way to learn how to can and these quick pickled pearl onions just need a short processing time.


Pickled pearl onions that are red in a canning jar with rosemary and peppers.
Pickled Pearl Onions are great to use on a condiment tray, in cocktails or in salads.

Why You’ll Love this Pickled Onions Recipe

You can use either the small pearl onions or sliced regular size onions. And you can cut the recipe if half if you don’t want to can them and store the finished jars in your fridge. Or, make a full batch and then water bath can the jars so they can be safely put into your food storage.

Onions are really easy to grow, but if you don’t have a vegetable garden then just buy the onions instead. Sometimes you can find a great deal on pearl onions at the store, your local farmers market or at a farm store near by.

Onions are inexpensive and they are easy to store whole to use over winter. Here’s how we store onions all winter long. But if you like pickles and you like onions, whip up a batch of these pickled onions. 

Add them to meat based dishes, tacos or wraps and even in salads. Enjoy them with other pickles on a condiment tray. Or, just eat them right out of the jar.


Ingredients Needed

  • pearl onions – you’ll want to make sure they’re peeled before you pickle them.
  • pickling vinegar – this typically means your classic white vinegar, but apple cider vinegar can be used for a specific flavor addition if you don’t mind slight discoloration.
  • water
  • salt
  • sugar – helps offset some of the salt and acidity from the vinegar.
  • pickling spice – a perfect pre-made blend of spices that will result in a delicious pickled onion every time!


How to Make Pickled Pearl Onions

Lots of pearl onions on cutting board ready for preparing pickles.
Pearl onions are a delicious variety of onion that make for perfect pickling! They’re typically white, but gold and red onion exists in this size as well.
  1. We needed 8 cups of pearl onions, trimmed and cleaned, so we took off the loose papers and then dropped the onions into boiling water for 30 seconds.
  2. I used my mesh sifter to hold the onions so they were easier to deal with. From the hot water, they went straight into really cold water for about 30 seconds. This made the outer layer easier to slip off. That layer is fairly thick and tough so we didn’t want to pickle the onions with that layer on. It did take a bit to slip all the skins but you can see it’s worth it – those small onions look beautiful once they are ready for pickling. They are going to look so pretty once they are in jars.
  3. Slipping skins off pearl onions.
    Taking all of the skins off your onions can be slightly tedious, but so worth it for the finished product.
  4. Wash the jars and place them in a boiling water bath for at least 15 minutes to sterilize.
  5. Place your canning seals in a bowl and cover with hot water.
  6. Combine your vinegar, water, salt, and sugar in a medium saucepan and bring this mixture to a boil, then reduce to a simmer. Add the onions, simmer for about five minutes, bring it back up to a boil, then bring it down to a simmer for another 5 minutes.
  7. Add your pickling spice to the empty jars, then follow up with the onions and pickling liquid.
  8. Put on the seal and canning ring, then place the jars in the water bath canner and boil for 15 minutes. Remove them and allow them to sit for at least 24 hours.
Pearl onions ready for pickling.
These pearl onions have such a beautiful purple color, which makes them perfect to preserve.

Variations for Flavouring Pickled Onions

As long as you don’t change the measurements of vinegar or water, it is possibly to change up the flavour of these pickles. You may like to try adding a teaspoon or so of:

  • thyme leaves
  • mustard seed
  • celery seed
  • cloves
  • bay leaves
  • coriander seeds
  • black peppercorns
  • garlic cloves
  • hot peppers such as cayenne or jalapeno


Getting Mason Jars Ready for Canning

Canning for your first time can be a bit of an intimidating process, so here’s another breakdown for you.

While the onions were being prepared, we got the water bath canner full of water and set on the stove to boil. Make sure to have a bottom rack in the canner, so the mason jars do not sit directly on the canner.

Then, we set all the clean empty jars in the water bath canner and let it boil. After 15 minutes the jars are sterilized and they can be taken out. Also, we got the canning seals ready in a shallow bowl and covered with hot water.

They will sit in the water until the moment they go on the jars. We also got the pickling mixture going on the stove. This included vinegar, water and sugar. 

After the pickling solution came to a boil, we turned to the stove down to a simmer and cooked the onions about 5 minutes.

Small onions being heated for pickling.
The onions just soak up all of that pickling liquid, which means they’re absolutely packed with pungent flavor!

At this point, add the clean pearl onions to the pickling mixture and wait for it to come back to a boil. Once it boils, turn it down and let it all simmer for 5 minutes.

Filling the Canning Jars

Now, we’re ready to fill the jars. We’re canning these in half pint jars, but you can easily use pint jars if you like. The smaller jars get used a lot here, as we like to open a jar and then use it all up! 

Onions and some pickling spice on the counter.
These pickled onions are perfect for drinks, to pair with meat dishes, or to eat right out of the jar.

Sprinkle some pickling spice (or whichever spices and herbs you like) into each jar and then add the pearl onions. Then fill the jar with the warm pickling liquid (sometimes called brine) and leave 1-inch headspace. Be sure to remove any air bubbles as well.

Be sure to wipe rims of jars with a wet cloth. This helps remove any food or liquid on the rim – that will definitely interfere with the jar becoming properly sealed. Don’t skip this step.

Put your canning seal on top and add the ring. Tighten just to fingertip tight – don’t overtighten them.


Canning Pickled Pearl Onions

Using your jar lifter, add each jar to the boiling water in the water bath canner. Reminder: be sure you have a rack on the bottom of the canner, so there is a barrier between the bottom of canner and the bottom of the jars.

Try to not let the jars touch each other. I can usually get 7 jars in my boiling water canner; if I want to add more, I add another rack on top of the jars.

Then add more jars on top of the rack. Put the lid back on the canner and let the water come back to a boil.

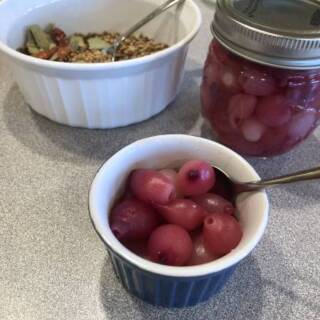
A dish of pickled onions sits with a jar of pickled onions.
This pickled pearl onions recipe is simple to make and yields tasty results every time. Try it out, you won’t be disappointed!

The depth of your water bath canner will determine how many jars you can do at one time, on two levels.

Let the water boil and then set the timer for 15 minutes. Once done, remove the canning lid and use your jar lifter to carefully remove the hot jars.

Set the jars on the counter (put a thick towel down first) and be sure to leave space between each jar. Now leave the jars alone for 24 hours to seal and cool down. As they jars seal, they will make a pinging noise.

After the 24 hours, test each jar to ensure it is sealed. Are all the seals concave? If not, put the jar in the fridge and plan to use it up first or you can again put them in the water bath to see if they will seal.


FAQs

How to Store Pickled Pearl Onions

If you don’t want to bother water bath canning any jars of pickles, you can easily reduce the recipe to make fewer jars. Then, after the jars have been filled with the pickling mixture, wipe the rims and place the seals and lids on the jars.

Let them cool on the counter for at least 12 hours (24 is better) and then just store the jars in your fridge. They will last indefinitely in the fridge because of the pickling.

Remember: If you do NOT can them, keep them in the fridge at all times.

If you do water bath can them, you can add these to your food storage, whether that is in your pantry or cold room. Because they have been through the canning process, they will be safe stored at room temperature.

How to Serve Pickled Pearl Onions

They’re a great appetizer, or use them in cocktails. Put a couple of pickled onions on a toothpick and serve with a martini with gin and vermouth. This is sometimes also called a Gibson cocktail. And pickled onions work as a great garnish for a Bloody Mary!

You can also add them to pulled pork, burgers, or other sandwiches, tacos and salads.

I recommend you drain off some of the liquid before serving, or you could combine it with a bit of oil and use it as a salad dressing.

Can you eat pickled pearl onions out of the jar?

Of course! If you love the flavor of these pickled pearl onions, feel free to grab a fork or toothpick and eat them right out of the jar.

Are pickled pearl onions good for you?

Pickled onions are known to have antioxidants, and ingredients that are anti-inflammatory and that can help with heart health and blood sugar levels!

What is a good substitute for pearl onions?

You can make this recipe using chopped white onions, shallots, or even leeks.

Do pearl onions have another name?

Pearl onions are also sometimes referred to as white cocktail onions, but are also called button onions, baby onions, or silverskin onions in certain places (like the UK).

A opened jar of pickled onions sits on a counter.
Pickled Onions is an easy canning recipe that is made in a water bath.

More Preserving Recipes

Our entire Country Living in a Cariboo Valley Recipe Collection can be found here, and here are some more fantastic canning and preserving recipes hand-picked for you!

  • Check here for an entire collection of preserving recipes.
  • This Pickled Asparagus is another great and easy pickling recipe!
  • And for something a little more festive, check out this recipe to learn how to can your own Homemade Salsa.


Homemade Pickled Pearl Onions Recipe

The Bottom Line: these Pickled Pearl Onions are easy to make and are a great way to fill your pantry

If you enjoy this recipe, please be sure to rate it 5 stars below! And print this off or save it to your recipes folder!

a dish of pearl onions and some pickling spice on the counter

Quick Pickled Pearl Onions Recipe

Yield: 4 pints
Prep Time: 30 minutes
Cook Time: 15 minutes
Total Time: 45 minutes

These quick and easy Pickled Onions are perfect for a condiment tray or used in cooking. Add to meat dishes, in tacos or in any tomato dish.

4.5 Stars (10 Reviews)

Ingredients

  • 8 cups peeled pearl onions (typically 10-12 oz)
  • 5 1/2 cups pickling vinegar
  • 1 cup water
  • 2 tsp salt (optional)
  • 2 cups sugar
  • 8 tsp pickling spice

Instructions

  1. Prepare jars for canning by washing them and then setting in a boiling water bath for 15 minutes to sterilize.
  2. Place canning seals in a shallow bowl; cover with hot water. Replace water as needed, if water cools too much.
  3. Put a large pot water on to boil.
  4. Prepare onions by removing loose wrappers. Then set in a colander and place into simmering water for 5 minutes.
  5. Plunge onions into cold water and then peel. Measure out 8 cups onion.
  6. Combine vinegar, water, salt and sugar and bring to a boil. Reduce to a simmer.
  7. Add spices to empty jars.
  8. Add pickles to the jars, put on the seal and canning ring (fingertip tight)
  9. Place jars in the water bath canner, bring to a boil and let boil for 15 minutes.
  10. Remove canning jars and place on the counter where they can stay for 24 hours without being moved.
Nutrition Information:
Yield: 16 Serving Size: 6
Amount Per Serving: Calories: 138Total Fat: 0gSaturated Fat: 0gTrans Fat: 0gUnsaturated Fat: 0gCholesterol: 0mgSodium: 294mgCarbohydrates: 34gFiber: 1gSugar: 29gProtein: 1g

Did you make this recipe?

Please leave a comment on the blog or share a photo on Pinterest

Category: Recipes

First Published October 2020; Updated October 2023


Filed Under: Canning, Recipes

Fireball Whiskey Recipes – Food and Drink

By Annie

Try these recipes with Fireball whiskey! Delicious for the autumn months, you’ll love the spicy cinnamon flavor.

Fireball is a tasty type of cinnamon whiskey that is made with natural cinnamon and can be included in multiple different foods and recipes. You can find recipes using Fireball cinnamon Whisky that include everything from drinks to pies and cakes.

Typically, you can find some of the best Fireball Whiskey recipes in dessert dishes that we serve during the holidays. It adds a warm and delicious cinnamon taste to anything you include it in.

We’ve rounded up some of our favourite food and drink recipes using Fireball Whiskey. Enjoy!

Fireball Whiskey Recipes

These delicious Fireball Whiskey recipes are a great way to include your favorite delicious cinnamon flavored whiskey in various dishes and drinks.

Fireball Pumpkin Pie

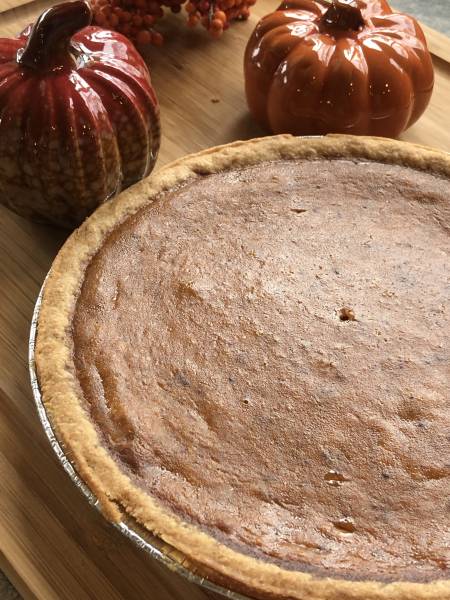
pumpkin pie on a counter


Perfect for fall, this Fireball Pumpkin Pie is easy to make and you will love the taste of the cinnamon whiskey that blends together with the pumpkin and gives it an extra kick. 

Fireball Whisky Pumpkin Pie puts an adult spin on a traditional favorite. Enjoy this treat for Thanksgiving or Christmas dessert.

You can buy the spices you need, but why not make your own Home made Pumpkin Pie Spice?

Easy Bread Pudding

Fireball bread pudding in a cast iron skillet
credit: thegoodheartedwoman.com


This easy and delicious bread pudding is made with a tasty cinnamon whiskey butter sauce. Whip this recipe up and bake it in a cast iron skillet.

It’s also an adaptable recipe so you can make various flavored bread puddings.

Fireball Jello Shots

Fireball Jello shots with whipped cream topping and a Red Hot candy.
These Fireball Shots are great for parties.

3 ingredients are all that’s needed to make these yummy Fireball cocktail recipe. Garnish with a cinnamon flavor candy like a Red Hot or cherries for a delicious fun treat.

Apple Pie Cupcakes

Apple pie Cupcakes with Fireball Whisky Frosting
credit: chiselandfork.com


These moist and delicious cupcakes have the taste of apple cider and apple pie filling that’s topped with a tasty a Fireball frosting!

Or, make these cupcakes without the Fireball – just increase the apple cider a bit.

Fireball Whiskey Cinnamon Roll Ice Pops

Fireball Whisky Ice Pops ready to eat
credit: crayonsandcravings.com

Inspired by the cinnamon roll cocktail, these delicious cinnamon roll ice pops include a shot of Fireball whiskey. It’s a simple and delicious ice pop recipe.

Grab these boozy ice pop molds and mix up a batch of these – perfect for a hot summer day.

Cinnamon Whiskey Balls

Cinnamon Whisky Balls
credit: homecookingmemories.com

Perfect for the holidays, these cinnamon whiskey treats will make a delicious dessert or finger dessert for the holidays.

Tuck 4 or 6 in a small gift box and take along for a holiday hostess gift.

Fireball Hot Toddy

Fireball Hot Toddy ready to drink
credit: trialandeater.com

A delicious cinnamon whiskey, honey, and lemon cocktail that’s great for a sore throat or a nice spicy night cap.

Serve this Hot Toddy warm in a tall mason jar mug with handles.


Toasted Butterscotch Maple Mule

Refreshing Butterscotch Drink
credit: foodwinesunshine.com

A sweet twist on the traditional Moscow Mule, this delicious tasted butterscotch is sweet, with a little heat, and a lot of tasty goodness.

Serve these in glasses or preferably, in these copper mule mugs. This drink is perfect for a Fall cocktail or at holiday cocktail parties. 

FAQ’s

Where did Fireball Cinnamon Whiskey originate?

The liquor company Seagram’s (Canada) developed Fireball in the mid-80’s. Later that decade, in 1989, Fireball was bought by the Sazerac company and developed it into a very popular liquor.

What time of the year is Fireball most popular?

Fireball always seems to come into its own during the autumn. It’s a great time of year for cinnamon flavored fall drink and lots of great cocktails can be made. You can find lots of Fireball recipes here.

What are some complementary garnish ideas for Fireball desserts and cocktail recipes?

Try any of these, the flavor goes very nicely together:

  • Orange slice, orange slice or even a bit of orange peel
  • Star anise
  • Cinnamon stick
  • Lime wedges

Read more about:

Over 20 delicious recipes using Pumpkin can be found here

Here’s how to make your own Pumpkin Pie Spice

If you buy Pumpkins and Winter Squash at low prices at the end of the season, here’s how to store squash to last for months


Fireball Whiskey Food and drink recipes


originally published Sept 2020; latest update Oct 2024

Filed Under: Recipes

The Fastest Way to Ripen Tomatoes Indoors

By Annie

Wondering what’s the fastest way to ripen tomatoes indoors? Here’s how to ripen tomatoes faster!

So many of us grow tomatoes. Whether we have tomatoes planted in our garden, greenhouse, or in pots on the deck, gardeners just love growing our own tomatoes! 

Home growers are well aware of the enhanced flavour of tomatoes grown in their gardens! 

But what can we do for our tomatoes when a sudden frost is expected or the nights suddenly become a lot cooler? Even though we may have a long growing season, the odd first frost can happen here in July or August. Tomatoes are heat lovers and they do not like the cold at all.

green tomatoes on the vine
Mature green fruit at the end of the season can be salvaged and ripened indoors to avoid frost and other issues.

But first, ask yourself if they do really need to come off the vine now? Is there any way you can add some frost protection to your tomato plant? You could use insulating blankets or several layers of Remay cloth. These will give you an extra couple of degrees of protection.

If that won’t be enough, then yes go ahead and pick your tomatoes. If in doubt, PICK them. The last thing you want is to head out to the garden one morning to find your plants have been hit with frost or rot. Tomatoes do not like frost and even one light frost can be enough to kill your plants.


Learn How to Ripen Green Tomatoes Faster

green tomatoes on the vine
This guide includes everything you need to know about ripening tomatoes indoors!

Need to pick all your tomatoes because cold weather is coming? Got lots of green tomatoes on the vines that need to be picked? Here’s an awesome trick to quickly ripen tomatoes.

How to Ripen Tomatoes Quickly

Will Green Tomatoes Continue to Ripen off the Vine?

You bet they will. Tomatoes are often ripened off the vine. Chances are, they were picked green and turned red before you bought any at the grocery store. They’ll still be just as delicious as any vine ripened tomato.

And, you’ve probably already put a few slightly green tomatoes on a windowsill at some point, right? Actually, that’s not really the best place for it for more than a day. Here’s a better idea.


Wondering How to Ripen a Tomato Indoors?

If you’ve got only a couple, you can ripen tomatoes stem-side down on a sunny windowsill; it doesn’t take much room. But, if you’re growing lots of tomatoes in order to make home made Tomato Sauce, AND you have to pick them from the vine, here’s how to ripen tomatoes off the vine. Even if you have LOTS of them!

The key to ripening tomatoes is you want to put them in some kind of bag or box at room temperature out of direct sunlight. Don’t put them in the refrigerator!

The fridge will make them cold, which will slow down the ripening fruit. Two other chemicals important to ripening, lycopene and carotene, are produced best at optimum temperatures of around 59-68 degrees F.

Avoid high humidity areas as well to prevent decay or issues with pests. Tomatoes naturally produce ethylene gas, which is what leads them to tun red and ripen

Keeping them in some kind of closed environment will speed up the ripening process. And this technique works for any kind of tomatoes, even smaller cherry tomatoes!

Here are some more detailed instructions for speeding up tomato ripeness!

ripening tomatoes
Tomatoes may ripen at different rates, so be sure to remove red ones from the bag so they don’t overripen.

How to Ripen Tomatoes – The Paper Bag Method

Carefully harvest your mature green tomatoes and place them inside paper bags. Yup, a big paper bag. The ones you get from the grocery store if you ask for brown paper bags. You do save those bags, right? Those kraft paper bags can be used and upcycled for so many things! Including…yup, garden produce!

Try to NOT bruise your tomatoes! Pick them carefully and place the unbruised tomatoes in the bag carefully – don’t drop them in there as they can easily become damaged.

You can fill the bag almost all the way, if you’re very careful with the tomatoes. So, go ahead and add additional layers of tomatoes to almost fill the bag. 

But use lots of bags! Just depends on how many tomatoes you have. The important thing is to be able to preserve tomatoes – you’ve worked hard enough tending to your plants all season.

ripened tomatoes in bowl
This method is an easy way to produce lots of delicious and beautiful red tomatoes.

The Trick to Using a Paper Bag to Ripen Tomatoes

OK here’s the trick. ALWAYS put one or two red tomatoes in the bag along with all the fresh green tomatoes. This gives a great head start for ripening!

If you don’t have any red tomatoes at all, then use a banana or an apple instead. This will ensure lots of ethylene gas is being produced. Add it to the bag, then close the bag up tight and set it aside.

Check the bag every single day, as the tomatoes will ripen quicker than you may think. You’ll also want to ensure the moisture of the fruits isn’t causing any rot or decay. Pull out each ripe tomato and leave the others in there to ripen.

You may also find you need to do some rearranging of the tomatoes, in case the lower ones are getting too much weight on them.

You’ll find that within a few days, all your tomatoes will be ripe. Now you can use them to make Homemade Tomato Sauce (canning instructions too) or put up a case of the best Salsa you will ever eat (canning instructions for the Salsa are there too).

Now you know how to make tomatoes ripen faster, give this a try! They’ll taste just as great as tomatoes ripened on the vine without the risk of frost or pests!

bag of tomatoes ripening
With just a paper bag or cardboard box you can quickly ripen your green tomatoes off the vine.

FAQS

How long does it take for tomatoes to ripen?

On the vine, it can take up to 20-30 days for a tomato to fully turn from green to red. Removing them from the vine and keeping them in an enclosed space traps the ethylene they produce, which will cause them to ripen much faster.

This can take anywhere from a couple of days to overnight, depending on how ripe they start.

How to ripen tomatoes overnight?

Use the method above to quickly ripen your tomatoes! Enclose them in a cardboard box or paper bag. To really speed things up, add a ripe banana or a bit of apple peel to increase the amount of ethylene gas.

Can you ripen tomatoes in a cardboard box?

Absolutely! Especially if you’ve got way too many to fit in one paper bag, a cardboard box is another good option. This method generally works best if the tomatoes aren’t touching too much, and like with the bag method, just be sure to check on them often and remove any ripe ones. Arrange them in single layers in the boxes for best results!

Are there other ways to use green tomatoes?

Yes! If you don’t want to bother with the ripening process, you can also use and eat tomatoes that are still green. They’re a bit crunchier than ripe tomatoes and have a somewhat tart flavor in comparison, and there are plenty of recipes that utilize this difference for the better.

Make these Fried Green Tomatoes as a way to capitalize on your unripe tomatoes, and poke around online to see what other recipes call for unripened/green fruits!


More Resources and Posts You’ll Love

  • Here is the absolute Best Salsa recipe ever – and it includes the canning instructions.
  • Want to read every Preserving post on this site? Here it is!
  • We LOVE this home made Pizza dough recipe – makes 3 pies.


Use this fastest way to ripen tomatoes indoors next harvest season!


originally published 2020, latest update Sept 2024


Filed Under: Grow Your Own Vegetables

20+ Best Pumpkin Recipes – Easy Recipes for Fall

By Annie

Fall is the prime time for pumpkins, and it is when you will start seeing the abundant number of pumpkin recipes coming out for all to enjoy. Now we’ve rounded up over 20 of the very best pumpkin recipes for you to try!

Pumpkin is versatile so you can use it just about anything. Pumpkin and pumpkin spice are often used in main dishes, drinks, side dishes, and even desserts.

There’s almost nothing you can’t put pumpkin in!

The Best Pumpkin Recipes for Fall

But first, we all know Pumpkin Pie Spice is an integral part of baking with Pumpkin. Did you know you can easily make your own spice? Yes!

This home made Pumpkin Pie Spice recipe adds a delicious pumpkin taste to all your Fall recipes. Here’s how to make your own!

If you are looking for some delicious pumpkin recipes, these tasty treats and dishes are a must try.

If you love pumpkin, these recipes are perfect for all pumpkin lovers, so you are sure to find a pumpkin recipe that catches your eye!


Fireball Pumpkin Pie

Fireball Pumpkin Pie recipe for a Fall dessert treat

An adult twist on a Fall favourite! A wee bit of Fireball Whiskey is added to this Pumpkin pie and what a delicious flavour it has.

Perfect for dessert on Thanksgiving and throughout the holidays.


Pumpkin Whoopie Pies

A classic New England pie gets an update with this recipe for pumpkin whoopie pies! Perfect for a sweet snack or individual dessert, these pies are delicious!


Pumpkin Risotto

Hearty and packed with flavor, this pumpkin risotto is the perfect way to celebrate pumpkin season!


Pumpkin, Ricotta and Sage Pasta

Pumpkin recipe for Ricotta
photo: Itsnotcomplicated.com

This tasty dish that is a great make-ahead dish and includes stuffed pasta shells.

The shells are stuffed with a combination of pumpkin, ricotta, and sage and is served with a creamy garlic sauce.


Pumpkin Parfait

If you are looking for a tasty pumpkin dessert, this pumpkin parfait is perfect for any after dinner dessert.


Pumpkin, Cranberry, and Almond Salad

Easy and quick to make, this delicious salad is mixed with the flavors of cranberry, roasted pumpkin and almonds for a delicious tasting salad.


Pumpkin Soup

pumpkin soup recipe
photo: JackSlobodian.com

Simple, delicious, and filling. This pumpkin soup uses pumpkin seeds, pumpkin flesh, and oil to bring you a wave of different flavors.


Pumpkin Brownies

Rich and filling, these pumpkin brownies are an easy way to satisfy your sweet tooth and can be served for dessert after a delicious meal.


Pumpkin & Spice Granola

Granola and pumpkin spice are combined to create a delicious snack or topping for your favorite yogurt, desserts, or any other recipes that call for granola.


Pumpkin Cranberry Banana Bread

pumpkin loaf recipe


Perfect with a cup of hot coffee, this Pumpkin Cranberry loaf is a sweet afternoon treat.

Loaded with healthy goodness, it’s delicious!


Pumpkin Waffles

These pumpkin waffles are topped with a homemade pear jam and condensed milk for the ultimate pumpkin breakfast waffle.


Pumpkin Spice Rice Krispie Treats

Not your traditional rice krispie treat, these treats are full of pumpkin flavor and are easy to make.

These treats will make a great snack or small treat throughout the day.


Easy No-Bake Pumpkin Cheesecake Dip

Pumpkin Cheesecake Dip recipe
photo: erhardtseat.com

Ready in just 10 minutes, this easy no-bake pumpkin dip makes the perfect fall dessert.

It can be paired with fruit, graham crackers, or vanilla wafers.

Pumpkin Pecan Bread

This pumpkin pecan bread is one of the most delicious parts of fall. The fact that it’s also one of the easiest, well, that’s just a great bonus.


Pumpkin Cake with Caramel Cream Cheese Frosting

Super moist and delicious, this pumpkin cake is topped with an amazing salted caramel cream cheese frosting for a delicious dessert.


Pumpkin Cinnamon Ice Cream

pumpkin ice cream recipe
photo: foodal.com

A homemade pumpkin and cinnamon flavored ice cream that is perfectly paired with any dessert or can be enjoyed on its own.


Pumpkin Spice Coconut Nectar Syrup

Delicious poured over waffles or oatmeal, you can also use this as a sweetener for any of your baking recipes!


Want to make home made Pumpkin puree? Here’s how to make your own!


Home Made Pumpkin Butter

Pumpkin Butter Recipe
photo: thefreerangelife.com


Delicious spread on toast or English muffins, this Pumpkin Butter is going to be a family favourite!

Pumpkin Caramels

Here’s a fun recipe to make! Only 6 ingredients and these would be a fantastic holiday treat or a Christmas hostess gift!


Pumpkin Poundcake

Full of pumpkiny goodness, this poundcake is frosted with a spice filled Cream Cheese frosting. A special treat alongside a steaming cup of coffee on a Fall afternoon.


Pumpkin Leaves

Chopped Pumpkin leaves on a cutting board ready to add to soup

Did you know you can eat Pumpkin leaves? They are super nutritious (full of vitamins A, E, B and K) as well as protein.

Use the smaller Pumpkin leaves and add them to soups, curries and peanut sauces. Who knew?


Pumpkin Chiffon Pie Filling

This pie filling is lighter and even tastier than traditional Pumpkin pie. Give it a try this Fall and it will become a new family favourite.

Use a store bought pastry crust if you like and don’t forget the whipping cream for topping!


Pumpkin and Ground Beef Soup

Here’s an easy one pot meal! Using canned (or homemade) pumpkin puree, this soup is Keto and low carb too. Top it off with some grated cheese or cilantro. Delicious!


There you have it – over 20 of the very best pumpkin recipes for you to try this year. So spend an afternoon in the kitchen whipping up one or more of these delicious treats!

20 best Pumpkin recipes for baking and cooking


Want to read more about Pumpkins?

Here’s how to store Pumpkins so they last for months! Buy when they are on sale or grow them in your garden!

Make your own delicious Pumpkin Pie Spice! 3 different variations to try 


Filed Under: Recipes

  • « Previous Page
  • 1
  • …
  • 11
  • 12
  • 13
  • 14
  • 15
  • …
  • 53
  • Next Page »

Connect With Us!

  • Email
  • Facebook
  • Instagram
  • Pinterest
  • Twitter

Search this site

Generic selectors
Exact matches only
Search in title
Search in content
Post Type Selectors
Search in posts
Search in pages

Our Most Popular Posts

Garlic cloves in oil

How to Preserve Garlic in Oil – and Other Ways to Store Garlic

a open jar of pickled brussel sprouts on a counter

Easy Pickled Brussels Sprouts Recipe (Water Bath Canning)

Privacy Policy

Read about our Privacy Policy

Disclosure

Please note that some of this site’s links are affiliate links, and CountryLivinginaCaribooValley.com is a participant in the Amazon Services LLC Associates Program, an affiliate advertising program designed to provide a means for us to earn fees by linking to Amazon.com and affiliated sites. At NO ADDITIONAL COST TO YOU, I will earn a small commission, if you purchase them. I recommend them as they are good products.

Theme Design By Studio Mommy · Copyright © 2026