Country Living in a Cariboo Valley

Homesteading in BC

  • How to Get Started
  • Vegetable Gardening
  • Preserving Food
  • Recipes
  • Homemade Wine Recipes
  • About Us
  • Work With Me
  • Shop
    • Vegetable Garden Planner Printable: Grow Your Best Garden Ever
    • Grow Enough Food for a Year
    • Delicious Dandelions: A Recipe Collection
    • Dirt to Dollars: Selling at the Farmers Market
    • 8 Pounds in 8 Weeks: Raising Chicks for the Dinner Table
    • Making Wild Wine
    • Build a Hanging Chicken Feeder
    • 15 Things to Know About Living in the Country

Weatherproof Plant Markers DIY – Cute & Creative Craft

By Annie

Make up some of these weatherproof plant markers for your garden this year!

If you’re looking for a fun and easy garden diy project, take a look at all of these fun ways to add some whimsey to your garden. It can be very easy to forget if “this is the row where I planted the rosemary seeds. . . or maybe it’s over there” – these markers are a wonderful help.

And to be fair, seedlings often look very similar to each other, especially when they are related.

weatherproof plant markers in the garden
These DIY weatherproof plant markers add whimsy to your garden!

Why You’ll Love These Weatherproof Plant Markers

If your garden is big enough, you may easily lose track of which squash variety is where, etc. Plant markers can be a tremendous help.

I collected together some really fun and unique ideas for markers. Some add a touch of glitter and some are just straight-up colorful. But each and every one of these ingenious creations will help you keep track of all those plants you are taking the time to care for and cultivate.

And they will look spectacular while they do it, with bursts of all sorts of colors! All of these markers are great for shrubs, plant pots, flower beds, in your container garden, even fruit trees!

Just be sure to use permanent marker pens when making these!

Gather them up at the end of the season, as it’s probably not best to just leave these outside year-round. Depending on your climate, the markers could start fading and begin to get weathered after a season of outdoor use.

Take a look through all these different garden row marker ideas! There are some wonderfully creative ideas here that will give you inspiration.

These also make great gifts for gardening friends! They are a lovely way to welcome visitors right into the garden to see these up close.

So instead of buying a gift on Etsy, why not choose a marker project or two and give a homemade gift.

What Kind of Paint is Best for Waterproof Garden Marker Project

It’s probably best to use a water-based acrylic paint based on its durability. It would not hurt to apply a coat of clear outdoor sealant as a top layer.

For writing, consider using a Sharpie’s Pro paint marker – it is very durable and will hold up to harsh weather. There are also a good variety of tip sizes to choose from.

Markers made with these materials will be durable enough, no matter where you live in Canada or the USA.

If you are just temporarily marking a plant, wax pencils or a grease pencil will work well. Read on for some very cute garden ideas for identifying your plants.

Cute DIY Weatherproof Plant Markers


Funky plant markers using old silverware
Funky Plant Markers From Creative Green Living

These plant markers are so funky and unique. Grab some cheap silverware, a steel metal stamp kit and whip up a great way to identify all the food you are growing in your garden. Bon Appetit! from Creative Green Living


Plastic spoon garden markers
Plastic spoon garden markers from Crafts by Amanda

I have a love/hate relationship with plastic spoons. They are so pretty and convenient and come in every color, but they also create a lot of waste. Unless you turn them into fanciful and fun plant markers, that is! TIP: Use these compostable spoons!

These Plastic Spoon Markers are from Crafts By Amanda.


Garden Markers With Painted Stones
These painted stone garden markers are from Adventure in a Box.

Painted stones add a dash of humor, and are such a fun way to add brightness and whimsy to your garden. But when you paint them up like adorable fruits and vegetables, they can also help you identify the plants you are growing. Here’s the paint kit to use for painting stones!

These Markers With Painted Stones can be found at Adventure in a Box.


Reusable Plant Markers With Chalkboard Paint
Reusable Plant Markers With Chalkboard Paint are from Tried and True blog.

Have you ever worked with shrink-plastic like Shrinky Dinks? These little garden nameplates are a genius way to use shrinkable plastic, and they look stunning, too!

These Reusable Plant Markers With Chalkboard Paint can be found on the Tried and True Blog.


More DIY Plant Markers

Polymer Clay Garden Markers
These garden markers are from Oh the Things We Will Make

If you create things with polymer clay, you’ll love this idea. And if you have been looking for an excuse to try working with polymer clay, here it is!

These weatherproof plant markers look like miniature, old-fashioned street signs, a nice nod to any fairy-folk hanging out in your garden! They’re from Polymer Clay Markers at Oh, The Things We’ll Make


Painted Rock Vegetable Garden Markers
These garden markers are from Crafts by Amanda.

This is another spin on the idea of painted rocks in the garden. These are as colorful and pretty as the vegetable themed ones above, but are easier for anyone who may be a little “artistically challenged.”

Still, I love them! You can find them at Painted Rock Vegetable Markers over at Crafts by Amanda.


DIY Color Blocked Garden Markers
These pretty garden markers are from Sarah Hearts

These cute little markers are simple, inexpensive, and ingenious. Simply paint the end of your basic wooden markers, and take it from dull to dazzling. Add the plant name and you’re done!

These stakes are small enough to use in a seed starting tray and look much nicer than the plastic plant tags used by the nursery for plant identification.

TIP: Use this to paint wood row markers!

You can find the tutorial here DIY Color Blocked Garden Markers at Sarah Hearts


Creative Garden Tags

Plant Markers From Recycled Clothespins
These herb markers are from Creative Green Living

I do enjoy all the different ways you can create herb markers – especially the ideas that are super simple – yet completely creative. These clothespin herb markers are a fine example.

So pretty – so easy – so handy! You can find these Herb Markers from Recycled Clothespins at. Creative Green Living


Easy Cricut DIY Garden Markers
These Cricut garden pegs are from A Mom’s Take

You might not think of tongue depressors when you think of identification markers, but they actually work quite well! Find them at Easy Cricut DIY Markers – A Mom’s Take

A simple splash of your favorite color and some vinyl letters from your Cricut and you have some fun vegetable markers large enough to be seen even when your plants get big!

TIP: Use this type of wooden craft sticks!


More Garden Row Marker Ideas


DIY Wooden Spoon Herb Plant Markers
These upcycled markers are from The Gardening Cook

It is amazing how easy it is to be overrun in wooden spoons, especially when you can pick them up so cheap at the store. But with just a bit of paint, you can turn those extra spoons into extra-special flower markers!

Use a sharpie or paint pens with permanent ink for this project. Find these DIY Wooden Spoon Herb Markers  here at The Gardening Cook


Birdy Flower Markers
Bird Markers from Crafts By Amanda

These adorable birdy markers sound like they are incredibly easy to make. Yet they look so lovely, people will think you spent a fortune on them. These cuties are certain to add some nice cheer to any garden! TIP: Here’s the wooden birds to use!

Find these Birdy Flower Markers For Your Garden over at Crafts By Amanda


Glitter Mason Jar Plant Markers
These glittery mason jar markers are from Mad in Crafts

Mason jars are often used as planters for herbs, but I had no idea they could become a plant marker too. At least, they can when they are wooden mason jar shaped signs!

Add a touch of sparkle and the first letter of the name of the plant and you’re all set! Find these Glitter Mason Jar Markers over at Mad in Crafts.

More Creative DIY Plant Labels


Garden Markers from Recycyled Can Lids
Make these cute hanging garden markers from Creative Green Living

I will admit that it probably would not have occurred to me to use tin can lids for markers, but as soon as I saw these wonderful discs, I was enchanted! These are a durable way to make plant labels! Find these Markers From Recycled Can Lids here at Creative Green Living.

This type of marker would also look great in copper. Bright and lovely, with plenty of space for letters, these are also a fun way to recycle! TIP: You can easily use canning seals for this!


Cork Herb Garden Markers
Use old silverware and wine corks for these herb markers from This Mama Loves

These herb markers are made with wine corks, and they are too cute to be believed. Rustic, natural, and charming, this wine cork plant marker will have you wanting to start your cork collection immediately!

Grab the tutorial for these Herb Markers  over at This Mama Loves


Wooden Spoon Garden Markers
Another take on wooden spoon markers from My Garden Your Garden

Another variation on using wooden spoons for markers – this is an inspiring idea for the more artistic people out there. If you have the skills to create them, these fun markers are just lovely!

Find this crafty project Artistic Wooden Spoon Markers  over at My Garden Your Garden


More garden articles:

You’ll find the perfect easy Herbs to grow (indoors or outside) on this list!

This printable vegetable garden journal and planner is just what you need to keep track of everything in your garden.

Want to know how to grow Valerian root? Here’s all you need to know.

Craft up some of these weatherproof plant markers to add some garden whimsy this year!

Plus, they are a  good gift idea! All gardeners will appreciate these durable markers. They are an attractive way to keep track of what plants you are growing. Happy gardening!


DIY weatherproof garden plant markers


originally published March 2021; latest update February 2025

Filed Under: Farmhouse Decor & Crafts

How to Roast Garlic

By Annie

Once you learn how to roast garlic cloves, you’ll be including this healthy side dish more often with your meals. Learn how to easily roast whole heads of garlic!

Roasted garlic tastes sweet and nutty and sends wonderful aromas throughout the kitchen. Garlic, as a cooking spice, is quite versatile and there are lots of delicious garlic recipes.

Fresh garlic cloves sit in a bowl.
Wondering how to roast garlic? Here are several ways to enjoy roasted garlic with your meals.

Why You’ll Love This Roasted Garlic Recipe

There are not many dishes or cuisines for which garlic is not a good complement either as a side dish, as an infusion or mixed into the meal.

For the best flavored garlic, learning how to roast fresh garlic cloves can give a subtle difference to the taste of a dish. Compared to dried powdered, salted garlic or minced garlic that is pre-prepared and purchased in a store?

Well, there really is no comparison – fresh roasted garlic cloves win! Hands down!

Roasted Garlic in a Saucepan and on tin foil.
If you’re searching for tips on how to roast garlic in the oven, be sure to read this post for all the information you could need!

It might come as a surprise how sweet and nutty freshly roasted garlic can taste compared to the mass-manufactured and pre-prepared garlic seasonings.

Roasted garlic complements most recipes or can be sautéed with onions, butter and a little brown sugar for a succulent side dish. Grate or chop into pasta, mix it in to your mashed potatoes for a super flavorful side dish, make a flavorful salad dressing, add to sauces or your favorite hummus, or use it to make homemade garlic bread!

Instructions

Heads of garlic can be roasted using a toaster oven, convection oven or conventional oven or on the grill, but garlic can also be roasted in a pan on a stovetop.

Roasting garlic is the best way to bring out the nutty sweetness and caramelized flavor that garlic is known for, instead of the pungent aroma often found with processed garlic.

In fact, garlic that is roasted doesn’t leave the bad breath scent for which garlic sometimes gets a bad rap, and there are many researched health benefits to consuming raw garlic or roasted fresh garlic.

How to Roast Garlic in the Oven

A bulb of freshly roasted garlic, still on the tinfoil it was cooked in after having the top chopped off and oil poured on.
  1. Peel the desired amount of garlic cloves or just cut off the pointed tops of a whole garlic bulb with a sharp knife to release the aroma and interior oils (just like that picture above). These pieces can be roasted whole or cut or chopped, and then placed inside foil. Leave the foil unsealed at the top.
  2. Drizzle the garlic with a couple of teaspoons of olive oil (or any favorite flavored oil) and add any complementary spices you like.
  3. Place the foil on a baking sheet in the center of the hot oven and bake at 350-375 degrees for 40 minutes, until the tops of the garlic are lightly browned but not burnt.

Roasting Garlic Cloves on the Stove

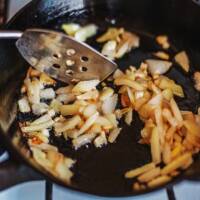
Roasting garlic cloves in a pan on the stove.
Slow roasting garlic cloves in a pan on the stove is another great way to prepare this treat!

Roasting garlic in a pan uses the same oil drizzle technique, except the garlic cloves cannot be unattended while roasting. Simply place the cloves in the pan, (we love Lodge cast iron – highly recommend) add a little butter, flavors and spices, and then drizzle the oil over the cloves.

  1. Turn the flame onto a low/medium-low heat, and use a metal spatula to constantly move the garlic.
  2. Once the garlic has softened, and this might take as much as 15-20 minutes of constantly stirring, the flame can be turned up higher and the cloves allowed to sizzle until lightly browned and slightly firm on the outside.

How to Roast Garlic in the Air Fryer

This method is similar to the oven method, but typically doesn’t take as long!

  1. Preheat air fryer to 375 degrees F.
  2. Gather individual cloves or chop the top off a whole bulb of garlic.
  3. Drizzle with olive oil and season as desired.
  4. Wrap well in a piece of aluminum foil and place in the air fryer.
  5. Air fry until soft and fragrant, about 16-20 minutes.

Which Spices Go Good with Garlic?

Any savory spice will work well, including:

  • rosemary
  • thyme
  • basil
  • sage
  • paprika
  • sea salt
  • pepper
Garlic Bulbs with tops cut off on parchment paper with spices and herbs
A variety of spices go great with garlic!

More Garlic FAQ

How to store roasted garlic?

Roasted garlic can be stored for up to a month in the refrigerator before it begins to lose its flavor. Just be sure to store in an air-tight container, plastic bag or jar.

A garlic bulb can also be infused into an oil and kept for longer.

How do I store garlic bulbs?

If bought fresh from grocers or farmers’ markets, garlic can be stored for several months in a cool and dry place in a pantry. We store our garlic in an open weave basket in the kitchen.

There is no reason to refrigerate garlic prior to roasting.

Can I grow garlic in containers?

Yes you sure can grow garlic in pots or containers! Here’s everything you need to know about how to grow garlic in the backyard!

Can I freeze roasted garlic for eating later?

Yup you can – here are several ways to preserve garlic by freezing.

How long to roast garlic?

Roasting time can depend on the size of your garlic cloves. It’s better to start out with a lower time, around 30 minutes, and add more time if needed.

Freshly peeled garlic on a brown cloth with wood spoon.
Freshly peeled garlic ready for roasting on the stove.

How to roast garlic without foil?

If you prefer, you can use parchment paper instead of foil for your roasted garlic cloves. Just be sure it isn’t wax paper, as that can melt in the oven and ruin your garlic!

How to remove garlic from skin?

Once roasted, it’s actually quite easy to remove each clove from the garlic skin. Give them some time to cool, then simply squeeze from one end and the individual cloves of garlic should should slide right out!

More Garlic Appetizer Recipes

Our entire Country Living in a Cariboo Valley Recipe Collection can be found here, and here are some more delicious garlic recipes hand-picked for you!

  • These Garlic and Bacon Wraps are the perfect appy side dish!
  • Feta and Garlic? Yes please! Try this Feta Cheese and Garlic Dip appetizer recipe.
  • Garlic Side Dishes for your family to enjoy.
  • This Garlic and Parmesan Asparagus makes a delicious side dish.

Now that you know how to roast garlic, add this roasted garlic recipe to more of your dinner recipes!

Roasting garlic in a cast iron pan

How to Roast Garlic with an Oil Drizzle

Yield: 2 bulbs
Prep Time: 5 minutes
Cook Time: 40 minutes
Total Time: 45 minutes

Once you learn how to roast garlic, you’ll be including this healthy side dish more often with your meals.

5.0 Stars (2 Reviews)

Ingredients

  • 2 garlic bulbs
  • oil (whichever kind you prefer)

Instructions

  1. Peel the desired amount of garlic cloves (or just slice off the tops) and place in foil. Leave the foil open at the top.
  2. Drizzle with oil.
  3. Place the foil on a baking sheet and bake at 350-375 degrees F for about 40 minutes.
Nutrition Information:
Yield: 2 Serving Size: 1
Amount Per Serving: Calories: 66Total Fat: 7gSaturated Fat: 0gTrans Fat: 0gUnsaturated Fat: 6gCholesterol: 0mgSodium: 1mgCarbohydrates: 1gFiber: 0gSugar: 0gProtein: 0g

Did you make this recipe?

Please leave a comment on the blog or share a photo on Pinterest

First Published March 2021; Updated November 2022


Filed Under: Food, Garlic, Recipes

Vegetable Garden Planner Printable: Grow Your Best Garden Ever

By Annie

The awesome worksheets in this printable vegetable garden planner will help you keep track of everything you need to remember!

Growing veggies takes planning, smart timing, and tips from seed to harvest, all of which you will find in this veggie garden planner.

I don’t know about you, but I am always keeping notes when it comes to gardening. I want to know the answers to questions like this:

  • How many bean plants did I put in last year?
  • What variety of carrots did we enjoy so much 2 years ago?
  • Which type of lettuce bolted so quickly 3 years ago?

Now, I’ve got some wonderful printables that help SO much when it comes to keeping track of the vegetable garden. And, I want to share them with you.

Vegetable Garden planner sheets laid out.
Get your Food Garden Planner today!

If you want a paper review to have on hand instead of having information on your iPad or in a spreadsheet, you will love this printable. The garden planner database is a great way to plan for the plot you have. 

Use the printable as guidance and feedback for the perfect place to plant each of our plants. Create a dream garden that is full of a mix of vegetable varieties that you will enjoy.

This vegetable garden planner printable is what we use every year to grow this large garden of healthy vegetables.
Food gardens need planning. Use this vegetable garden planner to figure out your gardening season.

Are you ready to start planning your garden? If yes, then this vegetable garden printable will give you everything you need to start your garden from beginning to end. Real life tips to help you have a successful garden with a fruitful year.

With a layout sheet, vegetable seed starting date tracker, water schedule worksheet, plant care notes, and so much more this full garden planner will ensure you have maximum success with your family garden this year!


The Best Vegetable Garden Planner Printable is right here

You may have heard that to achieve certain things in life that you need a plan.

This concept holds for gardeners, too! Using my best garden planner printable, you’ll have everything you need from start to finish. I’m convinced that you’ll have a larger harvest of healthy food for your family when you use this garden planner.

The first step is taking an inventory of what you have for seeds, and then thinking about how much food you’ll need for your family.

This planner will help along the way with a simple one-page template for every action you’ll take throughout the gardening process.

If you have kids around the house, this garden planner provides a simple water log sheet where they can color in the circle for each time they go out to water the plants.

This is an excellent option for parents who want their kids to learn where their food comes from and how to grow it.

Garlic growing alongside raspberry plants
This small garden includes lots of garlic plants, growing alongside raspberry plants, rhubarb and herbs.

Growing your own food allows you to be more self sufficient. You’ll no longer have to wait for fresh produce to be in stock, or for the prices to drop on fruits and vegetables.

And using this planning printable, you’ll be well on your way towards growing healthy crops year after year.

Use the zone you are in, to make sure you are in the right climate for growth period, and start planting and prep work as you wait for harvest time.

Already know that you WANT this?

Grab your Vegetable Garden Planner printable now!

Only $7.99

Buy Now Button


11 page vegetable garden planner printable showing each page


Are you still debating if this garden planner is needed? Okay, I understand that.

So I’m going to share some of the amazing benefits you’ll get when you buy my garden planner printable today:

  • Easily select which plants you want to grow using our monthly and weekly tasks alongside the seasonal planner of this garden planner.
  • Save time with the planning process of your garden year after year.
  • Use our simple graph sheet to plan your garden layout so the whole family can help.
  • Simplifies the process of a family garden so that you save time, money, and are focused on growing healthy crops.

As you can see there are many benefits of using this garden planner. For starters, at this amazing price of just $7.99, you’ll receive a tool that could otherwise cost you hundreds of dollars.

I’m here to simplify the process of gardening for you, using my tried and true methods.

When you purchase this garden planner printable you’ll get: 

  • Vegetable garden layout planner
  • Garden calendar monthly tasks
  • Garden calendar seasonal tasks
  • Seed starting tracker
  • Planting schedule
  • Watering log
  • Seed inventory
  • Weekly garden journal
  • Plant care notes
  • Seed packet template

Everything has already been figured everything out for you, so you simply need to print off this garden planner, make some notes, and get started with your goal to grow a healthy family garden this year.


Grab your Vegetable Garden Planner printable now!

Only $7.99

Buy Now Button


And…these vegetable garden planner printables are the PERFECT match to go along with our book “Grow Enough Food for a Year“.

Everything you need to know about growing food in small spaces is included, including container gardening and vertical gardening too! Take a look here:

Yes I want to know more about growing enough food for a year for my family!

Filed Under: EBooks, Grow Your Own Vegetables

Freezing Lemon Juice in Jars

By Annie

Freeze lemon juice in jars – yes, you can freeze fresh lemon juice!

If you live in the south, it’s citrus time. Late winter and early spring is the perfect time for picking lemons, grapefruits, limes and oranges. And if you’ve got lots of lemons, you need a way to lengthen their shelf life. You want to keep those natural vitamins and nutrients fresh through the colder months!

If you’re wondering can you freeze fresh lemon juice, yes you can! And it’s easy to do.

Freeze lemon juice in jars with this easy method.
Extra lemons? Freeze lemon juice in glass jars!

Preserving extra citrus juice is easy – here’s how to freeze lemon juice in jars. This preservation method works for any kind of citrus juice, including lime juice, orange juice, and grapefruit juice.

Plus, I’ve got ways for you to freeze lemon slices and also how to freeze lemon zest.

We love freshly squeezed juice. We also love southern California, so we try to get down there every year. When we drive home, we always bring bags and bags of citrus with us.

We just store the bags of fruit in our cold room. Over time I grab a bag of lemons and we use fresh squeezed lemon juice to drink fresh as our home made lemonade.

And if you really love lemons, try these delicious Lemon Meltaway cookies.

How to Freeze Lemon Juice in Jars

Using a juicer to squeeze lemon juice to freeze in jars
Love this Black & Decker juicer; it works great!

But there comes a point when the citrus is in danger of drying out, so here’s what I do to preserve the juice. I grab all the bags and bring them up to the kitchen, where my electric juicer is waiting.

Today, I juiced up the last of the lemons – 2 bags, each weighing 5 pounds. This juicer? I LOVE it and it has lasted for years. It’s a Black & Decker Electric Citrus Juicer and I highly recommend it.

Freshly squeezed lemon juice is poured into a mason jar, leaving lots of headroom.
It doesn’t take long to get a big bag of lemons all juiced up and put away.

Just slice the fruit in half, set it on the cone and push down. Perfect and easy! And this juicer does a great job of separating the pulp and pits, so you don’t have to worry about straining the solids from the liquid.

You can choose the amount of pulp you want in your juice too. As the carafe below the juicer fills up, I pour it directly into clean mason jars.

I add a seal and a ring. Each one then goes in the upright freezer. I always keep the jars in the door of the freezer, just in case.

freshly squeezed lemon juice to be frozen for later use
Filling mason jars with juice is fast using the juicer.

Be sure to NOT fill the jar all the way! If a jar is too full, it may crack in the freezer. So leave lots of head room.

In a pinch, you may also be able to store lemon juice in plastic containers made for freezing liquids like these ones. But I find glass jars the safest and most reliable option!

Thawing Frozen Lemon Juice

When I want some lemon juice for either a drink or to include in a recipe, I can just pull a jar out of the freezer and move it into the refrigerator. It thaws in the fridge and we can use it how we like. Freezing the lemon juice preserves the taste well.

We can make Popsicles for a hot afternoon. We love chicken baked with lemon – try our recipe and make this dish for yourself. These are also great for making a simple lemon water; just that and combine with some cold water and regular ice cubes.

Lemons waiting to be juiced then frozen for later use

Be sure to give the jar a good shake right before you use the juice like you would with store bought plastic bottles of lemon juice. Just make sure the lids are on tight!

freshly squeeze lemon juice ready to be frozen.
Freshly squeezed juice ready for the freezer.

Here’s the finished result – remember to be sure and leave more head space than usual in the jars so the glass doesn’t break when the juice freezes.

That small pint jar on the right will be going straight into the fridge. I’ll use that one up first, so I could fill it all the way to the top.

Other Ways to Freeze Lemons

Wondering how else you can freeze fresh lemons? If you’d rather not just be preserving lemon juice, here are a few other ways for freezing lemons for later use.

How do I freeze lemon slices?

quartered lemons for freezing
Freeze lemon slices by cutting into quarters.

Another great way to enjoy lemons all year round is by freezing lemon slices. I don’t recommend trying to freeze lemons whole. You’ll need to slice each lemon into quarters and create lemon wedges. Place each lemon wedge onto a baking sheet.

Place the baking sheet in the freezer until the sliced lemons are frozen. Once the lemon slices are frozen you can place them in a freezer safe ziploc bag.

Freezing the lemon slices on a baking sheet before placing them into a freezer bag helps reduce the risk of having your lemon slices turn mushy from the juice seeping out before the bag of lemon slices are frozen.

You can keep frozen lemon slices in an airtight freezer bag for three to four months if you’re looking for the best flavor.

However, frozen lemon slices will stay safe for much longer. You’ll simply lose the robust flavor of the lemon slices the longer you store them in the freezer.

What can I use Frozen Lemons For?

Now that you know how to freeze lemons, there are lots of great ideas to use these frozen lemons in the future. There are a variety of uses for frozen lemons such as cold & flu remedies, cooking from scratch, homemade lemonade, and dessert recipes.

How to freeze lemon zest?

freeze lemon zest by grating and then freezing in a small bag.
Freeze lemon zest by grating zest and then freezing in a small airtight bag.

Depending on the size of your lemons, you should be able to take 1-2 tablespoons of zest from each fruit. Place your lemon rind in a single layer on parchment paper or a cookie sheet. Place the baking sheet in your freezer and allow the lemon zest to freeze completely.

Once the lemon zest is frozen you may remove the cookie sheet from the freezer. Place the frozen lemon zest inside a freezer bag and write the date on the freezer bag.

Freeze the zest for up to six months for the best flavor.

How to use lemon zest for after taking it out of the freezer?

Freezing lemon zest makes it easily accessible for you in the future. There are many options to use lemon zest after taking it out of the freezer.

You can add the lemon zest in your from-scratch recipes that call for lemon zest, you can include lemon zest or lemon peels in your favorite beverages, or use it to make lemon sugar.

Lemon sugar is one of the best ways to use your frozen lemon zest. This is a substitute for regular granulated sugar.

Lemon sugar may be used in drinks, recipes, and other concoctions that call for regular sugar. This will add an extra zest to any drink or recipe that calls for sugar!

How to freeze lemon juice in ice cube trays?

You can opt to freeze lemon juice so that you get to use out of your whole harvest of this citrus fruit. Making lemon juice into frozen cubes helps provide you with a quick grab-n-use option for your favorite beverages all year round!

Steps to Freeze Lemon Juice in Ice Cube Trays

  • You’ll need to gather your lemons. Slice each lemon in half using a sharp knife.
  • Using a citrus press you will squeeze each lemon half into a large bowl or mason jar.
  • As the bowl or jar fills up, pour your lemon juice into ice cube trays.
  • Once all of your lemons have been squeeze into juice and the ice cube trays are full, place the ice cubes in your freezer.
  • Freeze the juice for 24 hours.
  • You can take your frozen lemon juice cubes and place them inside a freezer bag.
  • Seal the bag and date it for quick access to your frozen lemon juice ice cubes in the future.

So, freeze lemon juice in jars this year – a great way to eat healthy year round!


More Lemon Recipes You’ll Love 

  • Mediterranean Lemon Chicken – so so good!
  • This quick and easy home made Lemonade tastes so delicious on a hot summer day.
  • Feel like doing some baking? This Lemon Loaf with a Rosemary Glaze is sure to please.
  • Want more information on the juicer I use and love? Plant a citrus tree indoors!

Mason jars of lemon juice for freezing

Originally published 2014; updated June 2022

Filed Under: Freezing Food

How to Grow Runner Beans in the Greenhouse

By Annie

Incredibly versatile and super delicious, runner beans can be a great veggie to add to your plate. Here’s how you can grow them in your greenhouse! 

We love green beans, and usually grow pole beans (also called runner beans) every year. I try to can up at least four dozen pint jars of beans every year to store in our Cold Room.

Because I want to be able to put up as many jars as possible, I look for plants that will give us the highest yields in a small growing space. Even though I look at different varieties of runner beans,  I usually end up planting Scarlet Runner pole beans. I’ll get a much higher yield growing these beans as opposed to bush beans.

chopped runner beans
Growing runner beans is always a great idea! You can get large harvests of green beans from a few plants in a small area of your garden.

How to Sow Runner Beans in a Greenhouse

They are the same bean, but the bush bean stays small and the pole beans, well, they climb poles! Since our temperatures can fluctuate so much from morning to night, we decided to not take any chances and plant the beans in our homemade Greenhouse. Beans do NOT like a frost.

greenhouse
Growing runner beans in a greenhouse is actually easier than you’d think!

Our Greenhouse has served us really well and we have been able to grow lots of common beans, tomatoes and peppers. 10 mm poly is recommended for covering Greenhouses, but we used regular  Builder’s Poly (6mm) that we had left over from building projects. 

We built our greenhouse right over the manure and compost piles, saving us a lot of time and ensuring great soil. Here’s how we built a simple DIY Greenhouse for under 200!

greenhouse gardener's companion book
An excellent book to get your hands on if you’re exploring greenhouse gardening.

If you’re thinking of building your own greenhouse (and why not?) here’s a great book to get some ideas from. I bought it the year before we built ours and had the chance to read it over several times. There are a lot of great tips and hints in the book.

garden
Runner beans can be grown outdoors too, but you’ll need to be careful about the frost.

Can I Grow Green Beans in a Greenhouse?

Yes! You absolutely can grow green beans in a greenhouse or a hoop house. If you have a soil floor in the greenhouse, you can just plant beans seeds (or bean seedlings) right into the ground. 

If you have a small garden or a small greenhouse, I would recommend growing these climbing beans with some kind of cane or wigwam support structure as you get much larger harvests in a small space.

Runner beans growing around supports in a greenhouse
Gardening tips for growing beans in a greenhouse.

Is a Greenhouse Necessary to Grow Green Beans? 

No, not all. You don’t need a greenhouse to grow beans. 

People can grow beans outside here in Zone 3, but remember that beans are a heat loving plant and cannot take any frost. Whether you can grow them outside in your garden depends on your night time temperatures.

When I do grow beans in the vegetable garden, I grow bush beans. Then I cover the leaves with Remay cloth every evening and remove it every morning.

This can get to be quite a pain on the daily chore list and if I even forget ONE time to put the cover back on, I may pay the price. It depends on how cool it gets that same evening.

The beans may be fine in the morning or they could be frosted over – they can never come back from that. Mulch can also help protect them. You don’t want slugs or snails getting to your beans!

fresh new runner bean plant
Growing beans in your greenhouse can minimize the risk of frost damage, and will in turn, increase your yield!

Tips & Tricks to Grow Runner Beans in a Greenhouse

One of the best parts is the fact that planting pole beans in the greenhouse minimizes the risk of frost damage and boosts up the harvest potential. It’s toasty warm in there all day long, and I make sure to water at least twice a day.

With it as hot as it is right now here, I’ve been watering three times a day. Usually when we have a larger garden planted we use a lot of water timers and soaker hoses, but I didn’t do that this year.

It is important to remember that runner beans need a lot of soil moisture, which is why, growing them in a greenhouse is actually perfect. 

garden
You can choose to hand water the plants or use an oscillating sprinkler.

The main garden is small enough this year to handle with one oscillating sprinkler. The Berry/Garlic Bed has another sprinkler set up, so this year, it’s just a matter of turning the tap on and off.

When to Plant Runner Beans in Greenhouse in Canada?

If you live on the coast in Canada, you’ll be able to plant bean seeds in the ground much earlier than we can. We are in Zone 3 and we need start our beans in the house as seedlings.

Beans like a warmer soil temperature – beans like 10 C which is about 50 F. And it takes a while for our soil to warm here in the spring. So we get a head start and plant bean seeds in the house under growing lights. It’s often most efficient to start indoors a few weeks before the last frost.

Later we transplant them into the garden (if they are bush beans) or into the greenhouse (if they are climbing beans). The beans plants are usually transplanted around mid-June or any time in the late spring to early summer.

black bottles with plants
Using black bottles can help grab warmth and collect heat. Making them is pretty easy too! 

Using Black Bottles for Heat in a Greenhouse

We use these bottles as heat collectors during the season. That’s why they are sitting inside the teepees; we fill them with water and spray paint them black. This will help them get nice and hot when the sun is shining and release that heat late in the evening when the temperatures go down.

During the Winter, those bottles are tied onto the tarp that we put over the greenhouse. The bottles weigh down the tarp, in case of winds.

We’ve been using this system ever since we first built the greenhouse. It’s an inexpensive way to get more heat to the plants and protect the greenhouse in winter.

How to Support Pole Beans – Bean Trellis

Before you go ahead and get started, remember to first find the right support to grow the beans and support their lanky frame. 

Grow pole beans using tree branches for support in the greenhouse.
You can also use tree branches as teepees to support the runner beans!

We used Alder branches to make the runner bean teepees. Easy to get and easy to hammer them into the ground. I like to plant 2 or 3 bean seeds around each of the teepee poles. As long as my teepee supports are thick, they can hold a lot of bean vines without any problems.

You can see I stapled a layer of Remay cloth all around the inside of the Greenhouse. It adds about 2 degrees and when the temperatures dip here, those 2 degrees can make the difference of having food or not. I’ll take what I can get.

How to Get Pole Beans to Grow Faster

  • Runner beans need regular watering. Don’t let the soil dry out too much.
  • Climbing beans like well drained soil so make sure your soil is not too heavy (like clay soil) to promote faster germination.
  • Keep picking beans off the plant. If you let bean pods get too mature, it signals the plant to slow down production.
growing runner beans
The runner beans grab on to any kind of support they find and grow around them.

Now the scarlet runner beans have grown up past the top of the teepees, and the flowers are forming. Don’t those plants look healthy?

They will just keep growing and wrapping themselves around anything that can support them.

Should I pinch out runner beans?

One the plants are as tall as you like, pinch out the top of the plant. This will encourage more beans to start growing and the bean plant will start sending out more shoots.

Mid to late summer, we pinch out the top of every plant. This sends more energy into setting bean pods – plus, our evening temperatures are starting to dip down, so it’s time for the plant to stop growing bigger and start putting everything it has into growing the bean pods bigger.

What is the ideal soil temperature to grow green beans?

Beans love soil that is between 50 – 85F. Because of this, you need to be sure to have some way to cool your greenhouse when temperatures get too hot.

I spray the outside roof and walls of our greenhouse on the days when outside temperatures are above 85; this cools the inside temperature very quickly. 

That we have open vents at the tops of the greenhouse helps a lot, as does the open weave door. You can also get automatic greenhouse vents, so you don’t have to worry about overheating.

chicken wire protecting plants
Bees can still make their way into the greenhouse, but this mesh door helps keeps larger pests away.

Since the greenhouse door is framed with wood and covered with chicken wire, it keeps the pests out I want to and it doesn’t make it too difficult for the bees to get in there. We have a roll up poly door that we can roll down each evening to keep the cool air out.

Scarlet runner bean flowers
The flowers on the Scarlet Runner bean plants looks so pretty! 

Think about growing runner beans under cover, especially if you live in an area where the nights are quite cool!

Scarlet Runner bean flowers are so pretty. They’re edible and they also tend to attract hummingbirds and bees. It shouldn’t be long till I am pressure canning beans, and hopefully I will be canning a LOT of them!

Here’s how to pressure can beans safely. After canning I store them in the cold room until we are ready for them.


More Gardening Articles

  • Want a Greenhouse? See how we built our own Greenhouse for under $200!
  • Want to see how I go grocery shopping without ever leaving my house? Come along with me on a weekly trip!
  • All kinds of great gardening tips.


Growing green beans in a greenhouse


Published in July 2013; latest update August 2022

Filed Under: Greenhouse, Grow Your Own Vegetables

  • « Previous Page
  • 1
  • …
  • 9
  • 10
  • 11
  • 12
  • 13
  • …
  • 53
  • Next Page »

Connect With Us!

  • Email
  • Facebook
  • Instagram
  • Pinterest
  • Twitter

Search this site

Generic selectors
Exact matches only
Search in title
Search in content
Post Type Selectors
Search in posts
Search in pages

Our Most Popular Posts

Garlic cloves in oil

How to Preserve Garlic in Oil – and Other Ways to Store Garlic

a open jar of pickled brussel sprouts on a counter

Easy Pickled Brussels Sprouts Recipe (Water Bath Canning)

Privacy Policy

Read about our Privacy Policy

Disclosure

Please note that some of this site’s links are affiliate links, and CountryLivinginaCaribooValley.com is a participant in the Amazon Services LLC Associates Program, an affiliate advertising program designed to provide a means for us to earn fees by linking to Amazon.com and affiliated sites. At NO ADDITIONAL COST TO YOU, I will earn a small commission, if you purchase them. I recommend them as they are good products.

Theme Design By Studio Mommy · Copyright © 2026