Country Living in a Cariboo Valley

Homesteading in BC

  • How to Get Started
  • Vegetable Gardening
  • Preserving Food
  • Recipes
  • Homemade Wine Recipes
  • About Us
  • Work With Me
  • Shop
    • Vegetable Garden Planner Printable: Grow Your Best Garden Ever
    • Grow Enough Food for a Year
    • Delicious Dandelions: A Recipe Collection
    • Dirt to Dollars: Selling at the Farmers Market
    • 8 Pounds in 8 Weeks: Raising Chicks for the Dinner Table
    • Making Wild Wine
    • Build a Hanging Chicken Feeder
    • 15 Things to Know About Living in the Country

How to Harvest Spinach Seeds

By Annie

Here’s how to harvest spinach seeds from spinach plants growing in your garden!

Can you save Spinach Seeds? Yes! Saving spinach seeds is something we do every year! As long as you grow heirloom or open pollinated seed, you can save spinach seeds from this years harvest to plant next year. Seed savers are my favorite, as you can enjoy eating then save the seeds for planting! 

I like using a lot of spinach in smoothies for breakfast and so we always grow a couple of rows. We eat spinach in salads and on sandwiches in early spring and later in the fall.

How to Let Spinach Go to Seed for Saving

This is a vegetable that we begin to grow in early spring. It loves cool weather and we can sow seed into the garden as soon as the snow is off the beds. In the fall, we fill our garden beds again with lots of good compost, full of nutrients. Come early spring, we are good to start growing.

spinach growing to save spinach seed
Save spinach seed by letting some of your spinach mature to set seed.

Once the spinach seedlings have started growing lots of leaves, we start enjoying baby spinach leaves. And as the plants get larger, we make sure to pick the outer leaves (cut or snap the stem). We usually just pick the small leaves for salads, and the mature leaves are added to soup or steamed as a side dish for dinner.

Spinach bolts easily in the hot summer months we have here. Actually, by late spring and early summer, the plants have usually started to bolt in the warmer days. We can use this to our advantage and easily save seeds for next year. Before you know it, they will be whole plants ready to harvest and devour.

Spinach growing in garden row.
Healthy spinach growing in a garden row.

In late summer, we can put in another row of spinach seed because the temperatures have cooled down. The plants will grow until after the first frost, past early fall. This way we can get two good crops each year.

If really cold weather hits for some reason, we can always use a row cover overnight. But we usually don’t have any problems growing enough for salads, soups and even dehydrating some for winter use. The soil temperatures don’t get as cold, so covering your plants will protect them for the few weeks of cool weather where you worry if they will survive the cold. 

There are many spinach varieties; we usually grow Bloomsdale spinach which has a good germination rate and does very well in northern gardens. Any variety of spinach will eventually bolt and when that happens, plan to save your own seeds!


How to Harvest Spinach Seeds

The most important thing when it comes to saving seed is to use the correct seed in the first place. Using heirloom seed is what you want!

Harvesting spinach seed is quite easy to do and it saves a lot of money. It also gives me a feeling of security knowing that I have viable seeds for the following year and don’t have to rely on ordering them.

Here’s a few pictures of how I harvest Spinach seeds. The theory works the same for pretty much any leaf crop, such as Swiss Chard.

When you harvest your Spinach leaves, be sure to leave a few plants alone (don’t take the entire plant) and just let them grow. Let some young plants just grow to maturity and then set seed. I have done this with lettuce seed as well.

If you can, pick your healthiest-looking ones (dark green leaves) so that you will have the healthiest, best seed for next year. Just make sure to watch for weeds and keep your plants thriving.

I also like to rinse my spinach really well, then soak it for a short while in a bowl of ice water. This will help to crisp up the leaves even more before serving. 


Mature spinach plants growing in garden
Set aside plants to grow, mature, flower and set spinach seed.

As the season carries on, those Spinach plants will get larger and larger and the female plants will start sending up flower stalks from the middle of the plant.

Note: the male plants will also flower a little bit, but much sparser than the female plants. However, only the female plants will set seeds.

Just leave them be and sit back and enjoy the flowers.

Why Spinach Bolts in Summer

Spinach naturally bolts when temperatures rise. Bolting means the plant sends up flower stalks and begins producing seeds instead of leaves.

While bolting usually signals the end of the harvest season, it’s actually the perfect opportunity to collect spinach seeds for future planting.

We often plant another row of spinach in late summer once temperatures cool again. These late fall spinach plants continue growing until after the first frost. The full sun and cooler temps still allow your spinach to thrive. 

When to Harvest Seeds

Spinach plant flowering
This spinach plant is bolting and starting to flower.

After the flowers fade just leave the plant be to continue maturing. Let the flowers dry on the stalks and over the next few weeks, you should see seeds setting. There will be a mix of seeds, some larger, some smaller. Once the seeds begin to dry, keep an eye on them.

You can either remove the spinach flower stalks now or let the seeds keep drying on the stems. As long as you remove them before the seeds actually start falling to the ground, it’s fine.

At that point, carefully snip the stalks with good garden scissors and put them into a paper bag large enough to fit all the stalks. If seeds start falling, put a paper bag over the entire seed head, close the bag and then cut the stem.

How to Save Spinach Seeds

Now, you want to store the spinach seeds safely until all of the moisture has evaporated. So, just tie a string around the bag and hang it up or set it out of the way. Air drying spinach seeds is the easiest way; just hang it up and forget it for a couple of weeks.

Stems on spinach plants with seeds on them all inside a tied paper bag.
Air drying the seeds and stalks of spinach plants.

After a few weeks, you can thresh out your seeds. An easy way to do this is to reach inside the bag, grab a stalk and then move your hand down the stalk, removing everything which will then fall to the bottom of the bag.

What do spinach seeds look like?


Spinach seeds hanging in tight clusters close to the dry stalk
Spinach seeds hang in tight clusters close to the stalk.


I realize this is a blurry shot, but it’s the best I have right now. Still, here you can easily see all the seed in tight clusters. The leaves have withered to almost nothing, but there are a lot of seeds on that little portion of stalk. When you finish threshing them into the bottom of the bag, transfer the seeds into a bowl.

Spinach seed cleaned and ready for storing
Cleaned spinach seed ready for storing in a paper envelope.

Now, we need to separate those pieces of leaves from the seeds. An easy way to do that is to stand on the porch with a breeze going and pour the seed from one bowl to another, letting the breeze catch those leaves.

The seeds are heavier so they will fall into the lower bowl. Meanwhile, the breeze will blow the leaves away.

Spinach seeds in paper envelope
Store spinach seeds in an sealed envelope in a cool spot.

After that, I can put them in an paper seed envelope and save them in a cool dark place. I store my seeds in our cool basement but you can store them in the freezer as well.


Spinach growing alongside spinach seeds in bowl
Save to your Pinterest board.

Originally published Oct. 2014; latest update Jun 2026


Filed Under: Starting Seeds

A Great Book for Butchering on the Homestead

By Annie

If you’re going to be slaughtering and butchering livestock this fall, you need to know the basics. Here is a great book that we used when we first moved out to the Valley to raise some animals.

Basic Butchering of Livestock and Game has proven to be a great reference tool for us every year. We bought it when we first moved here and still use it for information.

Some pages are kinda dog-eared, blood stained and even falling out, which I guess shows just how good a reference book it is!


Basic Butchering


If you’re homesteading or hunting, you may want to give it a read. Learn how and when to kill, slaughter and butcher, plus how to field dress game. There are lots of illustrations and step by step processes included. Basic Butchering even includes some recipes for you to try.

Filed Under: Great Books

What to do With all the Strawberry Runners?

By Annie

Do you grow your own fruit? Growing your own berries isn’t difficult and will be much cheaper than buying fruit from the store.

We’ve had strawberry beds every since we moved here in 2006. We added a lot more composted manure to the strawberry bed this year and it shows!

We have had runners going willy nilly and they are beyond getting out of control.


Grow your own organic berries

The strawberry bed sometimes suffers here; we’ve got so much else going on that it’s a bit easy to get overlooked.

As long as we get in there and remove most of the suckers, we’ll end up with nice large fruit.


Planting a Strawberry Pot

We’ve been snipping some of the runners for sale at the Farmer’s Market, but we still have a lot here. Jaime’s been busy…


Strawberry Pot

planting some of the runners into this large Strawberry Pot!


Berries - for your Health!

The pipe standing up in the middle is for watering. It probably won’t take long for the plants in the top tier to hide the pipe.

Strawberry pots like this are fantastic for on the patio or any other small garden space. You can get a lot of strawberries from one of these pots!

Filed Under: Grow Your Own Fruit

How to Keep Deer out of the Garden

By Annie

Use this easy guide for lots of tactics regarding How to Keep Deer Out of the Garden!

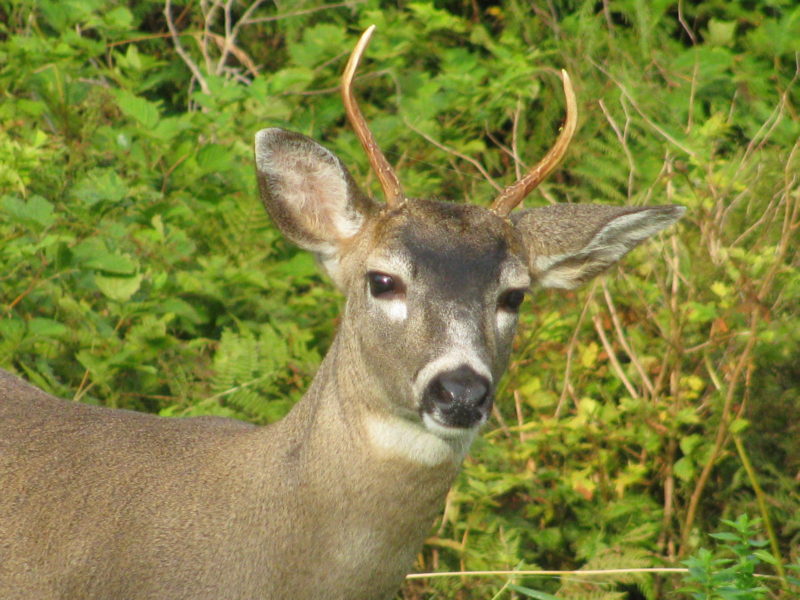
One of the problems with having a nice food garden, is that deer and other pests enjoy it right along with you. If you have deer getting in the garden, read about what we have been doing to get them to stay out! I work far too hard to get big garden harvests, to let animals get in there and take it away. Here’s one way that we are keeping deer out of the garden.

Deer in the garden? Keep them out by doing this!

Since we no longer have a dog here on the property, the deer have been getting into the yard again. Especially starting in the early spring, since this is a time of high stress for deer.

They love to munch on our apple trees and other fruit trees, but I sure don’t want them getting into the actual veggie gardens. In one night, one or two deer could do a lot of damage and the work we have done would be gone, just like that.

A deer eating vegetables in a garden.
Save this pin to your Gardening Pinterest board for later.

There are several deer repellents on the market, but I am after something more permanent than that. Sort of a “set it and forget it” type of solution.

how to keep deer out of garden
A fence or some rope are some good starting points for deterring deer.

How to Keep Deer Out of The Garden

A friend swears by using yellow rope, something she has done for years. Apparently the deer don’t like the color yellow? I am following her suggestion and asked Graham to cut some 2 x 4’s that we could screw onto the garden posts already in place. He did that for me and he also drilled 3 holes in each board.

Tips for keeping deer out of your garden
Using this yellow rope is one potential way to deter deer!

We started stringing out the rope. Here’s a good money saving hint if you need to buy rope. Never buy just 20 feet or 50 feet. You will pay a lot more when you just buy part of the roll.

Always buy the full roll, and then make sure you get a good discount on it! I did that, following Graham’s advice and saved 30% on a full rope.

Believe me, you will find a million other uses for rope on the homestead, whether it’s for tying down heavy duty tarps, using when fishing or some other project being worked on.

how to keep deer out of the garden
Building a high barrier of a color deer might not like is a great way to prevent them from coming into our garden.

We strung the rope through the drilled holes and went around the garden. Then around again. Then around once more. So here’s what it looks like out there now.

yellow rope, wildlife
Using this yellow rope is a solution that seems to work for us!

Those targets you can see on the garden posts? They’re for target shooting. Graham uses them to sight in his guns and it doesn’t hurt to be able to do some safe target shooting when the kids come for a visit.

Adding Chicken Wire

Once we got all the yellow rope strung up, we went around and added heavy duty chicken wire to the bottom of all the fence panels surrounding the main garden. This is to keep small pests out like rabbits.

We have seen a lot of rabbits this year and you know how it goes with rabbits. If you see one, you know there are at least 100 others out there!

Deer in the garden? Here are tips to keep them out
Even though rabbits are cute, they can really do damage in a garden!

So hopefully we are all set to ward off the deer and the rabbits. I am finding quite a few snakes in the garden though and although I know they are probably eating a lot of mice, I just don’t like snakes. I’ve been know to walk into the garden going the long way around, just so I don’t have to walk by a snake. What a sissy!

If you are looking for ways to keep deer out of the garden, give the yellow rope trick a try. You can read The Yellow Rope – an update to see how our garden did after the rope was up.

How to Keep Deer Out of Your Garden – Other Options

Using Deer Repellent Sprays

While these sprays are a more temporary solution, they’re also effective deer repellents. Spray the repellent around the plants you want to keep the deer away from and the scent will keep them away! Apparently, many of these spray deer repellents remind the deer of decaying animals (some are made with rotten eggs) and dissuade them from eating your plants.

If you prefer a less smelly solution, there are certain soaps, like Irish Spring, that have properties that deer dislike. Who likes the taste of soap? Take a couple bars of soap and carve up some shavings to sprinkle around the garden. Using hot pepper like cayenne can also deter deer. These deer sprays use hot cayenne pepper as one of their ingredients.

Just be sure to avoid products that could be potentially harmful to pets or people, especially if you’re growing a lot of food to be eaten!

a deer eating in a garden
This guide will teach you everything you need to know about keeping deer away from your plants!

Using Deer Resistant Plants

There are natural deer deterrents you can grow in your garden, as well as some tactics for managing your plants that will prevent deer from feeling comfortable grazing there.

Here are some deer-resistant garden plants that are good to grow as a natural physical barrier in order to prevent deer from coming into your garden:

  • Garlic – the strong aroma will be undesirable to the deer.
  • Lavender – though we might like the smell, apparently deer don’t as much!
  • Mountain Mint
  • Catmint
  • Chives
  • Rosemary
  • Lamb’s Ear – Has a texture that deer don’t particularly like.

The reason these plants function well is for a few different reasons. Some of them, deer just don’t like the scent. They also won’t want to walk through vegetation with strong odors, as that will make them more of a target for any predators. And finally, strong scents can cover up the delicious aromas of fresh vegetables and fruits that can attract deer.

A blooming lavender hedge around a garden to repel deer.
A wide Lavender hedge is perfect for around your vegetable garden.

Perimeter Planting to Discourage Deer

You can also find ways to arrange your plants naturally so you can keep an eye on things. Plant the ones with strong aromas around the edges and keep the ones you want to protect closer to your eyes. That way, if a deer or other animal does manage to get into your garden, you’ll be able to see it and scare them off.

Another thing to try is planting shrubs or other plants that grow prickly foliage on the outer edges of your garden. This will act as another natural deterrent!

Also, keep the leaves of your plants trimmed and the landscape nice and open. If a deer feels like your garden is a good predator guard, it will feel safe there. Making your vegetable gardens more open areas with less places to hide will make it so deer feel less inclined to stop and munch on your plants!

You can learn more about deer proofing your garden with any of these books.


Using Fencing

If you really mean business and have the resources for it, you could put up a deer fence around the perimeter of your garden, like we did. Built correctly, a tall fence will keep deer away from your plants (though it may not be enough to block other animals). Aim for a fence that’s anywhere from 6 to 10 feet tall.

In some cases, the deer might be quite persistent. Instead of wood or wire fences, it may be helpful to use electric fences, which will definitely deter deer from coming into your garden. Just be sure to check your local zoning laws before committing to electric fencing, as it’s not allowed everywhere.

For something less invasive and visible, fishing line can also be strung in the garden. The deer won’t be able to see it well, and walking into it will frighten them away. This is a great option when you want something inexpensive that won’t affect the beauty of your garden.


Using Scare Tactics

Another potential solution is to lean into scare tactics and install sprinklers that have a motion-activated function. The water won’t harm the deer, but the sudden spray from a motion-activated sprinkler like these will most likely scare them off and prevent them from eating your plants. Plus, it will keep your garden beds hydrated!

You could also hang wind chimes; the sound will make the deer uneasy and less likely to approach.


originally published 2014; latest update April 2025

Filed Under: Grow Your Own Vegetables

How to Grow Your Own Animal Feed

By Annie

Learn how to grow your own animal feed and save thousands of dollars in feed costs.


leafy root vegetables growing for livestock feed


It would be almost impossible for us to grow 100% of the feed we need for our animals here on our homestead. But we can grow a lot of it – here’s how we grow our own animal feed for:

  • goats
  • cattle
  • hogs
  • sheep
  • rabbits
  • chickens

Since we live in the North, we have a short growing season and a long cold snowy winter. But we do grow what we can.


piglets in their pen with electric fencing


Our pigs and chickens have their own garden here in the Valley and they even do some of the work in there for us. We offset a lot of the feed costs and you can too. Here is how to grow your own animal feed.

How to grow your own animal and livestock feed


Leafy root vegetables growing for livestock feed


The Animal Garden has about 3000 sq feet of veggies grown mostly for our pigs and chickens. (I say mostly because I’m not above going down there and forking up a nice bunch of carrots or beets to sell  at the Farmers Market  if I’m running out of those in the Main Garden.)

I plant my seeds and seedlings very close together to help keep down the weeds. As the plants grow we can thin them out and feed the them to the animals. Over time we are picking larger thinnings and still letting the other plants grow.


a garden of food growing to feed livestock


Because the vegetables are going to the animals, we don’t always have to pick them fresh in their prime. The larger the plants get, the less feed we have to buy. Over the season, this adds up to hundreds of dollars.


a large garden full of growing vegetables for growing livestock feed


In this garden we have collards, broccoli, carrots, potatoes, swiss chard, mangels and sugar beets. Many of these are later season vegetables, so we pick seasonally to feed the pigs and chickens.


Root crops harvested from the animal garden shows you can grow your own animal feed


By September we have finished the chard and broccoli and still have the mangels, beets, carrots and potatoes to feed off. Often we will feed these root crops off to the pigs until mid November when they are butchered.


a woodstove cooking vegetables to feed farm animals


Feeding Pigs from the Livestock Garden

We have a woodstove down at the barn. Every day during the season, we fire up the stove with canners on top full of veggies.

How long the food lasts depends on how many pigs we have. When we had 6, we fed one full canner load in the morning and another in the evening.


A garden harvest ready to be fed off to pigs


Just some of the veggies picked for a meal including beets, sugar beets, rutabagas, turnips and mangels. We try to fill one wheelbarrow a day – this will fill two canners to the top and then some.


Chickens eating the greens from root vegetables.


That’s a whole lot of natural organic livestock feed right there! Think of how delicious this meat will be since it has no chemicals or preservatives, plus the pigs have been eating healthy fresh garden vegetables.


Harvested root vegetables and leaves for animal feed


We chop the leaves off to give to our the hens. They also get some of the cooked vegetables too, but they love all the leaves fresh.

They make quick work of them – when it’s hot and sunny out, I bring the leaves into the coop or at least into the shade for them, so they don’t wilt as fast.

Sometimes I tie a big bundle of the leaves and hang it upside down for them to grab at. They love that and it keeps them entertained – they eat every bit!


Mangels and sugar beets ready to feed to pigs


The roots and stalks go off to the pigs. They will eat them raw, but if you feed potatoes they should be cooked.

Don’t ever feed potato or tomato leaves to your livestock; put those leaves on the compost and they will be fine for decomposing. But animals and humans should not eat them.

One canner will get fed to these 3 pigs in late afternoon along with their grain. The other will be fed the following morning with their breakfast grain.


A pig eating cooked potatoes and root vegetables


Pigs really enjoy garden vegetables. It’s good for them and it gives their pork a wonderful flavour. When we eat pork from pigs we have raised and pastured, we KNOW what we are eating.

More importantly we not what we are not eating – chemicals or preservatives.


A pig eating root vegetables


Nothing but awesome naturally raised pork. And the pigs have had a wonderful life while they are with us. They get to run and play, wallow in the mud and sleep in the shade of the willows.


A bucket of harvested root vegetables to feed to pigs and chickens


There is labour involved in growing an Animal Garden, there is no way around that. But, if you put in the time you can grow your own animal feed for the cost of the seeds.

Other crops to grow for animal feed include:

  • hay (for over winter; in summer they can graze on fields of grass, clover and alfalfa)
  • sunflowers (chickens especially love sunflower seeds added to the chicken feed)
  • pumpkins
  • all kinds of greens, including collards and kale
  • dent corn
  • soybeans


Using Pigs and Chickens to Clean up your Garden

Come late Fall just prior to butchering, let your pigs into the Animal Garden. They will clean up whatever you have left for them. They’ll root up the soil again tilling it with their noses.

They’ll add fertilizer too for the following year. Chickens can be let in after your garden is well established. When seedlings are young, they are a temptation to chickens and they will massacre your garden in a very short time.

By mid-summer, you should be able to let your chickens in there to gather some of their own food.


sugar beets growing for animal feed


If you are concerned about them doing too much damage, you could put them in your garden about 2 hours before dusk. When dusk rolls around, the chickens will most likely already be back in their coop.


Vegetables growing to feed livestock.


Start to grow your own animal feed – you will be surprised at how much money you can save. Let your animals do some work for you while they are with you. They love to work and you will love the benefits of their labor.

More Country Living articles you may be interested in:

Need to figure out how to store your livestock feed? Here’s 5 different ways!

Want to start selling produce at your local Farmer’s Market? Take a look at this article and my ebook.

Want to feed your chickens much cheaper over winter? Here’s how to grow fodder for chickens.

Everything you want and need to know about Raising Pigs for Meat in your backyard.

Want to get some chickens so you can have fresh eggs? Here’s all you need to know.


Filed Under: Animal Feed, How To

  • « Previous Page
  • 1
  • …
  • 44
  • 45
  • 46
  • 47
  • 48
  • …
  • 53
  • Next Page »

Connect With Us!

  • Email
  • Facebook
  • Instagram
  • Pinterest
  • Twitter

Search this site

Generic selectors
Exact matches only
Search in title
Search in content
Post Type Selectors
Search in posts
Search in pages

Our Most Popular Posts

Garlic cloves in oil

How to Preserve Garlic in Oil – and Other Ways to Store Garlic

a open jar of pickled brussel sprouts on a counter

Easy Pickled Brussels Sprouts Recipe (Water Bath Canning)

Privacy Policy

Read about our Privacy Policy

Disclosure

Please note that some of this site’s links are affiliate links, and CountryLivinginaCaribooValley.com is a participant in the Amazon Services LLC Associates Program, an affiliate advertising program designed to provide a means for us to earn fees by linking to Amazon.com and affiliated sites. At NO ADDITIONAL COST TO YOU, I will earn a small commission, if you purchase them. I recommend them as they are good products.

Theme Design By Studio Mommy · Copyright © 2026