Country Living in a Cariboo Valley

Homesteading in BC

  • How to Get Started
  • Vegetable Gardening
  • Preserving Food
  • Recipes
  • Homemade Wine Recipes
  • About Us
  • Work With Me
  • Shop
    • Vegetable Garden Planner Printable: Grow Your Best Garden Ever
    • Grow Enough Food for a Year
    • Delicious Dandelions: A Recipe Collection
    • Dirt to Dollars: Selling at the Farmers Market
    • 8 Pounds in 8 Weeks: Raising Chicks for the Dinner Table
    • Making Wild Wine
    • Build a Hanging Chicken Feeder
    • 15 Things to Know About Living in the Country

Search Results for: canning

Reuse Canning Jars – 10 Useful Ways to Upcycle

By Annie

Great ways to reuse canning jars around the kitchen!

Got lots of extra mason jars on hand? They can be used for many other purposes besides holding home preserved food!

For years, we have added a box of quart jars to our cold room when they are on sale, when we find them for a very good deal.

Over the years, we have a surplus and we manage to find ourselves all kinds of different ways to reuse canning jars here on our homestead.

So, what can home canners do with extra empty mason jars? The possible uses for canning jars are endless.

From dry food storage to crafts to workshop storage, here are some ways to reuse canning jars for other purposes. A few ideas are food related, the rest are not.

10 Great Ways to Reuse Canning Jars

pasta stored in canning jars sit on a counter

  1. Store foods that do not need processing, such as baking needs and pastas, in quart size canning jars. This is particularly helpful if ants and bugs are a problem. It is also decorative; farmhouse style kitchens often have jars of dried goods on display. The jars can be stacked easily.
A canning jar full of loose buttons for sewing sits on a table.
Save this to your Pinterest board for later.
  1. Use them when making gifts in jars, such as dessert and soup mixes. Tie a square or circle of fabric to the ring with ribbon or twine, and add an ingredient list and instructions for preparing the dessert or meal.

Canning jars upcycled to hold homemade marshmallows.

  1. Fill a couple of jars with candy, tie a bow around the lids, and place them on the counter during the holiday season. Put them on lace doily’s and place one to each side of a centerpiece. 
    Or, set one at each place setting on your holiday table and let guests take them home as a thoughtful party favor.

Canning jar filled with buttons on a sewing table.

4. Start filling one with buttons, like grandma used to do. If you glue a ball of batting covered with fabric to the lid, you can then use that as your pin cushion. Just unscrew the lid when you need a button.

Canning jar full of dry pasta for storage on a shelf.
Save these ideas for small glasses to your Pinterest board.

More Ways to Reuse Canning Jars

5. Large Kerr jars can be used to store pet food. Cats, for instance, can be pretty creative in figuring out how to get into food bags and other containers.

Mason jars filled with dried herbs on a counter.

  1. Small jars can be used to store dried herbs. Place them in a dark cupboard or in the refrigerator for storing, depending on the herb. Then use all winter long in cooking and baking recipes.

coffee beans stored in canning jars

  1. Use wide-mouthed canning jars to store coffee beans or tea bags, as well as creamers and sweeteners. This works especially great on camping trips.

Craft ribbon stored in canning jars.

  1. Canning jars are also great for storing scraps from a craft hobby, such as ribbon lengths, stickers and beads. Just cut a hole in the lid and feed your craft ribbon through it.
  2. Small jars without lids can be placed in a desk drawer to organize items such as paper clips, rubber bands and staples. Lids and rings are not required for these. This method can also be used within a junk drawer.

Glass canning jar used to hold screws.

  1. The small jars might also be used to store things like screws, nuts and bolts out in the garage or workshop.

As you can see, there are many ways to reuse canning jars. Think about the items in your home that need to be organized. How can you use jars to help with your home and kitchen organization?

Want to Learn About Home Canning?

Canning Tips – all kinds of great ways to make home canning easier and efficient.

How and Where to Store Home Canned Food – including light requirements and whether to remove canning rings before storage.

Canning Supplies you Really do NEED – keep this list of items on hand and you’re good to go.

Canning Checklist – ’cause it’s always good to know what you have on hand.

4 Different Ways to Preserve Food – it’s not always about canning!

Get over your Fear of Using a Pressure Canner – once you do, you can can all kinds of meat, fish, stews and more.

Everything you need to Start Water Bath Canning – what you need and what you don’t.

How to Use Tattler Lids and Seals – these are great, but you need to do this!

National Canning Guidelines

Finally, want to see all our Canning and Preserving recipes in one place? Here it is!

Other Types of Glass Jars to Use for Storage

  • You’re not only limited to using the commercial pint or quart jars – you can use any kinds of jars, including:
  • quart-size mayonnaise jars or
  • any kind of mayonnaise-type jars
  • salad dressing jars
  • pickle jars
  • jars that held commercial jellies and jams

Other Types of Glass Jars to Use for Storage

  • You’re not only limited to using the commercial pint or quart jars – you can use any kinds of commercial jars from store shelves, including:
  • quart-size mayonnaise jars or
  • any kind of mayonnaise-type jars
  • salad dressing jars
  • pickle jars
  • jars that held commercial jellies and jams

When to Not Reuse Canning Jars

Normally, glass mason jars last for decades, especially if they are in good condition. However, sometimes a few can fail.

If you have jars with nicks on the rim of the jar, you won’t get a good seal anymore. This can lead to unsafe food. My recommendation is to not reuse them for food preserving.

Over time, you have find scratches on some of your jars, especially is you remove the content with knives or metal spoons. 

If you find insignificant scratches, you can still use them for preserving. Heavily scratched jars should not be. 

Instead, you may want to find other things to store in them, instead of continuing to use for home food preservation.

More information can be found at the United States Department of Agriculture (USDA) 

Always buy jars from a known manufacturer such as Kerr or Bernardin.

Reuse Canning Jars in 10 Different Ways


Filed Under: Canning

Canning Tips – Making Home Canning Easier

By Annie

Looking for Canning Tips that will streamline your process and make your life easier? Keep reading to find out some of the best ways to improve your canning process!

Canning is a lot of work and can be quite exhausting and hot, especially if you are doing multiple batches. Sometimes, almost the whole day is spent in the kitchen, putting up mason jars of fresh vegetables, fruits and jams.

The good news is that there are a few things you can do to make canning easier and more enjoyable so you can fill your pantry with healthy home-canned food. These simple canning tips to make canning easier will help with everything from prep time to managing the summer heat so you can preserve more food this summer.


Canning tips like these will give you jars of food like these home canned green beans.
These canning tips will help you safely preserve shelf stable food.

The 7 Best Canning Tips

1. Clean Your Kitchen Before Canning

It is so important to have a clean space to work in. Not only should you have maximum use of all your counter tops, your sinks should be free of any dishes or utensils.

Canning tips: A clean kitchen with clear countertops ready for canning.
One of my most important canning tips is to maintain a clean and tidy work area. This will make the process much easier to keep track of!

Wipe down all your counter tops well before you start canning. You will be reducing the number of bacteria present in the kitchen that could contaminate the canning project.

The most useful part of cleaning your kitchen before you begin canning, is that you can freely move around and grab anything you need. You don’t want to be dealing with a sink full of dishes or odds and ends on the counter.


2. Gather Everything You Need Before You Start

Read your canning recipe through from start to finish. Then go through it again. This time, gather all the equipment you are going to need as you come across it in the recipe.

Taking the time to gather everything from your canning tools to the ingredients of your recipes before you start canning will definitely make the entire process easier and flowing properly.

Canning tips: Lots of empty jars and seals sitting on a counter.
If you gather all of your materials before the process begins, it will eliminate time spent looking for all of the necessary tools and materials.

I find it is always helpful to have extra large slotted spoons right on the counter in case I quickly need another clean one. Same thing with clean tea towels.

It’s much easier to be able to just grab it off the counter without having to go into the drawer. Especially because you may find you have sticky fingers from dealing with filling jars!

It is much easier to get the canning done without having to deal with looking for things over and over. Canning can be much more enjoyable when you can work smoothly.


3. Keep an Extra Pot of Water Boiling on the Stove

Whether you are water bath canning or pressure canning you can benefit from a large stockpot of boiling water on the stovetop while you work. A large pot of boiling water can easily sterilize tools or soften the seals on lids. Keep in mind to never put a cold glass jar into a pot of boiling water.

Lifiting a lid off a pot of boiling water.
An extra pot of boiling water is a great idea for any canning process. It can quickly and easily clean and sterilize any necessary tools.

If you are water bath canning, a pot of boiling water on the stove can help to keep your canner running at the proper water level for as long as you need to without risk.

Simply use that boiling pot of water to keep the water level up in your canner without cooling the water and stopping the boiling process.

I like to have a large soup ladle on hand in case I need to add water to the canner. When I use my really large canner, I use a clean empty saucepan to dip into the extra pot of water. 


4. Have the Right Canning Tools

You may be looking at ways to save money when you first start canning. But it is always a good idea to invest in the right canning tools to get started. This should include a canning pot with rack.

The canning rack goes on the bottom of the canner, then the full jars placed on it. Canning jars should never be placed right onto the bottom of your canner.

If you do not have a canning rack, many people have success with using a clean kitchen towel to keep jars off the direct heat at the bottom of the canner.

A 5-piece canning kit box on a counter.
It’s worth investing in quality tools for safe and efficient canning.

Look for a canning tool kit like this one. It has the everyday tools like a jar lifter, bubble popper, lid lifter, and funnel you need to ensure that you can easily fill and move jars and lids around without burning yourself on the hot jars.

Norpro makes a good quality kit, and you can get the Norpro Canning Essentials Kit here on Amazon.

A ladle and a strong pair of tongs can help, and are a necessity in my canning kitchen.

You can find a more complete list of the canning tools we use all the time

here at Canning Supplies


Jars of home canned food on a counter.
Preserving tips to help make canning easier.

5. Always Choose the Freshest Ingredients

While you can make jam and other home-canned foods using less-than-perfect product, you need to take the time to clean and trim away any bruises and damaged parts that would lower the quality of the overall product when it is done.

A collection of pears and apples.
Using fresh ingredients is another way to ensure safe canning with excellent results.

Sometimes you can find great deals on slightly bruised fruits and if you can take the time to properly trim them, you can save a lot of money.

Whether you are canning fresh produce directly from your garden or you’ve found a great deal at the grocery store, make sure your ingredients are fresh, clean and any bruised areas are removed. 


6. Enlist Some Help with Canning Projects

While small-batch canning projects are easy to do on your own, if you are planning on making a large batch of anything to preserve for your family, it can be a great idea to enlist the help of your family.

A woman and a girl holding cans of foods.
Make canning a family activity. They say many hands make light work!

Even kids can help wash and trim produce or stir a simmering pot of jam while you work your way through the process.

Canning goes much faster when it is a team effort. No one in the family able to help? Try splitting the work with a friend to help fill both of your pantries while you work together. 

It makes for a great afternoon of canning and visiting that can’t be beat!


7. Take Your Canning Outside

The peak of the canning season takes place in the hot summer months. This means it can be incredibly difficult to can without heating your home up and making everyone inside miserable.

Canning tips: an outdoor water bath and someone removing a can of peaches.
Be sure to take things outside whenever possible to prevent overheating your home!

The good news is that you can easily can outside over a gas burner allowing you to keep your home cooler and even giving you more space to work on a hot summer day.

If you do not have central air or do not want to raise your power bill this is one of the best things you can do to make home canning easier.

A propane burner sitting on a dark surface.
A simple propane burner is a great way to move your canning process wherever it’s most convenient.

We often can outside on our porch, using a propane burner. These work fantastic and we use ours all the time. You can find our propane burner on Amazon.

We just hook the burner up to the 5 gallon propane bottle we use for our barbecue.

Canning outdoors works very well for us, keeping all that extra heat out of the house during the warm summer months. It also ensures that no mess from the process makes it inside.


Even More Canning Tips

Looking for specifics on how to can certain foods? Try one of these handy posts that includes more canning tips and info on materials and supplies!

  • Best Canning Supplies for Preserving Food
  • Canning Salmon at Home
  • How to Can Fresh Cherries
  • How to Preserve Garlic in Oil
  • Canning Homemade Sauerkraut
  • How to Store Home Canned Food – Tips You Should Know
  • 43 Must-Try Home Canning Recipes


Filed Under: Canning

Canning Supplies for Preserving Food
By Annie

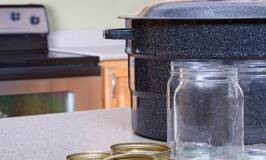
Canning supplies are a necessary part of preserving food – here’s what canning equipment you need to get started!

This food preservation/canning essentials equipment guide is designed to save you money. Straight up, pure and simple. After all, if you’ve been reading my blog for any time now, you know how much I love to save money!

Preserving food through canning, pickling, and fermentation saves you a lot of money. But only if you don’t spend more on equipment than you would at the grocery store. And it’s easy to do just that!

There are always new products out there and new ways of doing the same old thing. If you aren’t completely sure about what you are wanting to buy, it is easy to get overwhelmed. Which products do you actually need? And which ones are just going to collect dust in a cupboard.

If you are new to canning, you need this canning guide full of home canning supplies. Even if you’ve been at it a while, you might find it helpful.

(I hope you’ll also check out my post on Preserving Food for all kinds of great tips and recipes for freezing, canning, and pickling food.)

The Ultimate Food Preservation and Canning Guide

Here are a few of the items that I prefer to have in my “canning arsenal” because they make my life easier. And since they are all Amazon canning supplies, it’s super easy to order these canning supplies online!

Basic Canning Supplies and Canning Equipment

Canning Kit Essentials

Whether you are just getting started with canning – or are a seasoned pro – this Norpro Canning Essentials Set is a pretty great setup. This handy canning kit offers 6 of the most essential canning tools you need when canning or dehydrating food. You get:

  • long-handled tongs – which help keep everything sanitary during the canning process
  • a vinyl-coated jar lifter – for removing canning jars safely from boiling water
  • an extra-wide funnel – which helps you fill your canning jars with less spilling
  • a jar wrench with vinyl coating – to help you tighten your jar lids to keep them well-sealed
  • a magnetic lid lifter – for lifting lids out of boiling water while keeping them sanitary
  • a bubble popper/measurer – serves the dual purpose of making sure no air bubbles are left in the food you are canning and that you aren’t overfilling your jars

Water Bath Canner

Water bath canner and jars on a kitchen counter
Water bath canner for canning jams, jellies and fruits.

When canning fruit, jams, jellies, and home made salsas, you want a good water bath canner! I have used one just like in the photo for over 20 years now. These canners are still widely available. The only disadvantage is that I really can’t cook a big batch of soup in it. It’s made for canning, period.

So, if I was to buy a new canner, I really like this McSunley Stainless Steel pot. At 21.5 quarts, this pot is plenty large enough to hold up to 7-quart jars, 9-pint jars, or 12 half-pint jars. Comes with an inner rack to help you safely raise and lower your jars during the canning process.

This heavy-duty pot is meant to be tough enough to resist dents and it even comes with a 10-year warranty in case something goes wrong with it.

And when you aren’t canning, you have a huge pot you can use to cook up an extra-large batch of soup or stew or chili! (Which you can always pressure can jars of leftover soup or chili!)

Crock for Pickling


Crock for pickling sits beside a cupboard.
A crock with a lid is just what’s needed for batches of sauerkraut.

Pickling or fermenting food is a wonderful way to preserve it. Pickled foods are good for you, too. They taste delicious and put a smile on your face while providing you with great nutrition. They are a wonderful source of probiotics, too.

One of the best tools for pickling or fermenting is a good-sized crock like this one – along with the cover and a weight for the top.

Note: Try to find a crock with a lid! You can always buy the crock lid separately but it’s nice if you can get a crock that comes with the lid.

When not being used for pickling, this attractive crock simply looks good sitting beside our dining hutch. This crock makes pickling so easy, you may never buy store-bought pickles or sauerkraut again!

Here’s my recipe for Home Made Sauerkraut – I make this every year in this crock.

Ball Blue Book of Preserving

Every canner needs the Ball Blue Book of Preserving. Put out by the same people who make those wonderful Ball canning jars and lids, this helpful book teaches you all about preserving food. There are over 500 recipes in this book – and it is complete, too.

If a type of food can be preserved or canned, you’ll find it here – along with ideas of how to utilize your canned food when you pull it out of storage.

With this book, you’ll have one more tool to make sure your family has all the delicious and nutritious food they need to thrive. And with so many tasty recipes, this canning guide product also makes a great gift!

Presto Pressure Canner

Dial Gauge pressure canner on a stove
A dial gauge pressure canner used for canning homegrown vegetables, meats and fish.

Unless you’re making something acidic like jam or jelly, the safest form of canning is with the use of a pressure canner like this Presto. If you have vegetables, meat, chicken, or fish to can, this is exactly the tool you need to do the job.

This large pressure canner is 23 quarts – the right size to handle the biggest jobs. The deluxe pressure dial gauge helps you make sure that whatever you are canning gets processed at the right amount of pressure to do the job correctly and safely.

But this flexible canner can also work as a water bath canner, too. This Presto canner wants to be the only canner you need!

Stainless Steel Strainer

Straining Jelly
Filter fresh berries through cheese cloth to make jelly.

Do you dream of going a step beyond just canning the basics like cut vegetables, meat, and fruit? If you need a tool to help you with jellies, creamy soups, broths, mashed berries, apple sauce, and so on, this 3-piece Stainless Steel Strainer is just what you need.

Be sure the strainer you buy comes with a pestle, like this set has!

This strainer lets you take your food preservation to the whole next level, allowing you to fill your storage with tasty and convenient canned treats to make your life a little easier.

Food Strainer

For really large jobs processing fresh produce, this Johnny Apple Sauce Food Strainer is a dream. It makes processing applesauce or tomato sauce a snap.

You can use the hand crank for smaller jobs, or replace it with the optional Electric Motor when you have a lot of work to complete.

This sturdy grinder/strainer can handle the toughest jobs, but if anything goes wrong, it also has a full 1-year warranty!

Canning Jars

Empty glass jars for canning
Buy canning jars with lids and seals by the case to save money.

The price of canning jars has climbed quite a bit in recent years. However, one place you can just about always count on getting a great price on canning jars is at Amazon, and they have any size you could be looking for.

They also have replacement canning lids, if that’s all you need. Be sure to grab all the jars you might be needing before the prices go up again!

HINT: The very best time to stock up is in the off season!

Canning Racks

Canning rack for between layers of jars
Graham made this canning rack for our pressure canner.

A versatile rack is a canning guide game-changer when you slip it into your canner. It elevates your jars, which allows for proper water circulation all around.

It’s necessary to use a canning rack like this one if you have more than one layer of jars in your canner! Jars should not be touching each other.

Heavy enough to handle the biggest jars, it is also a wonderful place to set your hot jars after you remove them from your canner. You’ll definitely want to consider having a few of these racks around once you see how handy they are.

You can even use them in your air fryer, Instant pot, or for cooling pies and cookies. 

Jar Lids and Bands

Canning Lids sitting in hot water
Stocking up on canning lids and rings is a good idea.

For certain foods, you really need wide-mouth jars. The trouble is, it can be tough to find a replacement for the lids (which you really should only use once) and the bands. But I found these for you and wanted to share them here.

It’s a pretty great price and you get 12 lids in each box! Personally, if you like wide-mouth jars, I would stock up on several boxes of these canning lids and bands so you don’t run out before you find them at a great price again!

Dissolvable Food Labels

Whether you have ever heard of these or not, no Canning Guide would be complete without mentioning Dissolvable Food Labels. Gone are the days of proudly sticking a pretty paper label to your jar of canned beans only to be cursing that very same label months later when you try to remove it from your jar again.

These labels literally dissolve in water. It doesn’t even matter what temperature the water is – they just go away. And they don’t leave behind any of that sticky stuff.

Best of all, you get 500 of these wonderful stickers per roll, so you don’t have to worry about buying them constantly. And just like that, life got a little easier!

Fermentation Kit for Pickling

 Jars of cabbage kimchi and sauerkraut sour cabbage.
A fermenting kit is a great way to make small batches.

Venting is an important part of the fermentation process, and this awesome Fermentation Kit makes it easier. You get 4 complete sets that are made to fit wide-mouth jars, so you can easily have four different foods fermenting on your counter at once.

(If you have the counter space, why not?) Fermented foods (kimchi, anyone?) are delicious and so good for you. And this kit gives you one more reason to try it for yourself!

Canning supplies make preserving food much safer and easier!

I hope that reading about some of these basic canning supplies has been helpful and inspiring. I would love to hear about some of your favorite products for canning and preservation, too, if you care to leave a comment. I’m always on the lookout for a great new idea!

Check out my post on Preserving Food for all kinds of great tips and recipes for freezing, canning, and pickling food.

Here you can find out all about storing home canned food safely.


Canning equipment on a table with canning jars
Save to your Pinterest board for later!

Filed Under: Canning

Canning Inventory Checklist – A Free Printable
By Annie

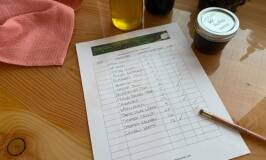
I had to go down to the cold room yesterday to put away a few more filled canning jars. And I realized it is a mess down there! I really needed some kind of printable canning inventory checklist to keep track of our food storage.

I needed a canning list that I can keep in the kitchen and just make a new note every time we can some more food for the pantry. 


dozens of home canned mason jars of food, and eggs, garlic and onions on a stove top


Free Printable Canning Inventory Checklist

I made something yesterday that will help me so much with knowing exactly what is in my canning room. 

And I want to tell you about it so you can download your own free printable canning checklist!


Ever year, we can jar after jar of fruits, vegetables and fish including:

  • pickles
  • jams
  • jellies
  • sauerkraut
  • berries
  • tomato sauce
  • all kinds of vegetables
  • salsa

and other food as well. So it doesn’t take long to forget exactly how many jars of beans I still have on hand. 


getting mason jars of salmon ready to go in pressure canner


Pantry Organization

I love it when my food storage is well organized. I have my cases of empty mason jars stacked in quarts, pints and half pints.

One stack is quarts, another pints, and so on. Usually I keep the boxes of empty jars on one side of the (very small) room.

This helps me know, at a glance, how many empty jars I have on hand. Do I need to buy more? I can tell with one look.

On the other side of the room we have strong shelves along the length of the wall.

On these shelves are the boxes of full jars, labelled on the outside. I usually just tape a labelled paper on the outside with the contents of the boxes.

That way, it makes it easy to reuse the same boxes, just rip of the label and put a new one on when needed.

So I do start out organized. It just never stays that way.

Over the course of the year, it always ends up that full jars get mixed in with empty jars.

And I really needed a better system to keep track of my jar totals.

This canning inventory chart is really going to help me organize our food storage better. And I’d love for it to help you too!


Sign up for our newsletter and

download your own copy of my printable

Canning Inventory Checklist


printed Canning checklist to keep track of home canned food


How I can Benefit from my Canning Checklist


Every time I finish a pressure canning session, I will just add it right away to the inventory list. 

And when I do water bath canning and end up with more jars of pickles, I can add that to the list!

There’s 6 columns set up – item, how many jars and I’ve included the size of the canning jars.

Since I’m using pencil, I can update the amount when I need to.

This checklist can be a great balance with your canning goals at the beginning of the season. What’s left to can?

Do we need another 12 jars of chicken broth?


A canning inventory checklist in front of home canned jars.


Download your copy of this Canning checklist and get your canning organized!


Sign up for our newsletter!

Sign up here and then download your

Free printable Canning Inventory Checklist!


Looking for Canning articles?


Here are links to every article about food preservation on this site.


Filed Under: Canning

Quick Pickled Pearl Onions Recipe for Canning or Fridge
By Annie

These easy and flavorful Pickled Pearl Onions are the perfect recipe for anybody who’s new to canning.

With just a couple of simple ingredients, you can have your own pickled onions to use in drinks, condiment trays, or cooking. Here’s a quick and easy pickling recipe.

Water bath canning is a great way to learn how to can and these quick pickled pearl onions just need a short processing time.


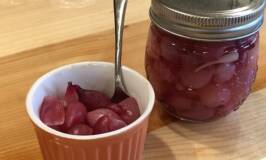
Pickled pearl onions that are red in a canning jar with rosemary and peppers.
Pickled Pearl Onions are great to use on a condiment tray, in cocktails or in salads.

Why You’ll Love this Pickled Onions Recipe

You can use either the small pearl onions or sliced regular size onions. And you can cut the recipe if half if you don’t want to can them and store the finished jars in your fridge. Or, make a full batch and then water bath can the jars so they can be safely put into your food storage.

Onions are really easy to grow, but if you don’t have a vegetable garden then just buy the onions instead. Sometimes you can find a great deal on pearl onions at the store, your local farmers market or at a farm store near by.

Onions are inexpensive and they are easy to store whole to use over winter. Here’s how we store onions all winter long. But if you like pickles and you like onions, whip up a batch of these pickled onions. 

Add them to meat based dishes, tacos or wraps and even in salads. Enjoy them with other pickles on a condiment tray. Or, just eat them right out of the jar.


Ingredients Needed

  • pearl onions – you’ll want to make sure they’re peeled before you pickle them.
  • pickling vinegar – this typically means your classic white vinegar, but apple cider vinegar can be used for a specific flavor addition if you don’t mind slight discoloration.
  • water
  • salt
  • sugar – helps offset some of the salt and acidity from the vinegar.
  • pickling spice – a perfect pre-made blend of spices that will result in a delicious pickled onion every time!


How to Make Pickled Pearl Onions

Lots of pearl onions on cutting board ready for preparing pickles.
Pearl onions are a delicious variety of onion that make for perfect pickling! They’re typically white, but gold and red onion exists in this size as well.
  1. We needed 8 cups of pearl onions, trimmed and cleaned, so we took off the loose papers and then dropped the onions into boiling water for 30 seconds.
  2. I used my mesh sifter to hold the onions so they were easier to deal with. From the hot water, they went straight into really cold water for about 30 seconds. This made the outer layer easier to slip off. That layer is fairly thick and tough so we didn’t want to pickle the onions with that layer on. It did take a bit to slip all the skins but you can see it’s worth it – those small onions look beautiful once they are ready for pickling. They are going to look so pretty once they are in jars.
  3. Slipping skins off pearl onions.
    Taking all of the skins off your onions can be slightly tedious, but so worth it for the finished product.
  4. Wash the jars and place them in a boiling water bath for at least 15 minutes to sterilize.
  5. Place your canning seals in a bowl and cover with hot water.
  6. Combine your vinegar, water, salt, and sugar in a medium saucepan and bring this mixture to a boil, then reduce to a simmer. Add the onions, simmer for about five minutes, bring it back up to a boil, then bring it down to a simmer for another 5 minutes.
  7. Add your pickling spice to the empty jars, then follow up with the onions and pickling liquid.
  8. Put on the seal and canning ring, then place the jars in the water bath canner and boil for 15 minutes. Remove them and allow them to sit for at least 24 hours.
Pearl onions ready for pickling.
These pearl onions have such a beautiful purple color, which makes them perfect to preserve.

Variations for Flavouring Pickled Onions

As long as you don’t change the measurements of vinegar or water, it is possibly to change up the flavour of these pickles. You may like to try adding a teaspoon or so of:

  • thyme leaves
  • mustard seed
  • celery seed
  • cloves
  • bay leaves
  • coriander seeds
  • black peppercorns
  • garlic cloves
  • hot peppers such as cayenne or jalapeno


Getting Mason Jars Ready for Canning

Canning for your first time can be a bit of an intimidating process, so here’s another breakdown for you.

While the onions were being prepared, we got the water bath canner full of water and set on the stove to boil. Make sure to have a bottom rack in the canner, so the mason jars do not sit directly on the canner.

Then, we set all the clean empty jars in the water bath canner and let it boil. After 15 minutes the jars are sterilized and they can be taken out. Also, we got the canning seals ready in a shallow bowl and covered with hot water.

They will sit in the water until the moment they go on the jars. We also got the pickling mixture going on the stove. This included vinegar, water and sugar. 

After the pickling solution came to a boil, we turned to the stove down to a simmer and cooked the onions about 5 minutes.

Small onions being heated for pickling.
The onions just soak up all of that pickling liquid, which means they’re absolutely packed with pungent flavor!

At this point, add the clean pearl onions to the pickling mixture and wait for it to come back to a boil. Once it boils, turn it down and let it all simmer for 5 minutes.

Filling the Canning Jars

Now, we’re ready to fill the jars. We’re canning these in half pint jars, but you can easily use pint jars if you like. The smaller jars get used a lot here, as we like to open a jar and then use it all up! 

Onions and some pickling spice on the counter.
These pickled onions are perfect for drinks, to pair with meat dishes, or to eat right out of the jar.

Sprinkle some pickling spice (or whichever spices and herbs you like) into each jar and then add the pearl onions. Then fill the jar with the warm pickling liquid (sometimes called brine) and leave 1-inch headspace. Be sure to remove any air bubbles as well.

Be sure to wipe rims of jars with a wet cloth. This helps remove any food or liquid on the rim – that will definitely interfere with the jar becoming properly sealed. Don’t skip this step.

Put your canning seal on top and add the ring. Tighten just to fingertip tight – don’t overtighten them.


Canning Pickled Pearl Onions

Using your jar lifter, add each jar to the boiling water in the water bath canner. Reminder: be sure you have a rack on the bottom of the canner, so there is a barrier between the bottom of canner and the bottom of the jars.

Try to not let the jars touch each other. I can usually get 7 jars in my boiling water canner; if I want to add more, I add another rack on top of the jars.

Then add more jars on top of the rack. Put the lid back on the canner and let the water come back to a boil.

A dish of pickled onions sits with a jar of pickled onions.
This pickled pearl onions recipe is simple to make and yields tasty results every time. Try it out, you won’t be disappointed!

The depth of your water bath canner will determine how many jars you can do at one time, on two levels.

Let the water boil and then set the timer for 15 minutes. Once done, remove the canning lid and use your jar lifter to carefully remove the hot jars.

Set the jars on the counter (put a thick towel down first) and be sure to leave space between each jar. Now leave the jars alone for 24 hours to seal and cool down. As they jars seal, they will make a pinging noise.

After the 24 hours, test each jar to ensure it is sealed. Are all the seals concave? If not, put the jar in the fridge and plan to use it up first or you can again put them in the water bath to see if they will seal.


FAQs

How to Store Pickled Pearl Onions

If you don’t want to bother water bath canning any jars of pickles, you can easily reduce the recipe to make fewer jars. Then, after the jars have been filled with the pickling mixture, wipe the rims and place the seals and lids on the jars.

Let them cool on the counter for at least 12 hours (24 is better) and then just store the jars in your fridge. They will last indefinitely in the fridge because of the pickling.

Remember: If you do NOT can them, keep them in the fridge at all times.

If you do water bath can them, you can add these to your food storage, whether that is in your pantry or cold room. Because they have been through the canning process, they will be safe stored at room temperature.

How to Serve Pickled Pearl Onions

They’re a great appetizer, or use them in cocktails. Put a couple of pickled onions on a toothpick and serve with a martini with gin and vermouth. This is sometimes also called a Gibson cocktail. And pickled onions work as a great garnish for a Bloody Mary!

You can also add them to pulled pork, burgers, or other sandwiches, tacos and salads.

I recommend you drain off some of the liquid before serving, or you could combine it with a bit of oil and use it as a salad dressing.

Can you eat pickled pearl onions out of the jar?

Of course! If you love the flavor of these pickled pearl onions, feel free to grab a fork or toothpick and eat them right out of the jar.

Are pickled pearl onions good for you?

Pickled onions are known to have antioxidants, and ingredients that are anti-inflammatory and that can help with heart health and blood sugar levels!

What is a good substitute for pearl onions?

You can make this recipe using chopped white onions, shallots, or even leeks.

Do pearl onions have another name?

Pearl onions are also sometimes referred to as white cocktail onions, but are also called button onions, baby onions, or silverskin onions in certain places (like the UK).

A opened jar of pickled onions sits on a counter.
Pickled Onions is an easy canning recipe that is made in a water bath.

More Preserving Recipes

Our entire Country Living in a Cariboo Valley Recipe Collection can be found here, and here are some more fantastic canning and preserving recipes hand-picked for you!

  • Check here for an entire collection of preserving recipes.
  • This Pickled Asparagus is another great and easy pickling recipe!
  • And for something a little more festive, check out this recipe to learn how to can your own Homemade Salsa.


Homemade Pickled Pearl Onions Recipe

The Bottom Line: these Pickled Pearl Onions are easy to make and are a great way to fill your pantry

If you enjoy this recipe, please be sure to rate it 5 stars below! And print this off or save it to your recipes folder!

a dish of pearl onions and some pickling spice on the counter

Quick Pickled Pearl Onions Recipe

Yield: 4 pints
Prep Time: 30 minutes
Cook Time: 15 minutes
Total Time: 45 minutes

These quick and easy Pickled Onions are perfect for a condiment tray or used in cooking. Add to meat dishes, in tacos or in any tomato dish.

4.5 Stars (10 Reviews)

Ingredients

  • 8 cups peeled pearl onions (typically 10-12 oz)
  • 5 1/2 cups pickling vinegar
  • 1 cup water
  • 2 tsp salt (optional)
  • 2 cups sugar
  • 8 tsp pickling spice

Instructions

  1. Prepare jars for canning by washing them and then setting in a boiling water bath for 15 minutes to sterilize.
  2. Place canning seals in a shallow bowl; cover with hot water. Replace water as needed, if water cools too much.
  3. Put a large pot water on to boil.
  4. Prepare onions by removing loose wrappers. Then set in a colander and place into simmering water for 5 minutes.
  5. Plunge onions into cold water and then peel. Measure out 8 cups onion.
  6. Combine vinegar, water, salt and sugar and bring to a boil. Reduce to a simmer.
  7. Add spices to empty jars.
  8. Add pickles to the jars, put on the seal and canning ring (fingertip tight)
  9. Place jars in the water bath canner, bring to a boil and let boil for 15 minutes.
  10. Remove canning jars and place on the counter where they can stay for 24 hours without being moved.
Nutrition Information:
Yield: 16 Serving Size: 6
Amount Per Serving: Calories: 138Total Fat: 0gSaturated Fat: 0gTrans Fat: 0gUnsaturated Fat: 0gCholesterol: 0mgSodium: 294mgCarbohydrates: 34gFiber: 1gSugar: 29gProtein: 1g

Did you make this recipe?

Please leave a comment on the blog or share a photo on Pinterest

Category: Recipes

First Published October 2020; Updated October 2023


Filed Under: Canning, Recipes

  • 1
  • 2
  • 3
  • …
  • 16
  • Next Page »

Connect With Us!

  • Email
  • Facebook
  • Instagram
  • Pinterest
  • Twitter

Search this site

Generic selectors
Exact matches only
Search in title
Search in content
Post Type Selectors
Search in posts
Search in pages

Our Most Popular Posts

Garlic cloves in oil

How to Preserve Garlic in Oil – and Other Ways to Store Garlic

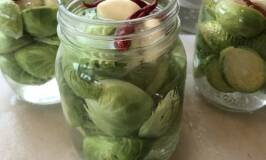
a open jar of pickled brussel sprouts on a counter

Easy Pickled Brussels Sprouts Recipe (Water Bath Canning)
Privacy Policy

Read about our Privacy Policy

Disclosure

Please note that some of this site’s links are affiliate links, and CountryLivinginaCaribooValley.com is a participant in the Amazon Services LLC Associates Program, an affiliate advertising program designed to provide a means for us to earn fees by linking to Amazon.com and affiliated sites. At NO ADDITIONAL COST TO YOU, I will earn a small commission, if you purchase them. I recommend them as they are good products.

Theme Design By Studio Mommy · Copyright © 2026