Country Living in a Cariboo Valley

Homesteading in BC

  • How to Get Started
  • Vegetable Gardening
  • Preserving Food
  • Recipes
  • Homemade Wine Recipes
  • About Us
  • Work With Me
  • Shop
    • Vegetable Garden Planner Printable: Grow Your Best Garden Ever
    • Grow Enough Food for a Year
    • Delicious Dandelions: A Recipe Collection
    • Dirt to Dollars: Selling at the Farmers Market
    • 8 Pounds in 8 Weeks: Raising Chicks for the Dinner Table
    • Making Wild Wine
    • Build a Hanging Chicken Feeder
    • 15 Things to Know About Living in the Country

Saskatoon Raspberry Wine

By Annie

The weather forecast was for a nice hot weekend, but by Sunday late afternoon, it was going to start getting overcast with a possibility of rain. They were right – we enjoyed a round of golf yesterday in Willliams Lake. By the time we hit the 16th hole, the thunder had started. It rained too, and we spent some time hiding out under a tree. By the time we headed home, the lightning had begun.

So here we are, it’s Monday morning and it poured rain for most of the night. It’s still raining, that’s OK. It’s not like we don’t have things we can do inside.

Making Wild Wines


This morning, I pulled some berries out of the freezer. We’ve got 20 pounds of Saskatoon berries and 20 pounds of Raspberries thawing in large stockpots on the stove. It will likely be tomorrow by the time they are all thawed and then we can get started on a mixed batch of wine.


IMG_3776


We made this Saskatoon/Raspberry wine a few years ago and it was wonderful! Easily the best flavour of the many different types of wild wines we have made. Here’s hoping this batch doesn’t disappoint.

I’ll be writing about the process in the next week.

More Wine Making Recipes:

Here’s how to make Homemade Strawberry Wine

Try this delicious homemade Dandelion Flower Wine

This Saskatoon Raspberry Wine will be a favorite for red wine lovers

Got Rhubarb? Try your hand at this Rhubarb Wine

Ever heard of a Parsley wine recipe?

Filed Under: Homemade Wine Recipes

A New Way to Make Rhubarb Wine

By Annie

We usually make one or two batches of Rhubarb wine each year. Several years ago, Graham made a Rhubarb bed and I think we have 7 plants out there. That provides us with plenty of Rhubarb, both for making wine and also for stewing and using in baking.

Here’s a link to the process we have used in the past for making Rhubarb wine. It’s easy to make, easy to bottle and easy to sip on. This year however we are trying something new with the way we get the Rhubarb ready for the primary fermenter.

Instead of breaking the stalks, then covering them with water, this year I cut all the Rhubarb into fairly small pieces (maybe 1/2 inch each). Then I tossed them in Ziplock bags and put them in the freezer. We were wondering whether a freeze/thaw method would work better. We have always had to add water to the wine, but this time there is no water at all in the primary.

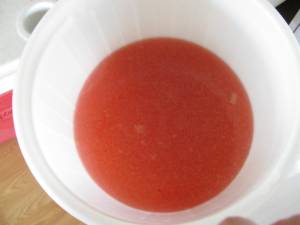
The liquid is pure juice, or quite close to that. The only water in there came from any frozen crystals of ice around the Rhubarb.


IMG_7739


The picture shows 2 bowls of thawing Rhubarb and also one large bowl of Saskatoon berries. I had these picked but hadn’t yet cleaned them before weighing and popping in the freezer.

Once I had enough Rhubarb and Graham was here to give me a hand, we moved on to the next step. We took the Rhubarb out of the freezer and set each bag into a strainer, pot or whatever else we could find. We could take the bags out of the freezer at night and by morning, the Rhubarb would be quite well strained.

Then I squeezed all the Rhubarb (yes with my hands!) and got even more juice out of the stalks. After squeezing that much Rhubarb, I realized something that should be on my Christmas gift list! Yes, a press!


Rhubarb Juice being turned into Wine


Squeezing the fruit may well result a more cloudy wine, but we’re willing to take the risk. There are tablets we can add later to clarify the wine and hopefully take out all the cloudiness.

I kept squeezing and straining Rhubarb until we hit the 5 gallon mark on the primary fermenter. Since we had lots of Rhubarb left still, we washed out another primary and got to work putting on a second batch.

You can read about the rest of the process by following the link above, which will take to you the Rhubarb Wine Recipe page of this website. If you have never tried it, Rhubarb wine is quite tasty and it’s easy to make. Pick up a wine making kit and get started – the only expense really is in buying the equipment. Also, you will need to buy sugar, but that’s it. If you can, start collecting empty wine bottles or have your friends start collecting for you. You can pay them back for their work by giving them a bottle of your wine!

If you are growing the fruit, wine is easy to make and a lot more affordable than the local beer and wine store.


Filed Under: Homemade Wine Recipes

How to Make Rhubarb Wine

By Annie

If you’ve got an abundance of Rhubarb, why not get out your wine making equipment? Here’s how to make Rhubarb Wine.

A glass of Rhubarb wine sits on a table outside
You’ll love this rustic homemade rhubarb wine!

If you grow a lot of rhubarb, consider making some delicious wine with some of your harvest. It’s tasty and easy to make – here’s a foolproof rhubarb wine recipe.

The middle of June is the ideal time to pick the bulk of your Rhubarb if you live in the North. Want to learn how to grow Rhubarb?

A rhubarb plant growing in the garden
This is what rhubarb looks like growing in the garden.

When you pick them, you can either twist the stalk (close to the ground) to snap it off. You are always better to snap them off instead of using a knife to cut them.

Be sure to leave several of the smaller ones on the plant. This way, your Rhubarb plant will continue to grow.

How to Make Rhubarb Wine

Ready to make wine? All you need are a few simple ingredients! Here are the instructions.

When your Rhubarb is ready to be picked, harvest it.

Rhubarb sits in a scale being weighed.
It’s best to keep close measurements during this process so you can easily recreate it once you get everything in the proportions you like best!

Using a kitchen scale, weigh the stalks – you will need 5 pounds rhubarb for every 1 gallon batch of wine (which is about 4.5 litres). This year we ended up with 37 pounds of Rhubarb from those 5 plants!

Clean out a primary fermenter and snap all the stalks many times. You don’t need to cleanly break each stalk into piece.

Just give them a quick snap so the rhubarb is exposed. The more times you can snap each stalk, the better as more surface area is exposed. A rolling pin is a good tool to expose the stalks.

A primary fermenter filled with rhubarb and water.
The rhubarb goes through primary fermentation before anything else.

Snap the stalks into the primary container and pour cold water over to cover them. Now let it sit 3 days and give it a stir every day.

After 3 days, scoop out the rhubarb and leave the water behind. Do NOT mash the rhubarb, as this can lead to a cloudy wine.

Rhubarb juice after being strained from the stalks.
You want to expose the insides of the rhubarb without mashing it, as this can lead to wine that’s cloudy.

 Hold the Rhubarb above the liquid for a minute to let most of the excess liquid drip back into the primary.

Give it a light squeeze to get more juice out but don’t squeeze it too hard. If you have backyard chickens or pigs, they will love this leftover Rhubarb.

Sugar being weighed before adding to Rhubarb wine.
Sugar is necessary for the yeast to produce alcohol! This is where the alcohol content of wine comes from.

Sugar for Home Made Wine

According to the recipe, I had to add 3 lbs of sugar for every 1 gallon (4.5 liters) of liquid. I stirred the sugar really well to get it dissolved.

You may find it easier to make a sugar syrup on the stove as the sugar will completely dissolve before adding to the fermenter. You can also use honey to sweeten wine, but you may need to use a little more than you would sugar.

Something to consider is that rhubarb doesn’t have the natural tannins like grapes do, so you may find it beneficial to add additional ingredients like some pectic enzyme or a tsp yeast nutrient or more. These ingredients can be found online at various homebrewing sources or at your local wine supply store.

This is because grape juice has a more natural balance of things like sugar, water, wild yeast, tannins, and other components that make wine making simple and more hands off. You may have to put in a little more thought with something like rhubarb wine.

For additional flavor, consider adding things like raisins (which can be a good yeast nutrient substitute), lemon rinds, ginger root, or brewed black tea (a good source of tannin powder).


Making Rhubarb Wine at Home – Testing Specific Gravity

After you add the sugar, test the specific gravity with the hydrometer. You are looking for hydrometer readings of 10 – 12%.

If it is closer to 10% you may want to add some more sugar. Next add a few Campden tablets (optional).

Rhubarb juice before yeast is added.
I love the color of rhubarb juice.

Pour this liquid into the primary fermenter. Look at the pretty pink!

Adding Yeast when Making Wine

Now, sprinkle 1 packet of wine yeast over the top of the liquid; don’t stir it in, just leave it sitting on top of the liquid in the jug.

Rhubarb wine fermenting in the primary container.
The yeast gets to work eating up sugar and producing alcohol.

 It’s supposed to start foaming, which means the wine is working. It will be foaming for a couple of days and then it will stop.

When it stops, rack it down from the primary fermenter into a carboy or demijohn.

Make sure you don’t let the siphon tube sit at the bottom – you want to leave the musty sediment and pulp behind.

Rack it down again into a clean carboy in a few weeks, then let it sit for 6 months to go through secondary fermentation till it can be bottled. When it comes time to bottle, you’ll want to watch airlocks for bubbles and then siphon into sterilized bottles.

Rhubarb wine being racked down into a carboy.
Here’s how we siphon wine between carboys.

Making Rhubarb Wine at Home – Racking

Whenever you finish racking wine, lift the carboy up onto a table or counter right away. It needs to sit someplace undisturbed. Place it in a large bucket out of the way to keep it safe if that will help.

This way, the sediment will begin to fall to the bottom. That’s exactly what you want. You want your carboy up high, so you don’t have to move it up when it’s time to repeat this process.

A carboy filled with Rhubarb wine.
Be sure you don’t bring any of the residual sediment along when you transfer your wine.

Every time you move the carboy, the sediment at the bottom of the mixture will start to move throughout the liquid again. You want it to settle so the sediment goes down to the bottom again.

Bottling Rhubarb Wine

Before you bottle it, rack it down one last time into another clean carboy. Then, let it sit for another four or five days so any sediment left has a chance to fall to the bottom.

You always want to make sure to leave all the sediment behind. If in doubt, rack it down again carefully.

When it comes to making wine, you simply cannot rack it too many times. Some people will rack the wine four or five times before they bottle.

What you are trying to do is make sure you have no sediment left at the bottom of the container, before racking into the individual bottles.

Be sure your siphon hose does NOT go all the way to the bottom of the carboy. We use a clothespin to help hold the hose at the level we want. If all else fails, you can also strain the wine using a straining bag.

Finished jugs full of pretty Rhubarb wine.
Rhubarb produces a wine that’s beautifully pink!

The finished result – a beautiful pink colour and sweet flavor. It will taste great in a few months. Squirrel some away so you can try a bottle from this batch next year!

Cap them with corks, using a corker and then lay them on their side. Or use wine bottles with screw-on lids. Cheers! Enjoy your Rhubarb Wine!


More Homemade Wine Recipes

  • More Wine Recipes from your Garden
  • Ever made Dandelion Wine at Home?
  • How about trying Carrot Wine?
  • Try this delicious Saskatoon Raspberry wine.
  • Here’s a great resource for making Berry Wine!
Rhubarb wine in two glasses on a table
Once you learn how to make your own wine, you won’t be able to get enough!


Filed Under: Grow Your Own Fruit, Homemade Wine Recipes, How To

How to Make Homemade Parsley Wine

By Annie

This Parsley wine recipe makes a lovely wine with a delicious slightly flowery taste.

You may think the idea of enjoying a glass of parsley wine sounds unusual to say the least. But, of all the herbal wine and berry wines we make here, this homemade parsley wine is my favorite. 

We all know popular ways of using fresh parsley, like on seafood dishes like scallops or shrimp, and of course, in pasta dishes, broth and soups and sprinkled on chicken. But, to enjoy a glass of wine alongside dinner is always welcome.

So, consider upping your home brewing skills and make up a small batch of this delightful herbal wine. We love the flavor and hope you will too!

How to Make this Parsley Wine Recipe


Fresh parsley leaves sit in a bowl ready to be weighed for wine.
This easy parlsey wine recipe is a real treat.


Use the following method for this wine:

To make one gallon of this wine, take one pound of freshly picked parsley. Leave larger stems behind, but freely use the smaller stems. There is no need to use only the leaves.


parsley wine, how to make wine


Wash the leaves, then place in a ceramic crock, a small fermentation bucket or a small brewing bucket.


how to make wine at home


.Pour eight pints of boiling water over the leaves, then cover with a tea towel or plastic wrap. Let the parsley infuse for three days.

Let the parsley infuse for three days. At the end of that time strain off the liquor into a large pan. Discard the parsley.

To the liquid, add half a pound of raisins, well chopped, together with the pulp and juice of a lemon and an orange, and the thinly peeled rind of the orange.

Simmer this liquid for an hour and at the end of that time, stir in three pounds of white sugar and allow it to cool.

When the liquid is lukewarm, draw off a pint of the liquid into a clean jar and prepare a starter with a little wine yeast.

A healthy Parsley plant with text overlay reading Parsley Wine homemade recipe.
Save this pin to your Pinterest board.

As soon as it begins to froth, strain it and add along with the rest of the liquid, into a small carboy or demijohns. Add airlocks, and leave it to ferment, covered well with a thick cloth.

This wine can usually be bottled after six weeks and will be fit to drink almost immediately. We like to use mini wine bottles for this and always use corks, rather than screw cap lids.

In a year’s time, it will have lost a good deal of its sweetness and will be an excellent table wine. Enjoy in moderation!

Which type of Parsley is Best?

You can use either curly parsley or a flat-leaf parsley for this wine. Some people prefer the curly parsley variety; we often use the flat leaf parsley for this recipe.

What Can I Make with a Bunch of Parsley?

If you have an overabundance of fresh Parsley, you can preserve it by drying to use year round. Here’s an article that teaches how to dry herbs.

But, if you have an extra pound of fresh Parsley, making this small batch parsley wine will both be fun and delicious.


Want to read more about winemaking? Here’s all our wine recipes using vegetables or fruits from the garden.


Originally published Mar 2011; latest update April 2025

Filed Under: Homemade Wine Recipes Tagged With: Parsley, wine

  • « Previous Page
  • 1
  • 2

Connect With Us!

  • Email
  • Facebook
  • Instagram
  • Pinterest
  • Twitter

Search this site

Generic selectors
Exact matches only
Search in title
Search in content
Post Type Selectors
Search in posts
Search in pages

Our Most Popular Posts

Garlic cloves in oil

How to Preserve Garlic in Oil – and Other Ways to Store Garlic

a open jar of pickled brussel sprouts on a counter

Easy Pickled Brussels Sprouts Recipe (Water Bath Canning)

Privacy Policy

Read about our Privacy Policy

Disclosure

Please note that some of this site’s links are affiliate links, and CountryLivinginaCaribooValley.com is a participant in the Amazon Services LLC Associates Program, an affiliate advertising program designed to provide a means for us to earn fees by linking to Amazon.com and affiliated sites. At NO ADDITIONAL COST TO YOU, I will earn a small commission, if you purchase them. I recommend them as they are good products.

Theme Design By Studio Mommy · Copyright © 2026