Country Living in a Cariboo Valley

Homesteading in BC

  • How to Get Started
  • Vegetable Gardening
  • Preserving Food
  • Recipes
  • Homemade Wine Recipes
  • About Us
  • Work With Me
  • Shop
    • Vegetable Garden Planner Printable: Grow Your Best Garden Ever
    • Grow Enough Food for a Year
    • Delicious Dandelions: A Recipe Collection
    • Dirt to Dollars: Selling at the Farmers Market
    • 8 Pounds in 8 Weeks: Raising Chicks for the Dinner Table
    • Making Wild Wine
    • Build a Hanging Chicken Feeder
    • 15 Things to Know About Living in the Country

Search Results for: greenhouse

How to Grow Runner Beans in the Greenhouse

By Annie

Incredibly versatile and super delicious, runner beans can be a great veggie to add to your plate. Here’s how you can grow them in your greenhouse! 

We love green beans, and usually grow pole beans (also called runner beans) every year. I try to can up at least four dozen pint jars of beans every year to store in our Cold Room.

Because I want to be able to put up as many jars as possible, I look for plants that will give us the highest yields in a small growing space. Even though I look at different varieties of runner beans,  I usually end up planting Scarlet Runner pole beans. I’ll get a much higher yield growing these beans as opposed to bush beans.

chopped runner beans
Growing runner beans is always a great idea! You can get large harvests of green beans from a few plants in a small area of your garden.

How to Sow Runner Beans in a Greenhouse

They are the same bean, but the bush bean stays small and the pole beans, well, they climb poles! Since our temperatures can fluctuate so much from morning to night, we decided to not take any chances and plant the beans in our homemade Greenhouse. Beans do NOT like a frost.

greenhouse
Growing runner beans in a greenhouse is actually easier than you’d think!

Our Greenhouse has served us really well and we have been able to grow lots of common beans, tomatoes and peppers. 10 mm poly is recommended for covering Greenhouses, but we used regular  Builder’s Poly (6mm) that we had left over from building projects. 

We built our greenhouse right over the manure and compost piles, saving us a lot of time and ensuring great soil. Here’s how we built a simple DIY Greenhouse for under 200!

greenhouse gardener's companion book
An excellent book to get your hands on if you’re exploring greenhouse gardening.

If you’re thinking of building your own greenhouse (and why not?) here’s a great book to get some ideas from. I bought it the year before we built ours and had the chance to read it over several times. There are a lot of great tips and hints in the book.

garden
Runner beans can be grown outdoors too, but you’ll need to be careful about the frost.

Can I Grow Green Beans in a Greenhouse?

Yes! You absolutely can grow green beans in a greenhouse or a hoop house. If you have a soil floor in the greenhouse, you can just plant beans seeds (or bean seedlings) right into the ground. 

If you have a small garden or a small greenhouse, I would recommend growing these climbing beans with some kind of cane or wigwam support structure as you get much larger harvests in a small space.

Runner beans growing around supports in a greenhouse
Gardening tips for growing beans in a greenhouse.

Is a Greenhouse Necessary to Grow Green Beans? 

No, not all. You don’t need a greenhouse to grow beans. 

People can grow beans outside here in Zone 3, but remember that beans are a heat loving plant and cannot take any frost. Whether you can grow them outside in your garden depends on your night time temperatures.

When I do grow beans in the vegetable garden, I grow bush beans. Then I cover the leaves with Remay cloth every evening and remove it every morning.

This can get to be quite a pain on the daily chore list and if I even forget ONE time to put the cover back on, I may pay the price. It depends on how cool it gets that same evening.

The beans may be fine in the morning or they could be frosted over – they can never come back from that. Mulch can also help protect them. You don’t want slugs or snails getting to your beans!

fresh new runner bean plant
Growing beans in your greenhouse can minimize the risk of frost damage, and will in turn, increase your yield!

Tips & Tricks to Grow Runner Beans in a Greenhouse

One of the best parts is the fact that planting pole beans in the greenhouse minimizes the risk of frost damage and boosts up the harvest potential. It’s toasty warm in there all day long, and I make sure to water at least twice a day.

With it as hot as it is right now here, I’ve been watering three times a day. Usually when we have a larger garden planted we use a lot of water timers and soaker hoses, but I didn’t do that this year.

It is important to remember that runner beans need a lot of soil moisture, which is why, growing them in a greenhouse is actually perfect. 

garden
You can choose to hand water the plants or use an oscillating sprinkler.

The main garden is small enough this year to handle with one oscillating sprinkler. The Berry/Garlic Bed has another sprinkler set up, so this year, it’s just a matter of turning the tap on and off.

When to Plant Runner Beans in Greenhouse in Canada?

If you live on the coast in Canada, you’ll be able to plant bean seeds in the ground much earlier than we can. We are in Zone 3 and we need start our beans in the house as seedlings.

Beans like a warmer soil temperature – beans like 10 C which is about 50 F. And it takes a while for our soil to warm here in the spring. So we get a head start and plant bean seeds in the house under growing lights. It’s often most efficient to start indoors a few weeks before the last frost.

Later we transplant them into the garden (if they are bush beans) or into the greenhouse (if they are climbing beans). The beans plants are usually transplanted around mid-June or any time in the late spring to early summer.

black bottles with plants
Using black bottles can help grab warmth and collect heat. Making them is pretty easy too! 

Using Black Bottles for Heat in a Greenhouse

We use these bottles as heat collectors during the season. That’s why they are sitting inside the teepees; we fill them with water and spray paint them black. This will help them get nice and hot when the sun is shining and release that heat late in the evening when the temperatures go down.

During the Winter, those bottles are tied onto the tarp that we put over the greenhouse. The bottles weigh down the tarp, in case of winds.

We’ve been using this system ever since we first built the greenhouse. It’s an inexpensive way to get more heat to the plants and protect the greenhouse in winter.

How to Support Pole Beans – Bean Trellis

Before you go ahead and get started, remember to first find the right support to grow the beans and support their lanky frame. 

Grow pole beans using tree branches for support in the greenhouse.
You can also use tree branches as teepees to support the runner beans!

We used Alder branches to make the runner bean teepees. Easy to get and easy to hammer them into the ground. I like to plant 2 or 3 bean seeds around each of the teepee poles. As long as my teepee supports are thick, they can hold a lot of bean vines without any problems.

You can see I stapled a layer of Remay cloth all around the inside of the Greenhouse. It adds about 2 degrees and when the temperatures dip here, those 2 degrees can make the difference of having food or not. I’ll take what I can get.

How to Get Pole Beans to Grow Faster

  • Runner beans need regular watering. Don’t let the soil dry out too much.
  • Climbing beans like well drained soil so make sure your soil is not too heavy (like clay soil) to promote faster germination.
  • Keep picking beans off the plant. If you let bean pods get too mature, it signals the plant to slow down production.
growing runner beans
The runner beans grab on to any kind of support they find and grow around them.

Now the scarlet runner beans have grown up past the top of the teepees, and the flowers are forming. Don’t those plants look healthy?

They will just keep growing and wrapping themselves around anything that can support them.

Should I pinch out runner beans?

One the plants are as tall as you like, pinch out the top of the plant. This will encourage more beans to start growing and the bean plant will start sending out more shoots.

Mid to late summer, we pinch out the top of every plant. This sends more energy into setting bean pods – plus, our evening temperatures are starting to dip down, so it’s time for the plant to stop growing bigger and start putting everything it has into growing the bean pods bigger.

What is the ideal soil temperature to grow green beans?

Beans love soil that is between 50 – 85F. Because of this, you need to be sure to have some way to cool your greenhouse when temperatures get too hot.

I spray the outside roof and walls of our greenhouse on the days when outside temperatures are above 85; this cools the inside temperature very quickly. 

That we have open vents at the tops of the greenhouse helps a lot, as does the open weave door. You can also get automatic greenhouse vents, so you don’t have to worry about overheating.

chicken wire protecting plants
Bees can still make their way into the greenhouse, but this mesh door helps keeps larger pests away.

Since the greenhouse door is framed with wood and covered with chicken wire, it keeps the pests out I want to and it doesn’t make it too difficult for the bees to get in there. We have a roll up poly door that we can roll down each evening to keep the cool air out.

Scarlet runner bean flowers
The flowers on the Scarlet Runner bean plants looks so pretty! 

Think about growing runner beans under cover, especially if you live in an area where the nights are quite cool!

Scarlet Runner bean flowers are so pretty. They’re edible and they also tend to attract hummingbirds and bees. It shouldn’t be long till I am pressure canning beans, and hopefully I will be canning a LOT of them!

Here’s how to pressure can beans safely. After canning I store them in the cold room until we are ready for them.


More Gardening Articles

  • Want a Greenhouse? See how we built our own Greenhouse for under $200!
  • Want to see how I go grocery shopping without ever leaving my house? Come along with me on a weekly trip!
  • All kinds of great gardening tips.


Growing green beans in a greenhouse


Published in July 2013; latest update August 2022

Filed Under: Greenhouse, Grow Your Own Vegetables

Preparing the Greenhouse for Planting

By Annie

We built a greenhouse in our second year here. The amount of food we can harvest from growing in the greenhouse is definitely worth it. We can’t grow tomatoes in the garden here without this extra protection. Preparing the greenhouse for planting is one of the first things we do in the Spring.

Each season, there is some greenhouse maintenance that has to be done. Here’s what we do to open the greenhouse for the growing season (and also how we protect it for the winter).


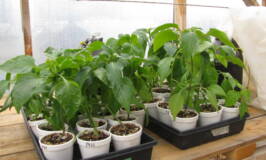
Pepper plants growing in pots in a greenhouse.
Save this article to your Pinterest board!


Preparing the Greenhouse for planting

Each Spring, there is work to do in order to get the Greenhouse open and ready for vegetable seedlings. The tarp we put on for extra protection in late Fall needs to be removed, folded up and stored for the season.


Greenhouse covered with tarp for wind and snow protection.


We save and recycle used bleach jugs for a couple of reasons. We fill them with water (not quite full) and tie them to the tarp. This gives us the extra weight we need to make sure the tarp doesn’t come off in the winds of fall.

So in the spring, they have to be untied. Now we are going to use them inside the Greenhouse for the coming growing season.

Cracked jugs (from cold winter weather) get thrown out and the others get a new coat of black spray paint.


Small bean plants grow next to pole for climbing.
Plant several bean plants around each pole.


Then they get refilled and placed right alongside the new transplants. This way the water warms up in the daytime from the sun.

At night it releases that warmth and helps to keep the transplants warm. Here we have pole beans growing in the greenhouse.


Preparing greenhouse soil for transplanting bean plants.
Cleaning up the greenhouse beds before transplanting beans.


After the tarp is taken down and the jugs taken care of, I open up the greenhouse door and take a look to see how it fared over winter.

Amending the soil

Cleanup gets done, unless it had been completely done in the Fall (not usually). Any native plants that got in there after we closed the greenhouse up, are dug out and composted. Then I dig and loosen all the soil. We have pretty good soil in here because it gets amended.

Improving the soil is an important part of preparing the greenhouse for planting.


A red trailer full of compost with a shovel, ready for amending greenhouse beds.
Add lots of compost to the greenhouse beds before transplanting.


This load is all composted manure – each year I add more to these beds. I use one trailer load of well composted manure and shovel it onto the beds in the Greenhouse.

Then I lightly dig it into the existing soil and the ground is ready for planting. I always make sure to water the beds heavily before planting; this soil is very dry and it can take a couple days of watering before it is ready for plants.


Hardening off transplants

Since we don’t heat our Greenhouse, we don’t use it as a place for starting seedlings – but it is a great place for hardening off some plants.

I can tuck the Peppers and Tomatoes in here a week or so before they need to go in the soil. It frees up a fair bit of room in the house, so I can get the last batch of seedlings out of the basement.


Pepper plant seedlings in cups ready for transplanting.
These healthy pepper seedlings are ready for transplanting.


We started these Peppers in our basement seedling room. Now they have been hardening off here in the Greenhouse for 3 days.

I have been covering them with Remay cloth in the evenings, as it is still pretty cool here overnight. There’s a nice mixture of Red and Green Sweet Peppers and lots of Hot Peppers.

We should get a great harvest to use in making our homemade Salsa and pickles.


Transplanted peppers in larger pots on a greenhouse shelf.
These larger pots are perfect for these growing peppers.


Some of the Peppers are transplanted into large pots. They can spend the next few months growing right here on the long shelf.

We can probably fit about 2 dozen large pots on this shelf. It adds a lot of growing room. Plus, it gives me a handy spot for doing seeding or transplanting.

The rest of the Peppers are planted in the ground directly underneath. Since the plants don’t grow very tall, there is lots of room for them under here. And it gets full afternoon and early evening sun, even under the shelf.


A new door made of chicken wire and wood
Almost finished getting the greenhouse ready for summer.


Last minute maintenance for preparing the Greenhouse for planting

And Graham built a new sturdy door – it has chicken wire laid over it. We needed a new door, but it  has to be “open” enough so bees can get in. Using the chicken wire allows that!

This new door will keep our free ranging chickens out, plus keep our cat, Ginger. She seems to like curling up in the corner in the warmth of the sun. We want her to stay out and spend her time down at the Barn chasing mice. And leave our plants alone!

Since we dug a water line and put in a tap right there at the Greenhouse door, we can just turn the water on. As soon as the weather is willing and the transplants are strong enough, we can start planting into the ground inside. We usually water by way of a drip system or a long soaker hose.


Peppers and pole beans growing in a greenhouse
Lots of healthy peppers growing in pots in the greenhouse.


Preparing the greenhouse for planting is an important part of beginning the gardening season here. We know that if we do the regular maintenance we have a much better chance of success in getting a large harvest of tomatoes, peppers and beans.


More Greenhouse and Gardening articles:

Want to read about how we built our Greenhouse on the cheap?

Read about how we grow pole beans in the Greenhouse! We like to grow Scarlet Runner beans because we always get a heavy yield.

Here’s how to pressure can green beans – we can about 4 dozen every year. This way, we can grow them cheap and eat them all winter. We save hundreds (maybe thousands) of dollars every year by preserving our own food. No need to buy fresh vegetables in the winter when the stores raise their prices so much.

Here are several ways to preserve food – try one or more of these options and save money at the grocery store.


Spring maintenance for the Greenhouse. Get your greenhouse ready for garden season. Here's what we do to get our Greenhouse ready for Spring. #gardening #greenhouse #DIYbackyard
Save this to your Pinterest boards!


Filed Under: Greenhouse Tagged With: corn, greenhouse, grow tomatoes, peppers

How to Build a Greenhouse Cheap

By Annie

Want to find out how to build a greenhouse cheap? This guide is full of great tips for constructing your own greenhouse on a budget!

A DIY vegetable greenhouse is a great way to extend your growing season. You could even possibly grow vegetables year-round if you ensure your little greenhouse is heated through the cold months.

Since we live in a fairly cold climate, we NEED to grow tomatoes and peppers under covers and a greenhouse works perfectly for us. Although we can’t grow enough tomatoes to preserve a lot of tomato sauce, we can fit enough plants in here for fresh eating.

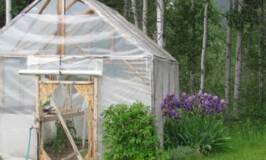
A cheap poly greenhouse sits in a backyard beside blooming iris plants.
Save this to your Pinterest Garden board!

There’s nothing better than picking cherry tomatoes right off the vine and popping them into my mouth!

How to Build a Greenhouse Cheap (Outdoor Greenhouse DIY)

DIY greenhouses are surprisingly affordable and offer lots of options. Our greenhouse is unheated and it’s usually used from April to October.

And we’ve outlined just how we built it below, to give you some free greenhouse plans that will work for you! But first, here’s some general important greenhouse information you should know.

Is it cheaper to build a greenhouse?

In our case, yes it was definitely a LOT cheaper to build our DIY home greenhouse instead of buying a full greenhouse kit. Keep reading to see exactly how we built ours for some greenhouse ideas for your yard!

What is the best direction for a greenhouse to face?

Try to site your greenhouse so it faces south or southeast. This holds true if you live anywhere in the Northern Hemisphere. The reason for this is to allow as much possible sunlight in, which is especially important of course in the winter months. 

Siting your structure properly will allow that winter sun in, even in January and February.

Small greenhouse in a backyard
Small greenhouse in backyard

Do I need a permit to build a greenhouse in my yard?

Well, that all depends on where you live. Many areas do require a building permit for any structure over a certain amount of square feet. 

Call your local town office and speak to the building department. It could be you don’t even need one, or it could be that the finished project can only be 10 x 10.

You won’t know unless you just ask how big a backyard garden shed or greenhouse can be before you need to apply for a permit.

What is a Cold Frame Greenhouse?

Cold frame describes a clear and insulated outdoor structure that can be used to shelter plants during the colder months. Instead of using gas or electric heaters, a cold frame garden depends on light from the sun to create solar heat.

They’re great for creating a more consistent environment, especially if you live in a climate where the weather can be unpredictable.

This kind of greenhouse allows you to start planting earlier and harvest later without having to worry about frosts, sudden dips in temperature, storms, or any other unexpected obstacles that gardening in colder weather may bring.

Cold frame greenhouses will typically offer a space that’s 5 to 10 degrees warmer than the temperature outside but also offer options for ventilation.

A cold frame garden is also a great option for transitioning any herbs or seedlings that may have been planted indoors but now have to come outdoors.

The environment it offers is stable and more controlled, which will allow your plants to adjust to the outdoors. They can then be transitioned to another garden, transplanted in grow bags for your patio or deck, or left in the greenhouse.


Here’s How to Build a Greenhouse 

You already know that a greenhouse is a fantastic addition to any home and it can be built cheaper than you think.

We built ours stick frame but you can easily build hoop greenhouses, which would be less trouble constructing than the one we built.

Ours is very durable however and we are glad we went with stick frame. Our winters are severe enough here we need a steep roof on the greenhouse, so the winter snows will slide off.

Since hoop houses don’t shed the snow as easily, we thought it was best to go with the steeper roof.

Temporary Greenhouse ( One Season)

diy greenhouse in a backyard.
We love the way our greenhouse adds to our yard.

The picture above is a temporary greenhouse that Graham made soon after we moved here. That year, we grew squash, beans and cucumbers under that cover.

For the permanent greenhouse plans, Graham wanted to reuse those roof panels that you see in the picture.

roo panelling for a greenhouse made of wood and plastic sheeting
It doesn’t take much to make functional roof panels for a greenhouse.

The roof panels were in two pieces. When it came to deciding where to site the permanent greenhouse, we had some thinking to do.

In the end, we decided to build the new greenhouse right on top of the oldest compost pile. Why create extra work for ourselves?

This way it would be easy to rake out, take away the excess, and leave some really awesome soil underneath the plants.

Right next to the site, we had a second pile of well composted manure. Nice and easy to move into the new greenhouse!

DIY Cheap Wood Greenhouse Equipment List

You’re obviously going to need the very basic tools to build a greenhouse, such as:

  • hammer
  • tape measure
  • nails
  • screwdriver and bits
  • drill
  • screws and bolts
  • brackets, if needed and other hardware

But there are additional tools that you will need, or at the very least will make this backyard project a lot easier. These include:

  • a miter saw
  • a circular saw
  • greenhouse plastic


DIY Greenhouse Lumber List

Use this list to estimate your lumber costs, depending on the size of greenhouse. Ours is 12 feet long.

Your costs will vary, of course, depending on the finished size and lumber costs in your area.

  1. 4 – 12 foot 2×4
  2. 16 – 8 foot 2×4
  3. 6 – 12 foot 2×2 (for roof panel)
  4. 1 roll polyethylene sheeting
  5. staples, nails, screws & the rest of the obvious!


Building a DIY Vegetable Greenhouse

The frame for the first side of the greenhouse.

 First, we framed up the one wall.

Finished frame for a greenhouse.
Here’s what the basic finished frame looks like!

Then another and another and voila. The basic frame was ready.

Reinforced greenhouse frame.
We reinforced the frame with some more wood for stability.

Next, we worked on framing in the walls.

greenhouse frame around a compost pile
Using logs as reinforcements was a great and free way to make the structure even safer.

Can you see where we laid logs inside where we needed to level the site out? You know why logs are good? Because they are FREE.

Then I started raking smooth all the compost and also adding the great soil from the pile in the back. The compost that wasn’t quite ready, I just shoveled onto the other compost pile. Siting the greenhouse right here was a LOT less work in the end.

Of course, we had put the piles in a good spot to begin with! Nice and close to the garden and far enough to the edge of the lawn that they weren’t under the trees.

You can really see the lay of the land we were working with. See the slope? And that middle hump inside the greenhouse is the left over pile of finished compost.

Over time, I raked that over to the edges to fill out the raised beds inside.

logs layered as reinforcement for a greenhouse frame.
This was a great way to make sure the frame was even and level.

Here’s a better picture of the log details.

installing roof panels on a greenhouse frame.
Though we used roof panels from a previous greenhouse, it’s easy to construct your own!

Once that was done, we started working on putting the roof panels in place. Graham added a ridge beam from timber we had here, then attached the panels to that.

Graham put a great pitch on the roof and it should hopefully be able to withstand all the snow in the winter.

Adding Plastic Poly to DIY Greenhouse Roof and Walls

Later, we stapled the plastic poly around the sides. We stapled it very well, so the wind couldn’t catch the plastic sheeting and start lifting it off.

For the greenhouse covering, , instead of buying the special plastic, we just used 6mm plastic off a roll that we had laying around for a building project. Some people prefer to get greenhouse weight plastic.

installing plastic sheeting on the greenhouse frame
Plastic sheeting is a cheap way to line your greenhouse frame.

Since the bottom areas of the front had open spaces, I played around with building rock faces on either side. Easy and FREE!

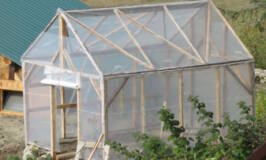
image of a greenhouse next to a shed.
The updated greenhouse has an even cleaner look and is just as functional, if not more so!

And here’s what it looks like from the porch – we are very happy with the way it turned out. It was a fair bit of work, but it will add a LOT to our homestead. And no tutorials or instructables were necessary; the structure was simple and easy to put together!

This greenhouse project has enabled us to grow peppers and tomatoes. If you live in a northern climate, you really can’t go wrong building a backyard greenhouse.

Using basic tools, you save a lot of money building your own, as opposed to buying a new greenhouse.

Build your own greenhouse for about $300, including electricity – extend your growing season, start your own seeds and grow your own organic food!

The cost for ours was well under $200, even if we would have had to buy that roll of greenhouse weight plastic.

A small DIY greenhouse with an open door and plants growing inside.
With a little bit of hard work, you can construct a DIY cold frame greenhouse in your own backyard!

What if the Greenhouse gets too hot?

Sometimes, in the heat of the summer sun, it does get really hot in the greenhouse, even though we have there is no plastic up close to the gables. You can see that in the photo.

If this happens with your greenhouse, you have a couple of choices, one being to install a greenhouse fan. Even if your greenhouse doesn’t have electricity, you could always run an extension cord from the outside of the house and run a fan.

You can also install greenhouse vents, the automatic vents make the most sense, because you don’t even need to be there to open and close them.

Or check out these solar greenhouse vents and fans!

What we do though, is we water the greenhouse – on the outside! I just hose down the clear roof and walls from the outside. If you do this, make sure your hose has been sitting in the shade. 

Or, run the house for awhile so all the hot water inside it runs out. You don’t want to be adding hot water from a sun baked hose to the already hot greenhouse.

I spray it down a few times a day in the heat of summer and it helps a lot.

Framing the walls for a home made greenhouse
Framing part of the construction of a small greenhouse.


Other Ways to Build a Greenhouse

There are a number of other materials you can employ when putting together your DIY greenhouse plans.

PVC pipe is a fairly inexpensive material, and the piping is especially great for a mini greenhouse, for adding internal structure, or for cold frame gardening.

If you’re particularly handy, sometimes old windows can be upcycled and used in your greenhouse. This may also be more easy to work with on a smaller scale. Here’s a beautiful greenhouse made from old windows.

Build a CD case greenhouse! Believe it or not, CD cases can also be helpful for planting. Making a small greenhouse out of the plastic cases is a great way to repurpose them if you have CDs lying around that you’re no longer using.

You can also buy CD cases in large quantities. The sturdy plastic is a reliable material for planting, and would be great for DIY cold frames.

Plastic bottles in excess can make a fantastic outer shell for a greenhouse. Check out this guide for more detailed instructions on making a plastic bottle greenhouse.


More Articles about Growing in a Greenhouse

  • Here’s how we get the Greenhouse ready for the growing season (Spring maintenance tips)
  • Find out why I always transplant tomato plants before planting them again into the greenhouse.
  • Ever wondered just how small of a pot is needed to grow peppers that actually set peppers?
  • Want to read all our posts about growing in a greenhouse?


originally published 2017; latest update Dec 2024

Filed Under: Greenhouse, Grow Your Own Vegetables Tagged With: EBooks, greenhouse, Grow Vegetables

How to Transplant Tomatoes into a Greenhouse
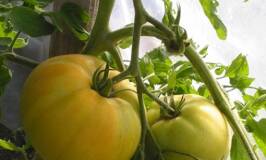
By Annie

Check out this handy guide to learn how to Transplant Tomatoes into a Greenhouse!

Why Should I Be Transplanting Tomato Plants?

To put it most simply, planting tomatoes in a greenhouse extends their growing season. Most popular greenhouse setups allow for things like temperature control, more control over the irrigation system, and ability to monitor things like air circulation and humidity level.

Transplanted tomatoes in greenhouse with stakes and ties
Newly transplanted tomatoes in the greenhouse.

Growing tomatoes in a controlled environment will allow you to tend to them outside of their natural growing season in your climate. It can also prevent disease and infection ensure you end up with the healthiest tomato fruits possible! But there are some things to consider for growers of tomato transplants, so let’s get into it.


Want read about how to build a greenhouse for your back yard?


Our Tomato Plants

Because of our cooler nights, we start many of our vegetables inside the house. Right now, I have beans, corn and zucchini busting out all over the living room.

We have much better luck transplanting rather than direct seeding any of the heat loving vegetables that we grow.

Our elevation means cooler temperatures and so we get them started early inside and pop them into the garden towards the end of May.

Transplant Tomatoes into a Greenhouse from their seedling cups.
Once your tomatoes start getting a little too big for their containers, it’s usually a good sign they need to be moved.

Although I would love to be doing that this weekend, it is still just too cold out there. What happened to all that sunshine and heat we were having just a week or two ago?

It’s not stopping me though; I’ve just moved into the Greenhouse. I spent some time cleaning it out and then started watering it. It takes several days of good watering to moisten the soil enough to transplant tomatoes into a greenhouse.

My tomatoes are getting a bit leggy although they do have nice thick stems for their size. If I don’t get them planted in the greenhouse I would have to transplant them into even larger pots.

Transplanting Tomatoes into Larger Pots

These tomatoes have been transplanted into a larger pot.
You may need to transplant tomatoes into a larger pot before planting in the ground.

Most years, I have to transplant tomato seedlings from their starter pots into larger pots. You can read about why it is important to do that; it is especially important for people living with short growing seasons.


Transplant Tomatoes into a Greenhouse starting with putting stakes in place.
Ensure that the tomatoes have ample space and stakes or trusses to latch onto as they grow.

My tomato trusses all in place. You can see I just go out in the bush and saw off some limbs to use as stakes. What are the black jugs for?

De Wit Garden Tools in the greenhouse soil
Invest in high quality garden tools, you won’t regret it!

I’ve got some fantastic hand garden tools this year – a serrated trowel and a 3 tine cultivator from De Wit Garden Tools.

I am looking forward to using these quality tools for many years to come.

Once the greenhouse soil is nice and moist, I pound the tomato stakes into the soil, spacing the stakes as needed so the plants have room to grow.

Transplanted Tomatoes in the greenhouse ties to stakes
Here’s what they look like right after being transplanted.

I’ve got three different kinds of greenhouse tomatoes this year planted and later I’ll be adding my pepper plant seedlings alongside.

Make a well to hold water when transplanting tomatoes
Give them plenty of water in the beginning to make sure they have everything they need to adjust to the new environment.

How to Transplant a Tomato Plant

Here are some general tips on how to replant a tomato plant:

Choose a spot in the greenhouse that gets lots of sunlight. If possible, check the soil to ensure it’s rich in nutrients like nitrogen, calcium, magnesium, and potassium, or enrich it with soil or potting mix. Also, you can use a PH test kit like this one, to check that pH levels are optimal–you don’t want the soil to be too acidic.

When I transplant tomatoes I always remove the bottom set of leaves and tend to any side shoots that grow off the main stem. Then I plant deep into the hole so more of the stem is covered.

If you like, you can also use organic fertilizer, compost, manure, or another nutrient-rich growing medium to further promote growth. Apply the fertilizer at the time of transplanting, and then once more just before fruiting if you like.

This will help the plants grow strong with sturdy stems to support the weight of the tomatoes. Velcro ties are used and these will be checked and adjusted as the season goes on.


Growing Tomatoes in a Greenhouse
Learn how to grow tomatoes in a greenhouse.

Watering Transplanted Tomatoes

When transplanting tomatoes, I create a well around the plant to hold onto the water. For the next several days I will keep them well watered to help them settle in. After they’re settled, tomatoes typically don’t need huge amounts of water. Overwatering can actually be harmful for them, so be mindful of water application to prevent disease and other harm from affecting your plants.

For the rest of the season I will be checking the Greenhouse every day – if it needs watering, it will get it. The hotter the days become, watering every day is a must – we may even set up a drip sprinkler on a timer in here.

Note: When watering tomatoes, try to not get the leaves wet! This is why soaker hoses or drip sprinklers work well in a greenhouse.

Greenhouse Tomato Crop
Pruning your tomatoes regularly is a great way to ensure you have beautiful plants that are growing and fruiting efficiently.

In a few months, it should be looking more like this and we can’t wait. Harvests are a highlight of the summer when we can pick and eat these right off the vine and have baskets of delicious tomatoes!


What is the Best Way to Transplant Tomatoes?

A simple answer to this is to plant the tomato in good soil, remove the lower side shoots and then bury the stem as deep as possible. This will enable roots to grow laterally from the stem. You need to ensure that your tomatoes are able to take hold of their new environment, and the best way to do that is give the stem and roots lots of opportunity.


What Tomato Variety is Best for a Greenhouse?

When picking out your tomato seeds or tomato seedlings, it’s important to consider your climate and the type of tomato. There are two major kinds: determinate tomatoes (bush tomatoes) and indeterminate tomatoes (or cordon tomatoes).

In most cases, you’ll probably want to go for indeterminate varieties if the climate allows it, as this variety continues to grow throughout the growing season and continually grows fruit throughout the entire season. They’re also called vining tomatoes.

Types of Indeterminate Tomatoes

  • Beefsteak
  • Big Boy
  • Brandywine
  • Sungold
  • Sweet Million
  • Early Girl (one of our favorites)
  • Gardener’s Delight

Types of Determinate Tomatoes

  • Glacier
  • Legend Tomato
  • Roma
  • Better Bush
  • Sunrise Sauce
  • Cappricia


When is a Good Time to Plant Tomatoes?

This may require some planning, but you’ll want to sow tomatoes seeds indoors in January or so, then transplant to your greenhouse in April or May. Depending on the climate, you may even be able to move the tomatoes as early as late February or early March. Pay attention to the last frost date in your area–past this point, you’ll be able to transplant tomatoes into a greenhouse.


Transplanted tomato plants in a greenhouse.
Save to your Pinterest board.


How to Prevent Pests from Ruining Your Tomatoes

There are a number of insects and other animals that could pose a threat to your tomatoes. Aphids, flea beetles, whiteflies, cutworms, and nematodes are all possible, though aphids and whiteflies are the most common.

For the most part, removing infected parts of the tomato plant is often enough to stop the pests. In extreme cases, you may have to resort to sticky traps or pesticides. We don’t use pesticides here, so we only use natural ways to get rid of pests.

Generally, keeping a good eye on your plants and taking good care of them is a great way to shore them up against pests.


How to Ensure Proper Pollination of Tomatoes in a Greenhouse

You’ll also want to make sure that bees are able to access your plants for pollination. Bees are the opposite of pests! But in some greenhouses, this won’t be possible. Especially if you don’t have a lot of good natural airflow.

One way to distribute the pollen yourself to ensure proper fruiting is to use tools like electric toothbrushes or other kinds of electric vibrators to spread the pollen. For only a few tomato plants, you can also be more precise with a cotton swab or small brush.

More articles about growing Tomatoes

Read here to find out how to ripen green tomatoes indoors fast!

Want to make your own home made Tomato sauce? Here’s my recipe! Canning instructions included too!


Now that you know how to transplant tomatoes into a greenhouse, grow some tomatoes this year!


Originally published 2016; latest update November 2022

Filed Under: Grow Your Own Vegetables

Come Into the Greenhouse

By Annie

These last weeks, it has been pretty busy around here. Hoping I get a chance now to put up some posts on what we have been up to. Here’s our Greenhouse – I’ve been spending quite a bit of time in there the last couple of days.

greenhouse, country living in a cariboo valley, tomatoes, peppers, northern greenhouse


This photo was taken last summer. In my Cold Room Inventory post, I wrote about hunting around downstairs only to find we had no green beans left in storage. I have got to plant lots this year.

Since we’re not planting a lot of tomatoes or peppers this year, I figured I would plant green beans throughout the greenhouse this summer. We have been having wonderfully warm days, but the nights are still very cool here. Too cool certainly, to plant bean seeds in the main garden. I’ll wait another week at least before planting them out there, and even then, will be covering them with Remay cloth.


greenhouse, country living in a cariboo valley, tomatoes, peppers, northern greenhouse

Thinking of how I could increase the temperature in the unheated Greenhouse, a thought occured to me. Why not staple up Remay cloth around the inside perimeter? This should increase the temperature by 2 or 3 degrees and I could get an earlier start with planting beans in there.


greenhouse, country living in a cariboo valley, tomatoes, peppers, northern greenhouse

While I was stapling it up, I realized I could just attach it half way up for now. That should help keep it even warmer. That’s what I did and later on, after the plants are all up and established, I should be able to staple the Remay up the rest of the Greenhouse walls.

After finishing with the cloth, I started watering the beds. I also laid a layer of compost over the whole area. I watered well several times a day for 3 days, digging down with a trowel to see how far down the moisture was going. It is amazing how dry the soil is when you first start watering it. It takes several repeats to get the soil moist enough for planting.

This morning, I brought my few tomato and pepper plants out to the Greenhouse.


greenhouse, country living in a cariboo valley, tomatoes, peppers, northern greenhouse

I have 5 Sweet Green Peppers that have been planted into the pots and they will sit on the shelf there.


greenhouse, country living in a cariboo valley, tomatoes, peppers, northern greenhouse

This morning, I stapled up the Remay in the one front corner, in preparation for planting Tomatoes.


 greenhouse, country living in a cariboo valley, tomatoes, peppers, northern greenhouse

After I dig the hole, I pound in the stake that this plant will need to hold itself up. Always have a stake or some type of support for your tomatoes, the plant ends up heavy and you don’t want branches snapping off, once the fruit is setting.

Then I put in the plant, usually taking off the lowest branches in order to plant the tomato deeper in the ground than it was in its growing pot. Deeper is always better for tomatoes. Then right away, I use a couple of velcro ties to hold the stem to the stake.


greenhouse, country living in a cariboo valley, tomatoes, peppers, northern greenhouse


I love these ties – I bought a roll probably 5 years ago and it’s still going strong. As the tomato plant now settles in and starts growing, I will add more ties, securing the plant to the stake. By the harvesting season, I could well have 6 or more ties on each plant. Sometimes, depending on how much fruit is on the plant, we also need to use string. We hang it from the Greenhouse ceiling and then tie the tomato branches to it.

These plants have already set their first flowers. Hopefully in a few months, the plants will look like this.


 Are you growing in a Greenhouse? Would you like to? We sure do love using ours! If you want to read more about growing in a Greenhouse, just click the link.

Filed Under: Greenhouse, Grow Your Own Vegetables

  • 1
  • 2
  • 3
  • …
  • 8
  • Next Page »

Connect With Us!

  • Email
  • Facebook
  • Instagram
  • Pinterest
  • Twitter

Search this site

Generic selectors
Exact matches only
Search in title
Search in content
Post Type Selectors
Search in posts
Search in pages

Our Most Popular Posts

Garlic cloves in oil

How to Preserve Garlic in Oil – and Other Ways to Store Garlic

a open jar of pickled brussel sprouts on a counter

Easy Pickled Brussels Sprouts Recipe (Water Bath Canning)

Privacy Policy

Read about our Privacy Policy

Disclosure

Please note that some of this site’s links are affiliate links, and CountryLivinginaCaribooValley.com is a participant in the Amazon Services LLC Associates Program, an affiliate advertising program designed to provide a means for us to earn fees by linking to Amazon.com and affiliated sites. At NO ADDITIONAL COST TO YOU, I will earn a small commission, if you purchase them. I recommend them as they are good products.

Theme Design By Studio Mommy · Copyright © 2026